flour

Trinidadian Flatbread

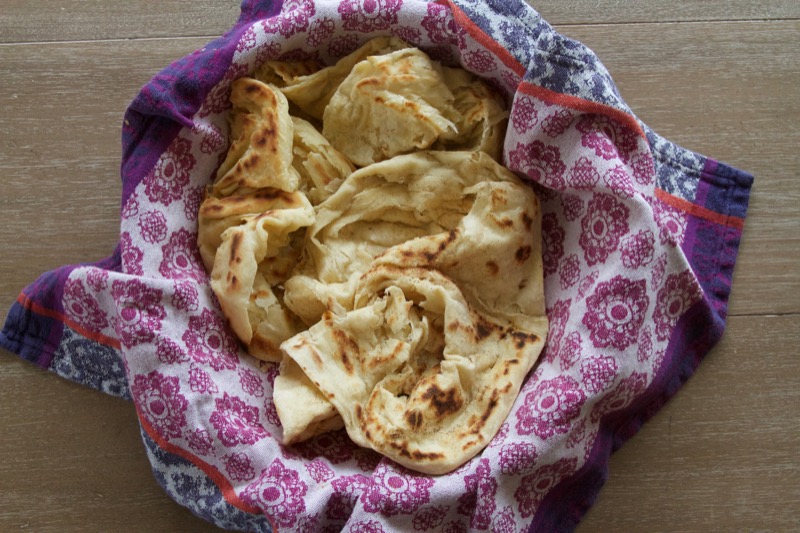
Buss up Shut

As Steve Fortune, from Marabella, Trinidad and Tobago, taught Lindsay Sterling in South Portland, Maine. Photos by Lindsay Sterling.

Notes: The name of this dish, buss up shut, is Trinidadian Creole for "busted up shirt," referring to the worn-in, flaky texture of the flatbread. Steve served this flatbread with a quick garbanzo and potato curry. They were delicious together. Here's a youtube video on another Trinidadian's take on how to manage the dough - worth a watch before you dive into doing this for the first time. Some details are different but the feel of the dough and the concepts are the same.

Makes: 4 servings
Cooking Time: 2 hours (50 minutes active)

Ingredients

  • 2 cups flour plus extra for your work surface
  • 2 tsp baking powder
  • 1/2 tsp salt
  • about 3/4 cup water
  • 5 Tbsp ghee 
  • 2 Tbsp oil 

Equipment

  • mixer (optional) with dough hook or mixing bowl
  • clean kitchen towel
  • rolling pin
  • spoon or flexible spatula for spreading ghee
  • two flat wooden spoons or flat sticks
  • 12-inch-wide sauté pan or flattop griddle
  • basket lined with napkin 

Instructions

1. Soften ghee by bringing it to room temperature or microwaving it a little bit.

2. Mix flour, baking powder, salt, and water by hand or with a mixer with a dough hook until the dough turns smooth, soft, and stretchy (about 5 minutes w/ mixer or 10 minutes by hand.) If the dough is sticking to the sides you can add a little more flour. If the dough is hard to maneuver, add a little more water so the dough is easy to move around and manipulate but does not stick to your hands. (You can always dust your hands with flour to keep the dough from sticking to them.) 

3. Divide the dough into four balls. Cover them with a clean cloth for 20 minutes. (If you're making other dishes, such as curry, now would be a good time to make that.)

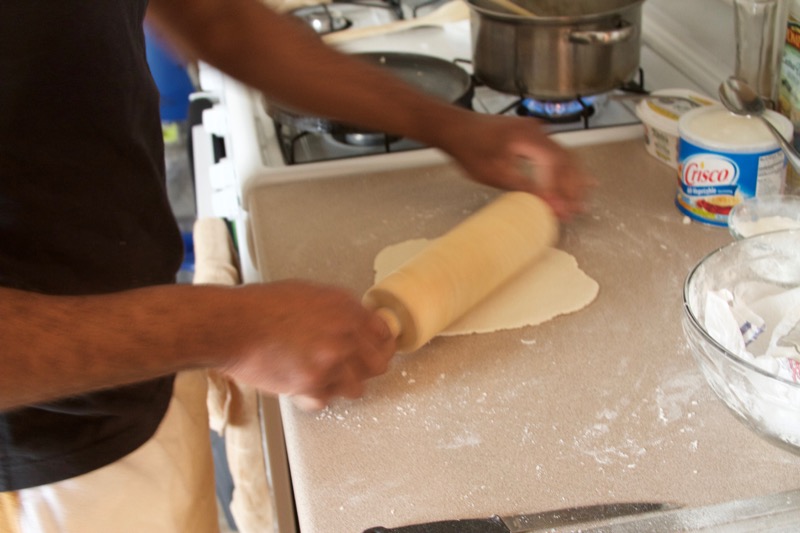
4. Once dough has rested, sprinkle flour on your work surface. Press one of the balls into a disc. Roll the disc out to a thin circle, about 1/8 inch thick. To help it keep a circular shape, turn the disc 45 degrees every couple times you roll it. When the dough starts to stick to the rolling pin, simply sprinkle flour on the dough and the counter, and spread it around with your hand.

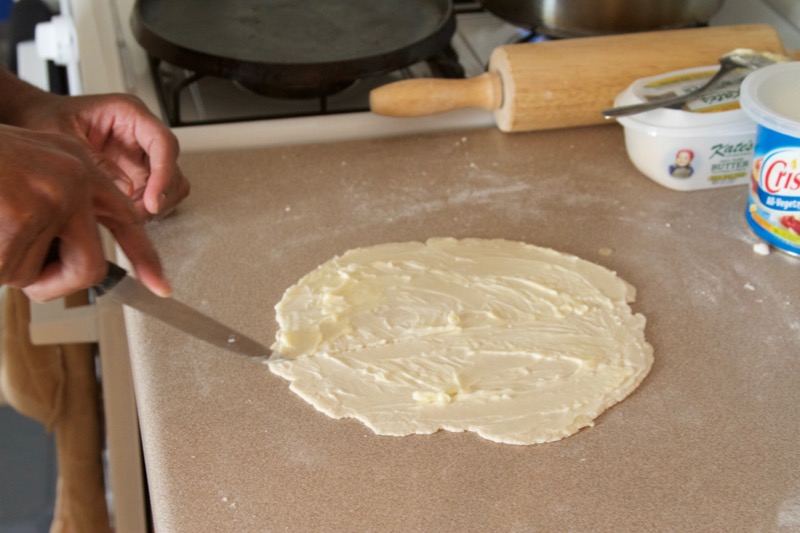
5. Spread about 1 Tbps ghee over the entire surface, and sprinkle with flour.

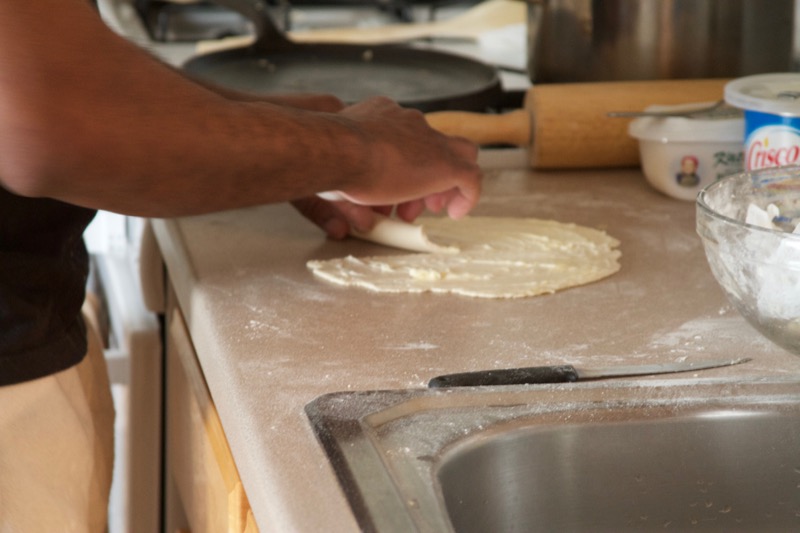
6. With a paring knife, cut the radius of the circle. 

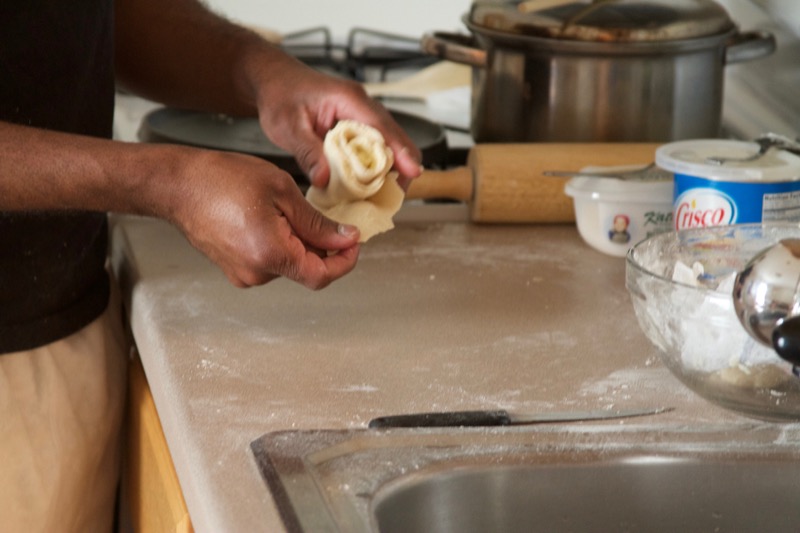
7. Roll the cut edge back on itself and keep rolling so that you roll almost the whole circle into a cone. Pull the last remaining flap over the base of the cone,  sealing the edges of the buttery layers inside.

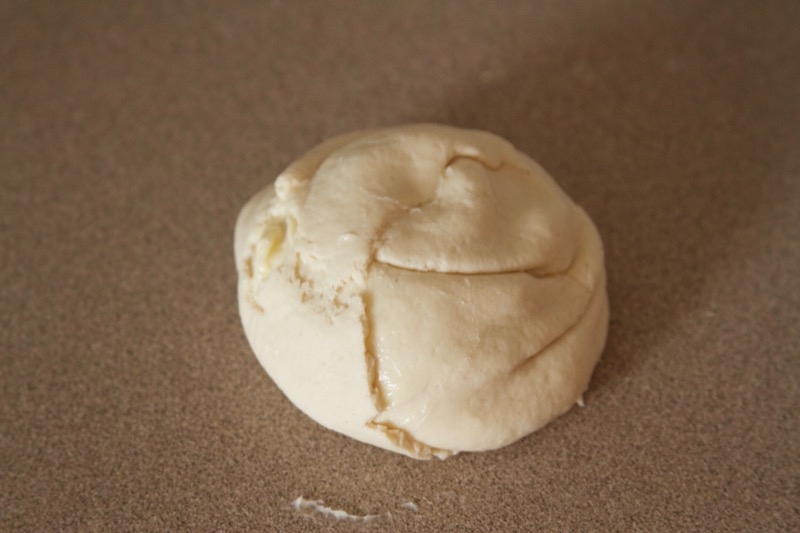
8. Place cone on its base and press the upended tip of the cone down into the base, transforming the cone into a mound. Place the mound on a flour-dusted counter and cover with clean towel. 

9. Repeat this process with the remaining three balls of dough. Once finished, cover the mounds with a towel and let rest 30 minutes.

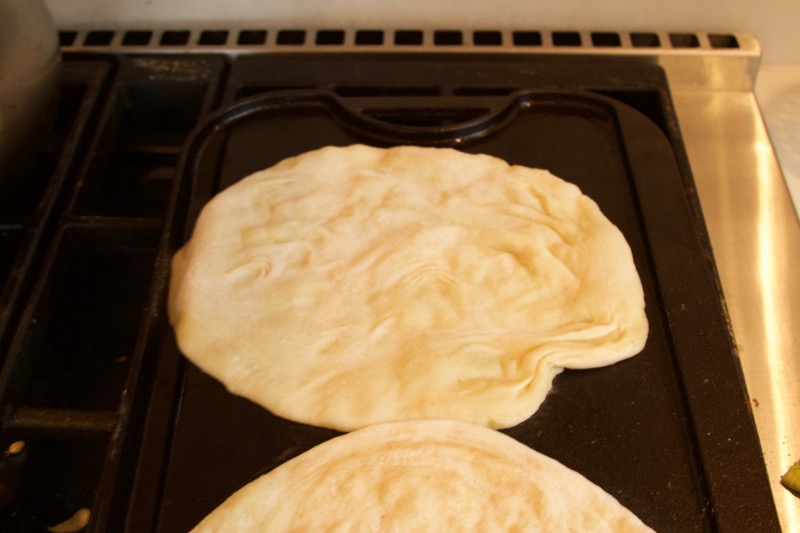
10.  Sprinkle counter top generously with flour. Pre-heat oiled flat pan or griddle to medium. Roll one of the mounds out into a circle. Sprinkle and wipe the top of the dough and/or counter with flour to keep the dough from sticking to the counter or the rolling pin. Roll into a thin circle, about 1/8 inch thick.

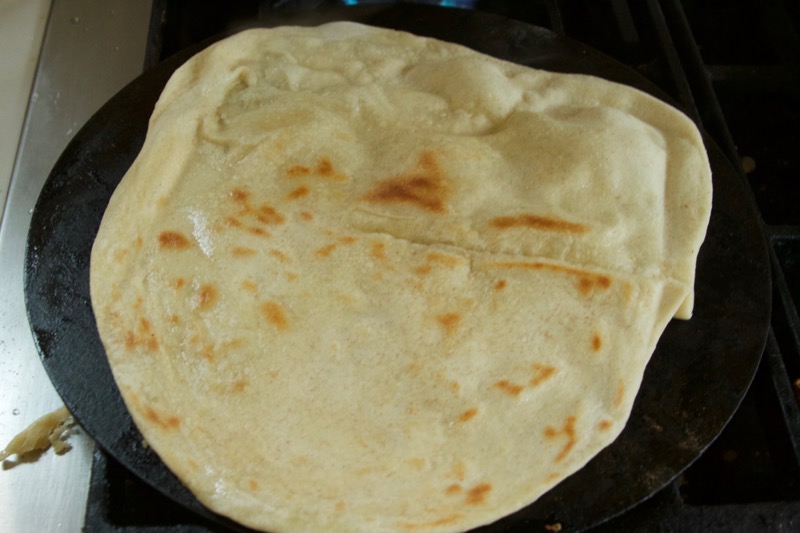
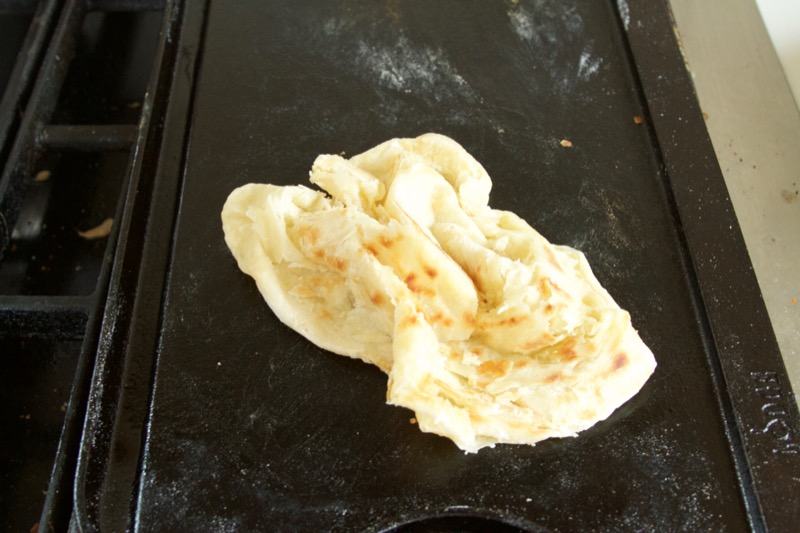
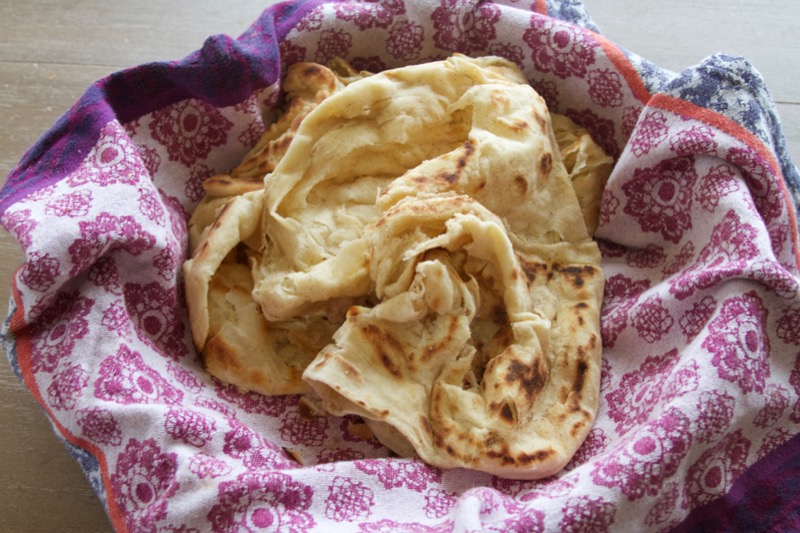
11. Place the circle of dough on the hot pan/griddle for a couple minutes, brushing the top side with vegetable oil. Flip and let the other side cook. With two wooden spoons push the edges of the circle into the middle multiple times, making it wrinkly and worn. Keep the circle scrunched in the center of the pan to make sure the edges have a chance to cook fully. Once the layered dough is cooked throughout, put it crunched up in a towel-lined basket. Repeat with the rest of the dough.

12. Serve busted up flat bread thick vegetable or meat dishes like stewed meats, dals, and curries. The classic Trinidadian combo is buss up shut and garbanzo and potato curry. Buss up shut is to be eaten with your hands - use ripped pieces of the bread to scoop up bites of other foods. 

English Popovers

Yorkshire Pudding

As Josephine Morris, from York, England, taught Lindsay Sterling in New Gloucester, ME.

Note: Josephine served these as part of her Sunday dinner, with roast beef, leeks in cheddar sauce, potatoes and gravy. They're also great by themselves for breakfast or brunch with jam and butter. In the U.S., these are called "popovers" because they puff up and pop over the edge of the container when they're cooking.
Makes: 24
Cooking time:  45 min

Ingredients

  • 1/3 cup vegetable oil
  • 2 cups milk
  • 5 small eggs (or 4 large)
  • 1 1/2 cup flour
  • 1/2 tsp salt

Equipment

  • blender
  • muffin pan(s) for 24 muffins
  • hot pads
  • teaspoon

Instructions

1. Take milk and eggs out of the fridge so they become room temperature.

2. Turn the oven temp up to 425 degrees F.

3. Pour a teaspoon of oil in each hole of the muffin pan and stick the muffin pan in the oven to preheat.

4. In a blender, combine 5 eggs, 1 1/2 cups flour, 1/2 tsp salt and 2 cups milk. Blend until smooth. When blender is stopped, look to see if there are air bubbles showing on the top of the batter. If not, blend a bit more.

5. Remove the hot muffin tin from the oven and pour batter to fill 1/3 of each mold. Put in over.

6. After fifteen minutes and give the pan a turn for even cooking. After five minutes (or when popovers are puffed up and a little golden, turn off oven and open oven door to let popovers cool down gradually (this helps them keep their shape).

Polish Sweet Cheese Dumplings

Pierogi

As mother and daughter, Jadwiga and Izabela Lutostanska, from Szczecin, Poland, taught Lindsay Sterling in Brunswick, Maine.


Notes: If you will be making your own Polish farmer's cheese (it's easy) for the filling, you'll need to start the process the night before. You can find Polish farmer's cheese already made in a Polish market. 

Pierogis freeze really well. It's great to make these in advance so all you have to do on the day you want them is make the topping and boil them.  

Makes: about 70 dumplings, enough to serve for 6 for dinner or more as an appetizer or snack.
Cooking Time: 3-4 hours

Ingredients

For the filling:

  • 3 cups Polish farmer's cheese (twarog), store bought or homemade
  • 2 egg yolks
  • 3 Tbsp powdered sugar
  • 1 package vanilla sugar (subst. 1/2 tsp vanilla)
  • (possibly 1-3 Tbsp milk)

For the dough:

  • 1 1/3 cup milk
  • 1 egg, whipped
  • 3 1/2 cups flour + 2-4 Tbsp for dusting
  • 1/2 tsp salt

For the toppings:

  • 1 cup breadcrumbs
  • 8 Tbsp butter
  • 1 cup plain yogurt
  • 4 Tbsp honey
  • juice of 1/2 lemon

Instructions


Make the dough. Warm the milk. In a large mixing bowl, mix the milk and whipped egg into the flour and salt with your hands until you have a mass of globby, rough, sticky dough that sort of sags when you hold it up as opposed to stays in its shape. It's a wet dough. Spread flour across your cutting board or counter and put the blob of dough on it. Knead the dough for 15 minutes. Use a knife or pastry cutter to scrape any dough that sticks to the counter. You may dust some more flour to help contain the stickiness but keep in mind that you want the dough to end up tacky so that it will stick to itself when you are making the pierogis. Stop kneading when the dough is smooth, stretchy, and slightly tacky. It feels like a baby's bottom when it's done. Form the dough into a ball and cover it with a towel so that the dough doesn't dry out while you make the filling.

Make the filling. Mix the filling ingredients together: Polish farmer's cheese, egg yolk, powdered sugar, and vanilla sugar or vanilla. You want it to be creamy and uniform rather than crumbly. Depending on how dry your cheese is, you may need to mix in small amounts of milk until your filling comes together in a creamy uniform mass.

Form the pierogis. See this video on how to form the pierogis. Put a 1-2 Tbsp of flour off to the side of your workspace on the counter. Break off a piece of dough about the size of a small apple, or about a quarter of all the dough. Roll the piece into a snake shape about as thick as a nickel. Cut across the roll, making 3/4"-thick pieces of dough. Dip the fingers of one hand in the flour and use them to turn each segment on its side and pat down on top of it once with two fingers to begin to flatten the piece into disc.

Use a rolling pin to roll out each piece into your dumpling wrapper. What you want is a thin disk about 2 inches in diameter and about 1/8th inch thick. Put the disk in one hand, and add a tsp of filling to the middle of the disk. Fold both halves of the dough over the filling, match the edges on top of one another, and press them together, sealing the filling inside. If the filling gets on the edge of the dough where you are trying to seal it together, then the seal won't work. If you need to push the filling back from the edges, it's helpful to dip your finger in a little pile of flour before using them to nudge the filling out of the way because then the filling doesn't stick to your fingers. Then press the dumpling wrapper closed.  Once the seal is secure, then pinch the dough six or seven times along the edge to make a pretty decoration.

If you are serving these another day, freeze pierogis in a single layer on a flour-dusted sheet pan. Once frozen, transfer into a Ziplock. Cook within 3 months.

On the day you want to eat them, prepare the toppings. Saute breadcrumbs in butter slowly on medium-low heat until breadcrumbs are golden. Remove from heat. Mix yogurt, honey, and lemon together in a bowl. If you're using Greek yogurt, whisk in a little water to loosen it into a sauce.

Boil the pierogis. Bring a pot of salted water to a boil. One by one, add enough pierogis to make a single layer in the water. Once they float, they're done. Another Polish source says she puts a tablespoon of oil in the water and then the pierogis don't stick to each other if you want to try cooking more at once.

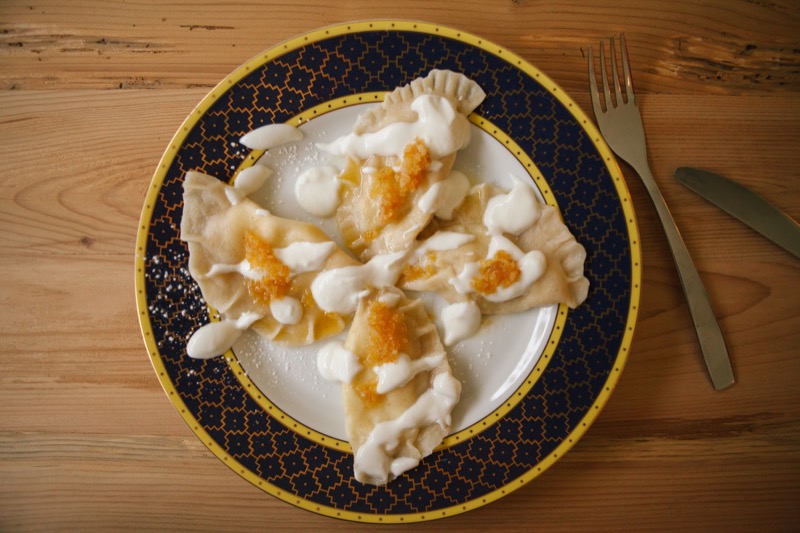
Remove cooked pierogis with a slotted spoon or spatula and serve on a platter. Top with small splatters of yogurt sauce and buttered breadcrumbs.
 

Congolese Mini Waffles

Gaufres

As Ariane Kambu Mbenza from Kinshasa, the Democratic Republic of the Congo, taught Lindsay Sterling in Yarmouth, ME, in May 2013.

Makes: 146 pieces, serving 10-35 people depending on appetite!

Ingredients

  • 5 cups flour
  • 2 sticks butter
  • 1 cup sugar
  • 3 eggs
  • 2 cups milk
  • spray butter (aka nonstick spray) or oil

Instructions

1. Put flour in bowl of a stand mixer. Cut 1/2 stick of butter into 1/4 inch cubes and melt the rest. Mix cold butter into flour, then mix in warm butter, sugar, and 3 eggs. Mix until incorporated.

2. Add enough milk so the consistency is thick but doesn't completely hold it's shape. Mix until smooth.

3. Heat up waffle iron. Spray the center of each quadrant with spray butter or oil so the waffle doesn't stick to the waffle iron. (You could also brush both sides of the waffle iron with oil).

4. Spoon 1 heaping teaspoon of batter into the center of each quadrant. Spray the top of each mound of batter with spray butter. Close the waffle iron.

5. When waffles are done, pluck them out of the press with a fork and put on a serving tray to cool. Serve straight up or with whipped cream, honey, ice cream, or peanut butter.