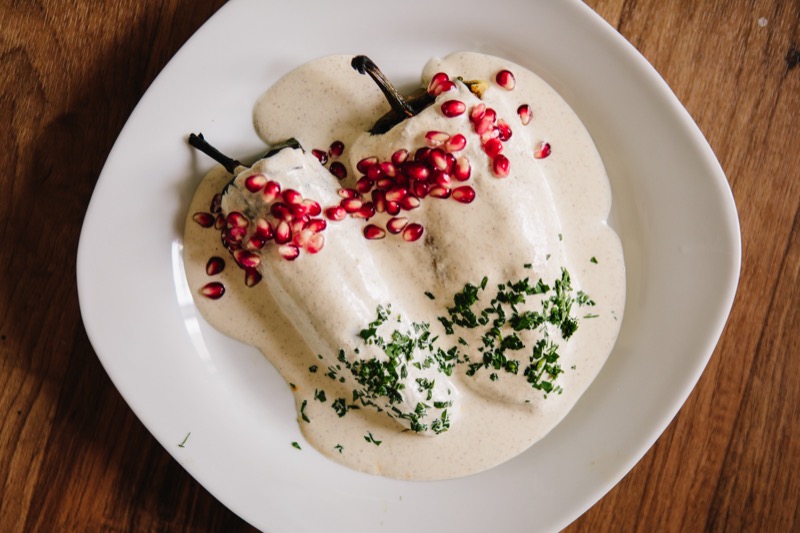
Appetizers

Mexican Stuffed Poblanos

Chiles en Nogada

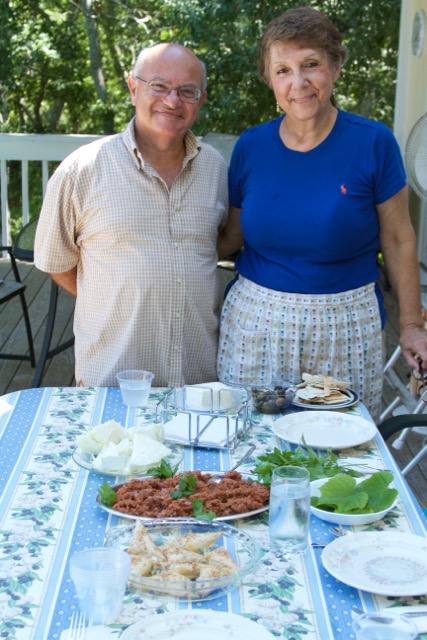
As Yazmin Saraya from Mexico City, Mexico, taught Lindsay Sterling in Old Orchard Beach, Maine. Photography by Cindy Giovagnoli.

Makes: 20 stuffed poblano chiles, serves 6-8 as a full meal
Cooking time: 1.5-2 hours
Note: This dish can be deep fried or simply roasted. Pick your pleasure. Also, if you have an apron, this would be a great occasion to wear it. 

Ingredients

For the stuffed peppers:

  • 20 poblano chili peppers

  • 1.5 pound ground pork

  • 3 garlic cloves

  • 1 onion

  • 1/4 cup sliced almonds

  • 1 apple

  • 3 teaspoons oil

  • 1 sweet plantain (yellow with black spots)

  • 1/8 tsp ground cloves

  • 1/2 tsp cinnamon

  • 2 sprigs fresh thyme

  • 1 tsp dried oregano

  • 2 tomatoes

For deep-frying (omit this part if doing gluten-free):

  • 1 cup white flour

  • 8 eggs

  • 3 cups frying oil

For the walnut cream sauce:

  • 1 cup walnuts

  • 1 cup sour cream

  • 6 oz cream cheese

  • 2 Tbsp sugar

  • 1 Tbsp sherry (optional)

  • 1/2 cup milk

  • 1 tsp salt or 1 chicken bouillon cube

Garnishes:

  • 2 pomegranates

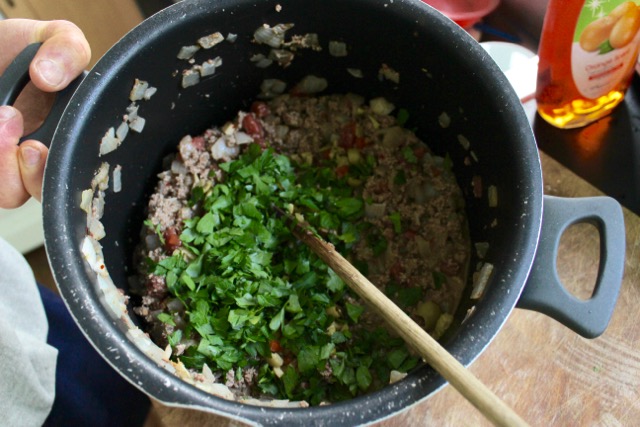
  • 1 bunch fresh parsley

Equipment

  • tongs

  • cutting board

  • chef knife

  • large metal bowl

  • 2 sheet pans/cookie sheets

  • paper towels

  • paring knife

  • 1 medium bowl

  • plastic wrap

  • large saute pan

  • blender

  • 2 small plates

  • 2 cereal bowls

  • toothpicks

  • slotted spoon

  • slotted spatula

  • electric mixer with whip

  • soup spoon for stuffing filling into peppers

Instructions

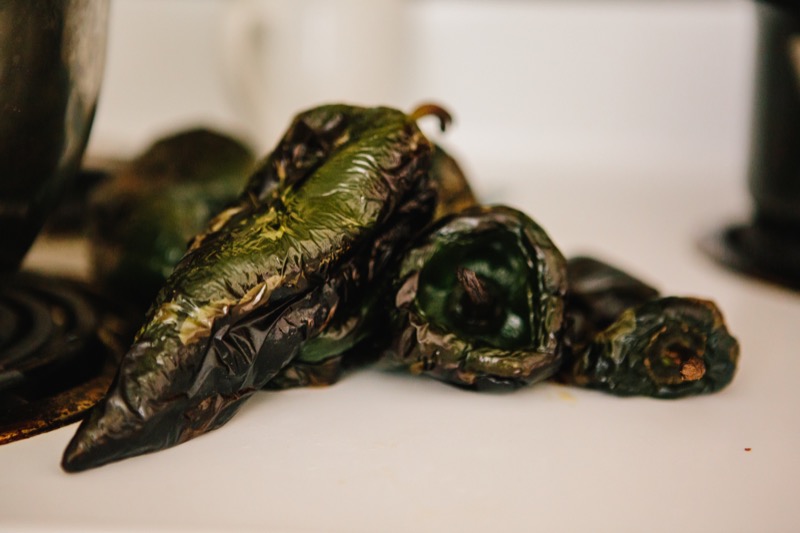
1. Broil the poblanos on a sheet pan on the top rack in the oven and broil. Keep on eye on them. Once the flesh is blistering (and colored brown or black) turn the peppers. Repeat until all sides of peppers are blistered. Put the peppers immediately in a bowl and seal with plastic wrap to steam for fifteen minutes.

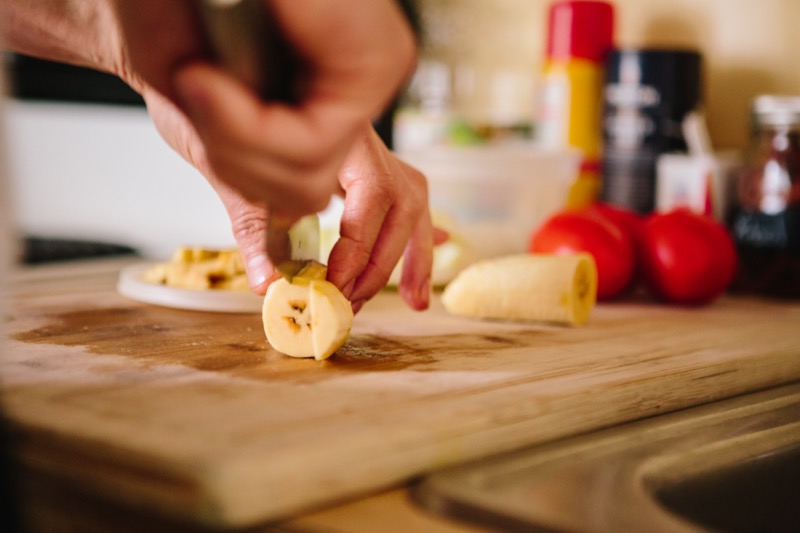
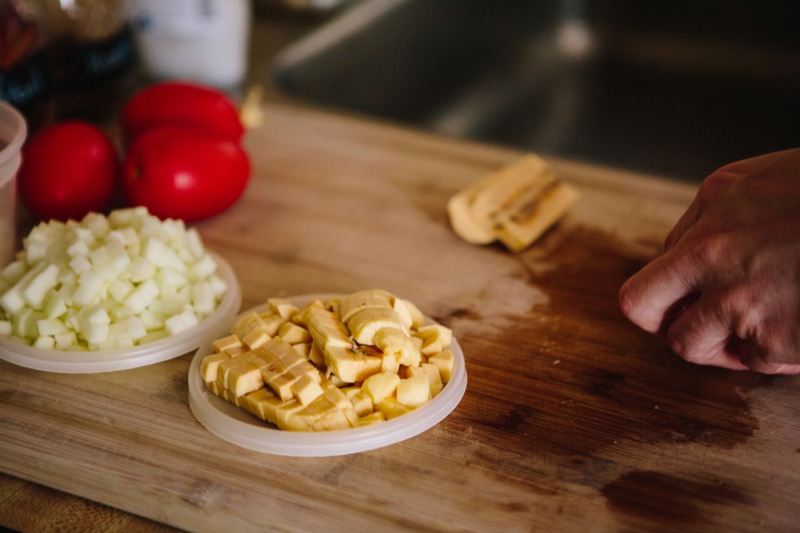
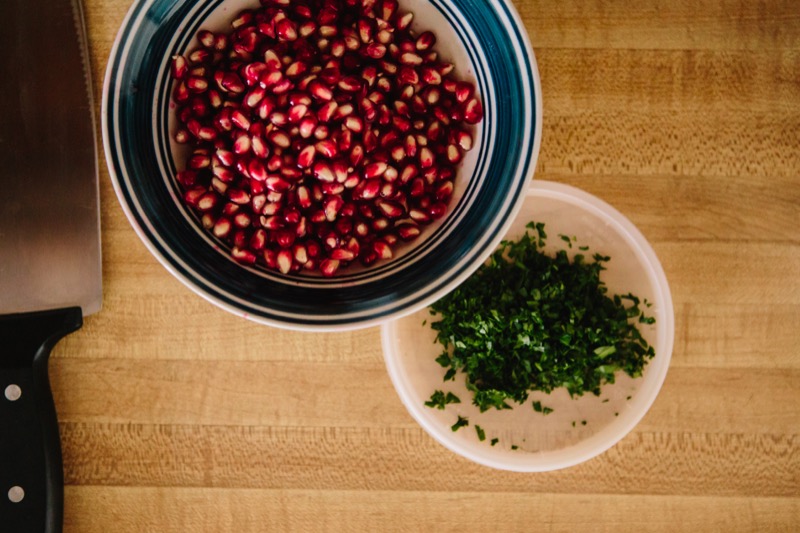
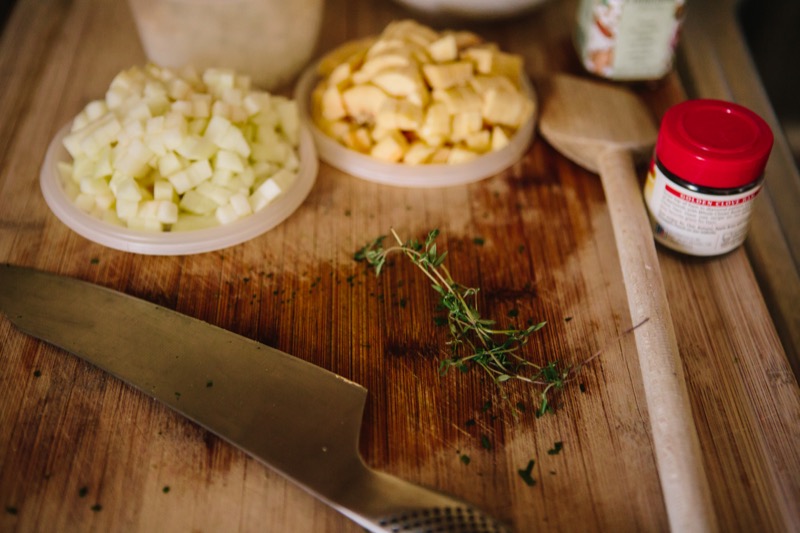
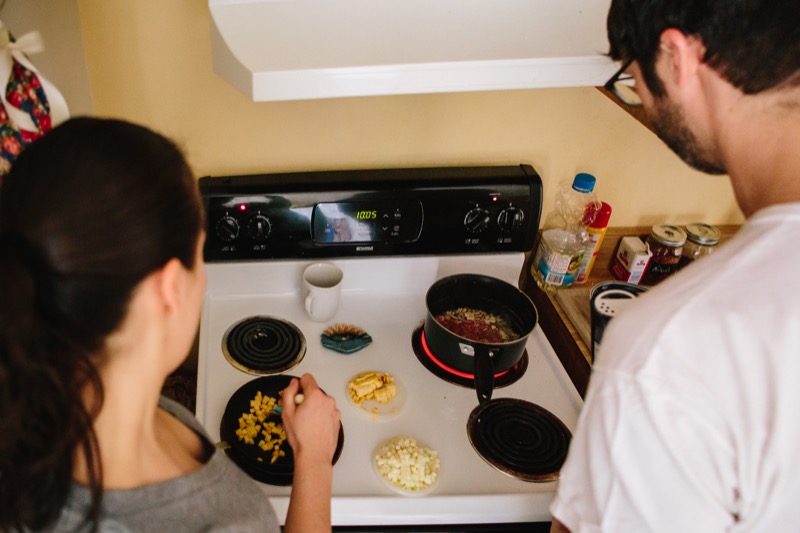
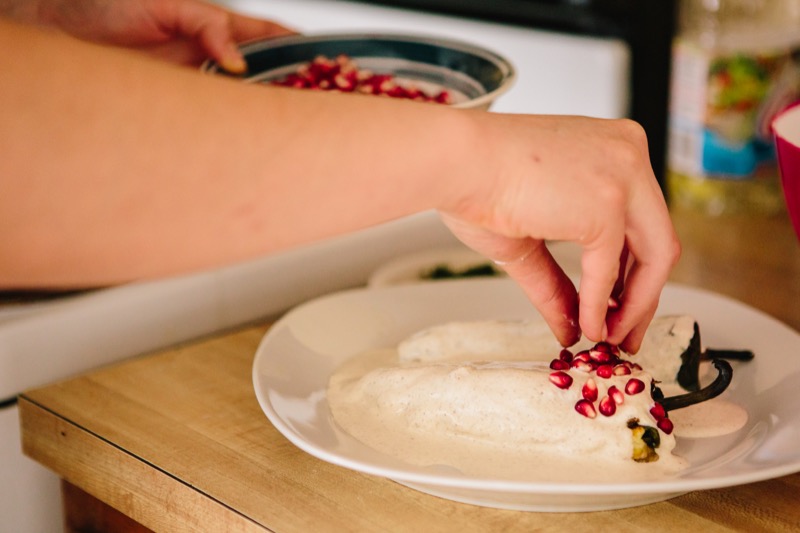
2. Prepare your other ingredients. Dice the onion, apple, plantain and keep in separate dishes. Pull the thyme leaves off the stems, discard the stems, and finely chop the leaves. Remove the skins from the garlic cloves and finely dice. Slice through the equator of the pomegranate. Hold the side that is revealing the seeds facing down into a bowl and whack she skin-side all over with the back of a soup spoon until all the seeds fall into the bowl. Repeat with the other half of the pomegranate. Remove any of the fruit lining that fell into the bowl. 

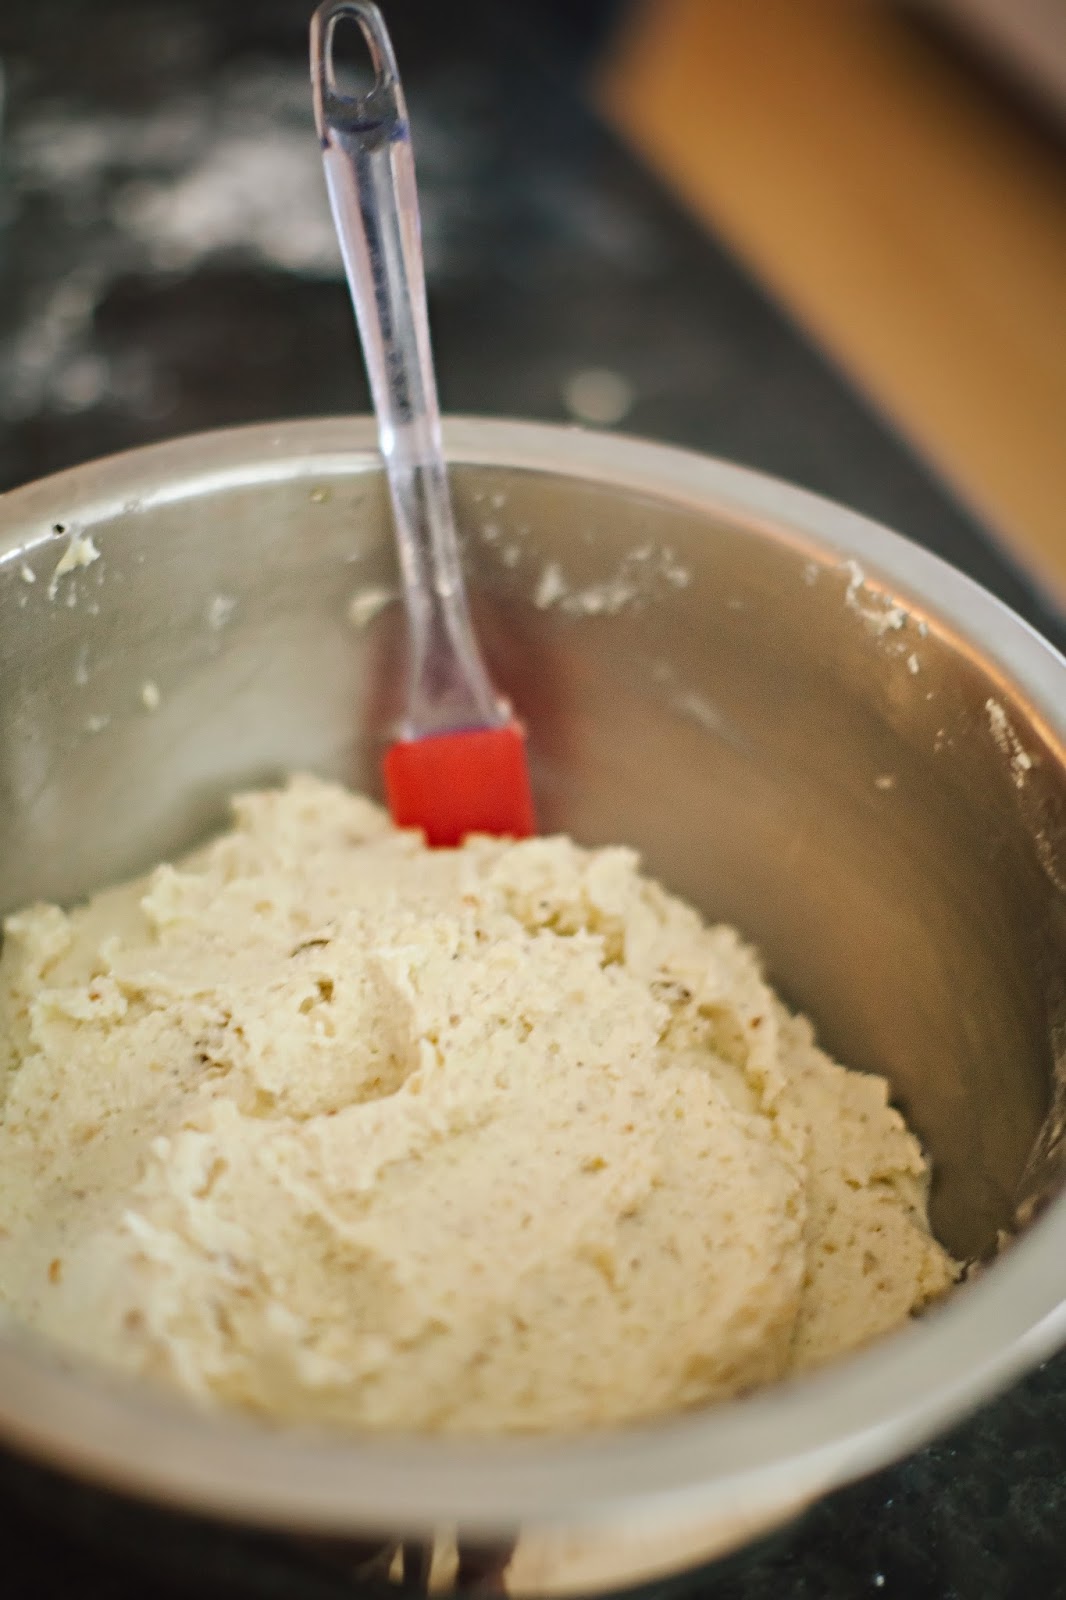
3. Make the walnut cream sauce by simply blend all the ingredients for sauce in a blender until creamy and smooth.

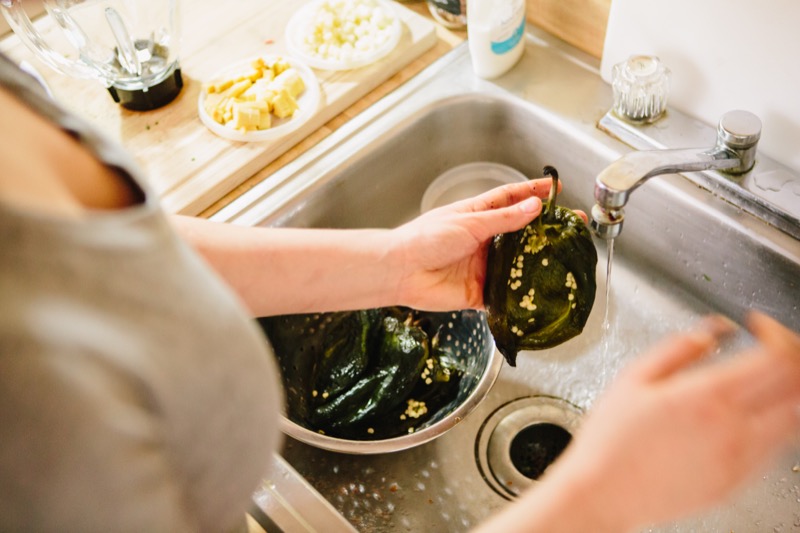
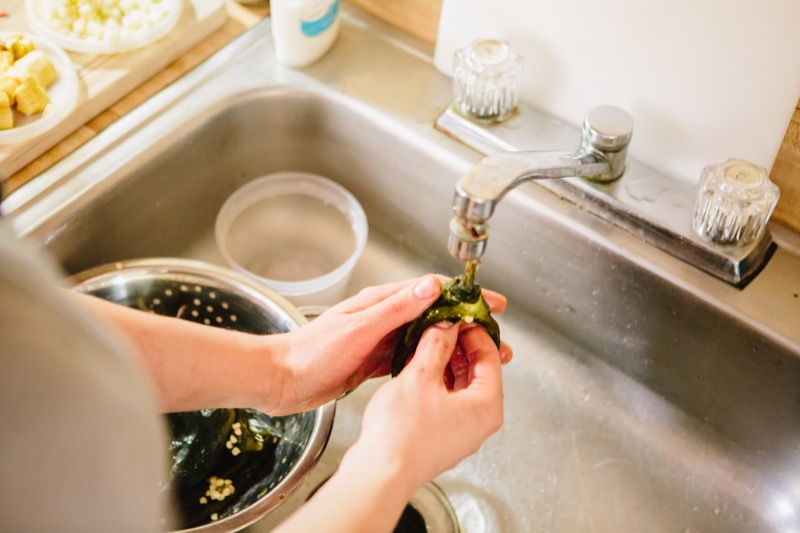
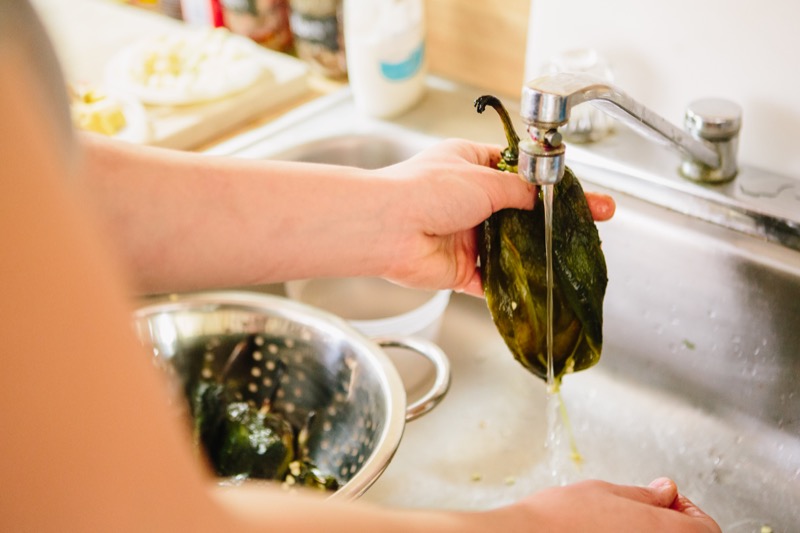
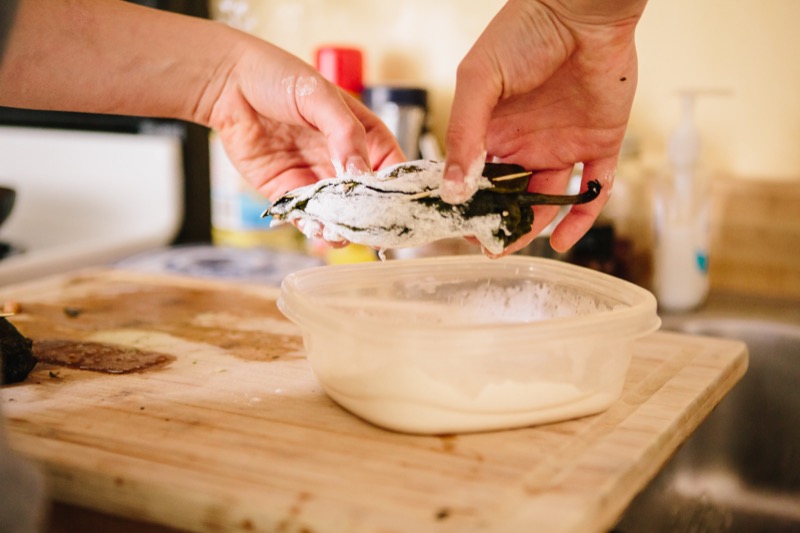
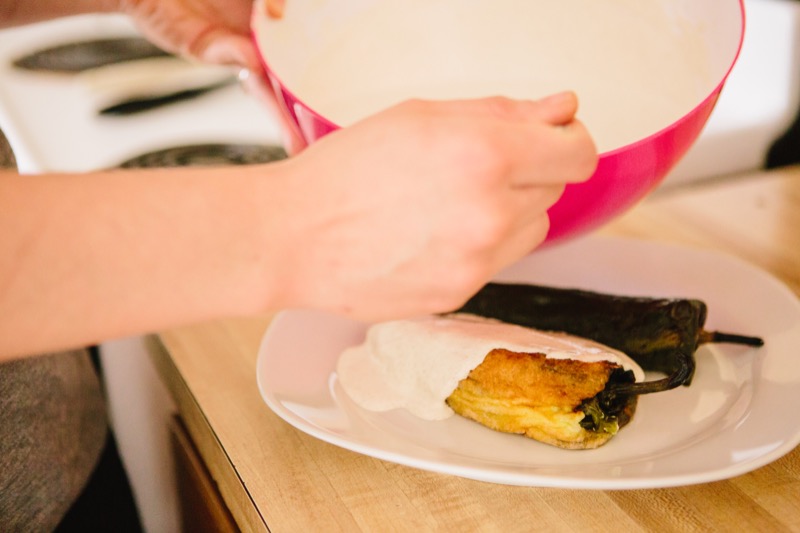
4. De-skin and de-seed the peppers. Line a sheet pan with paper towels and put it next to the sink. Over the garbage disposal or a bowl in the sink, peel the skin off a pepper with a paring knife or your fingers. Make a slit down the length of the pepper body and gently remove the seeds without breaking the pepper. If you do, just pretend it's not broken and move on. It'll still be great! Rinse the cavity of the pepper under the faucet to remove any stray seeds. Put the cleaned pepper on the paper towel to dry. Continue with the rest of the peppers. Increase your speed and efficiency as you practice on the next 19 peppers. I got my time down to about one minute per pepper. Pat all peppers dry with a paper towel.

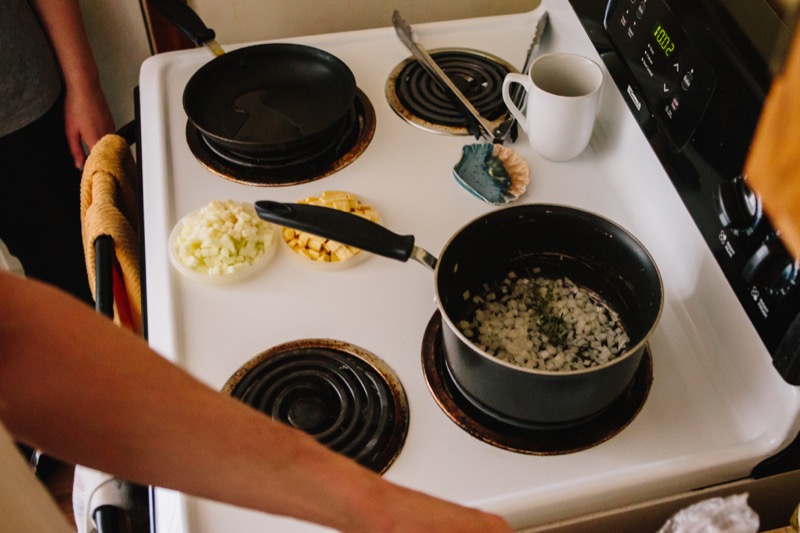
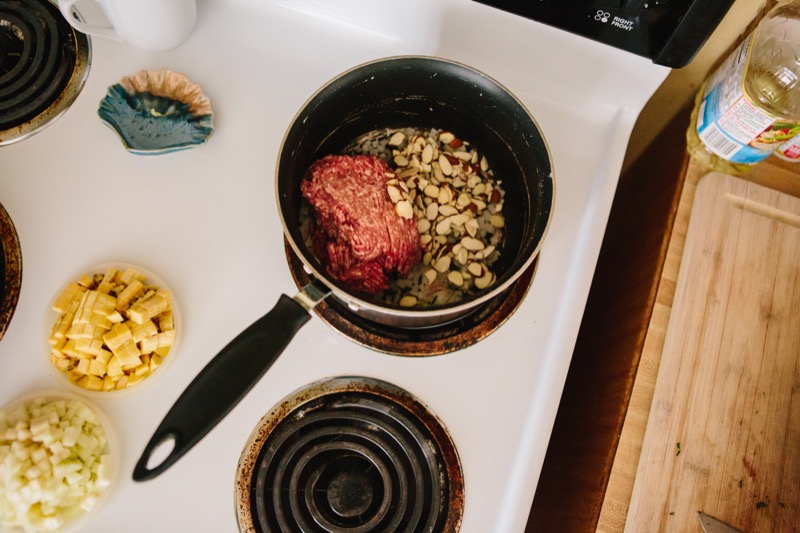
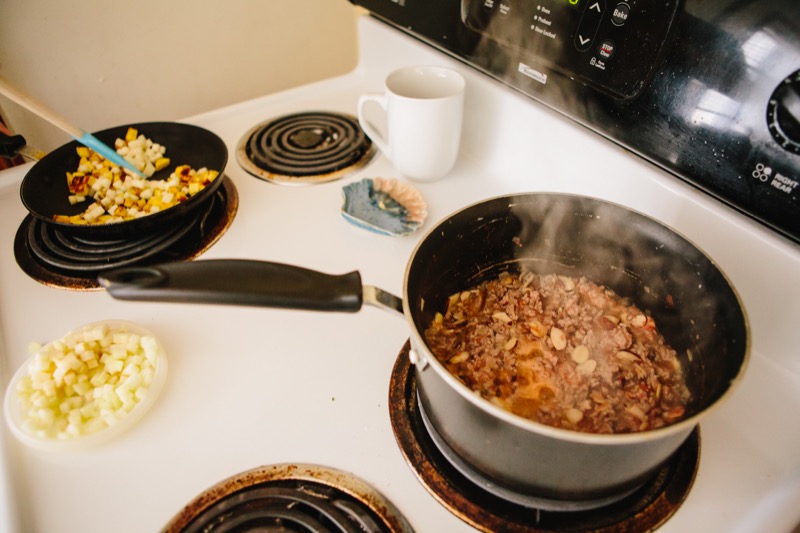
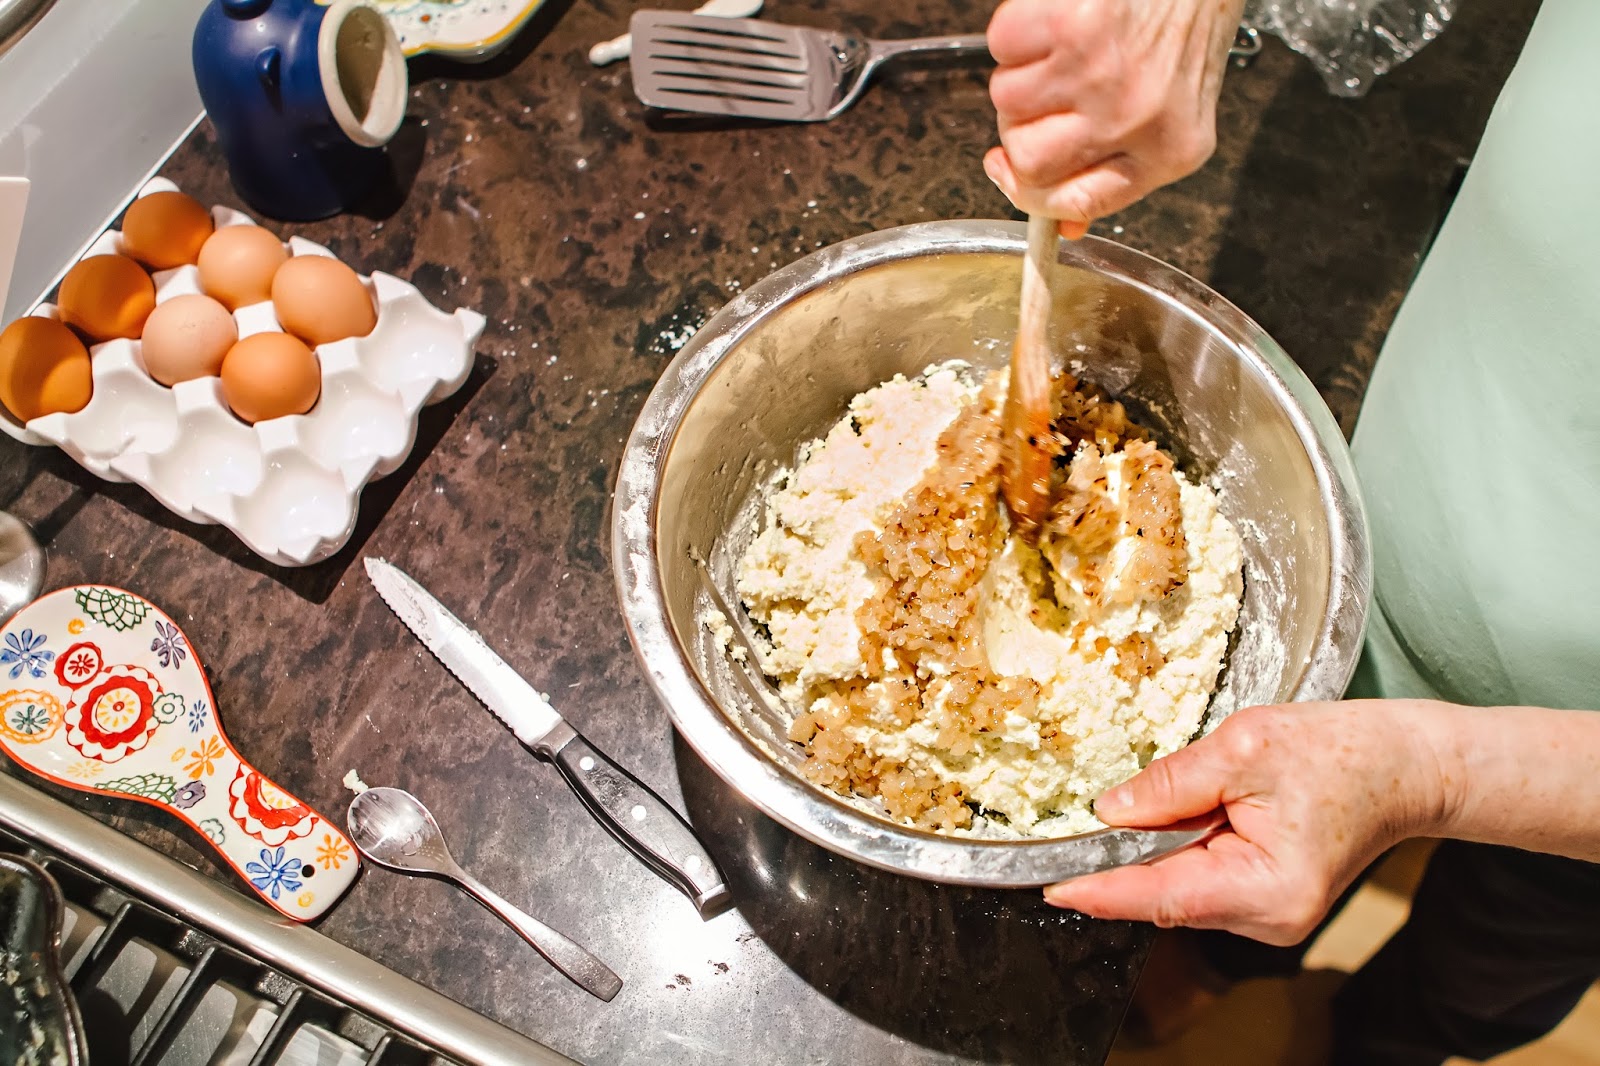
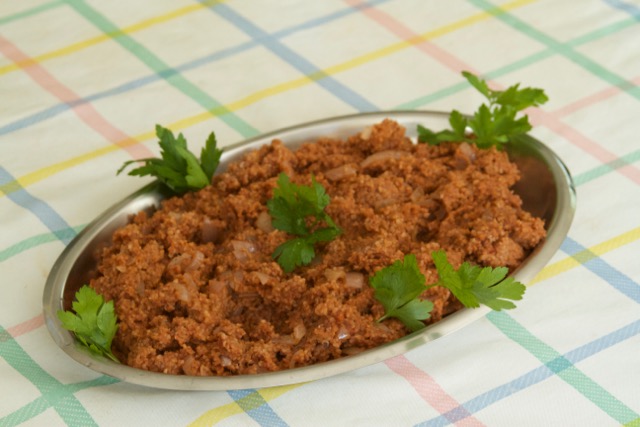
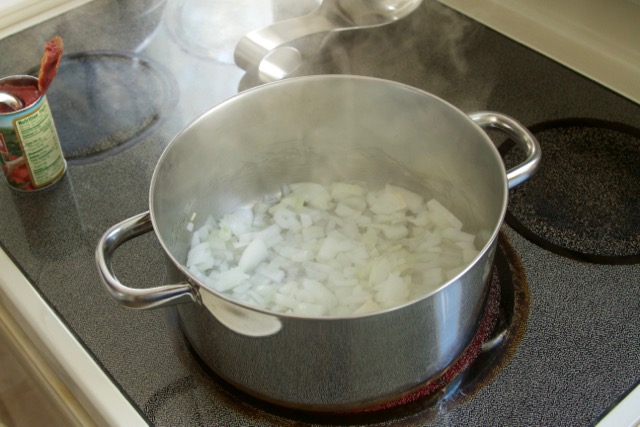
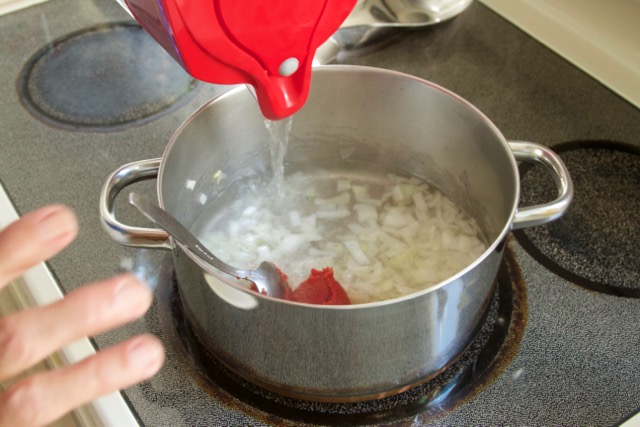
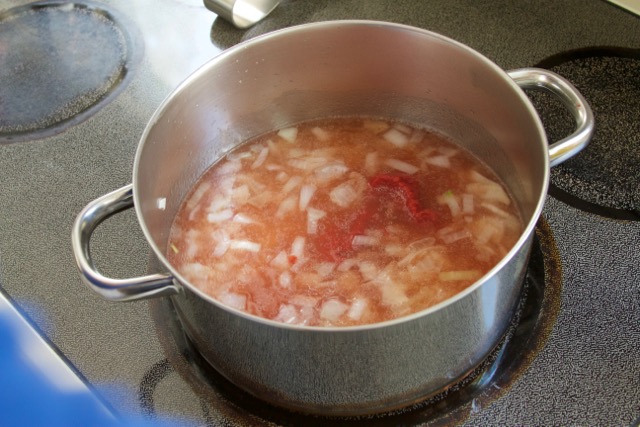
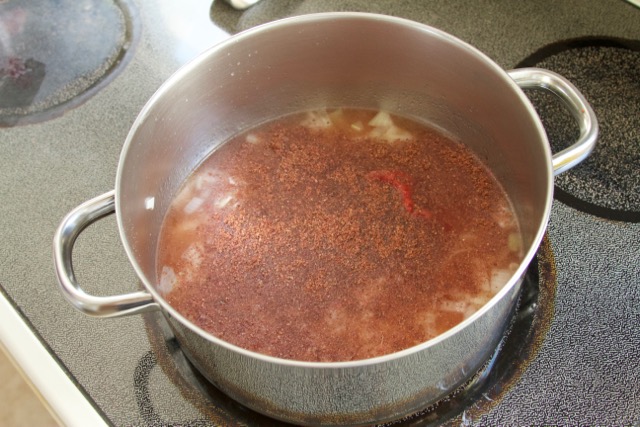
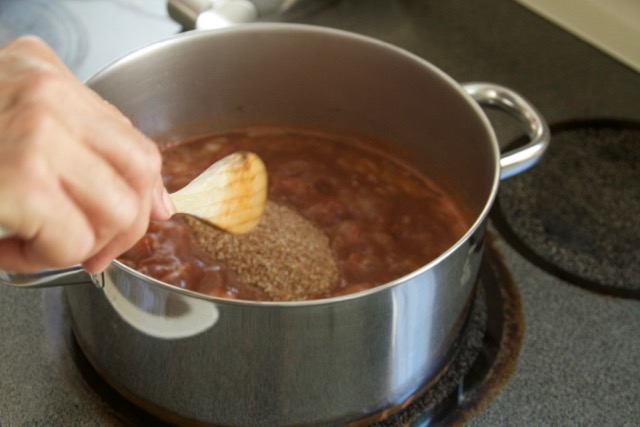
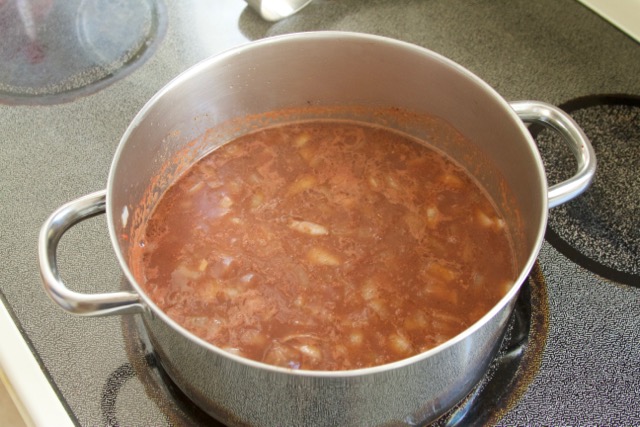
5. Make the filling. In a large saute pan on medium heat add a teaspoon of oil and saute the onion, thyme and garlic with a little salt, which helps them cook faster and enhances their flavor. Once onions are soft, add pork, cinnamon, oregano, and almond slices. Blend tomatoes in a blender. Once pork is cooked, add blended tomato and turn off heat.

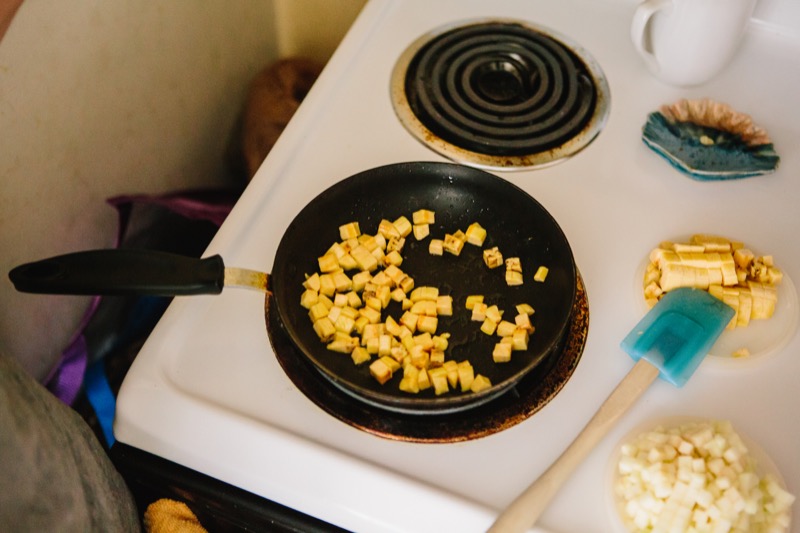
6. In a small saute pan, add a teaspoon of oil and saute the plantains for about three minutes until they soften and turn gold. Put them on a plate to cool. In the same pan, add another teaspoon oil and saute the apples briefly. When they are warm but still crunchy transfer them to a plate to cool. When the pork has cooled, mix the apples and plantains into it. This is your filling.

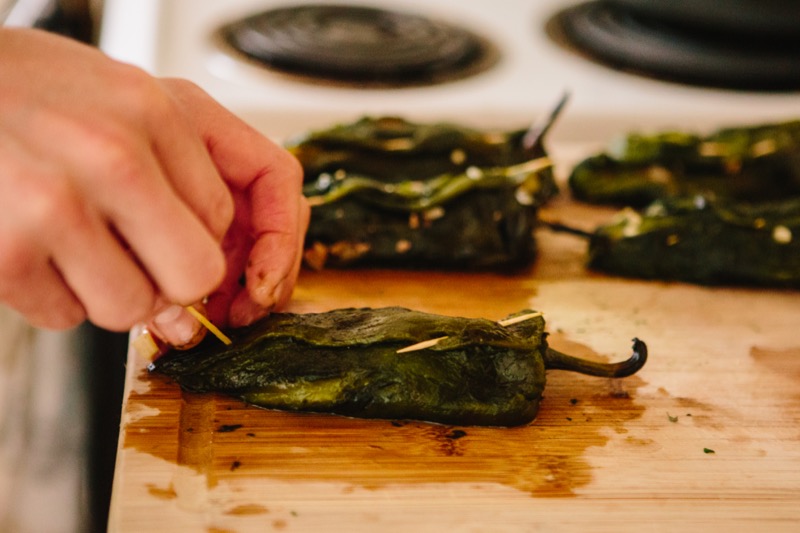
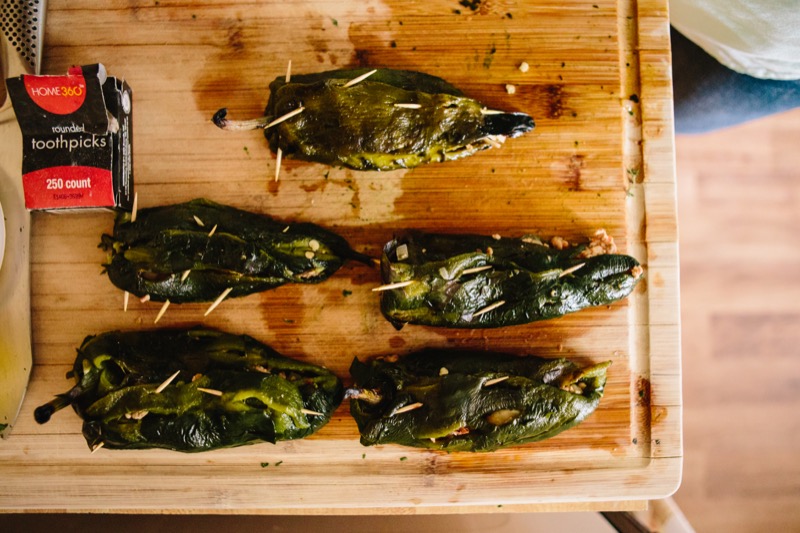
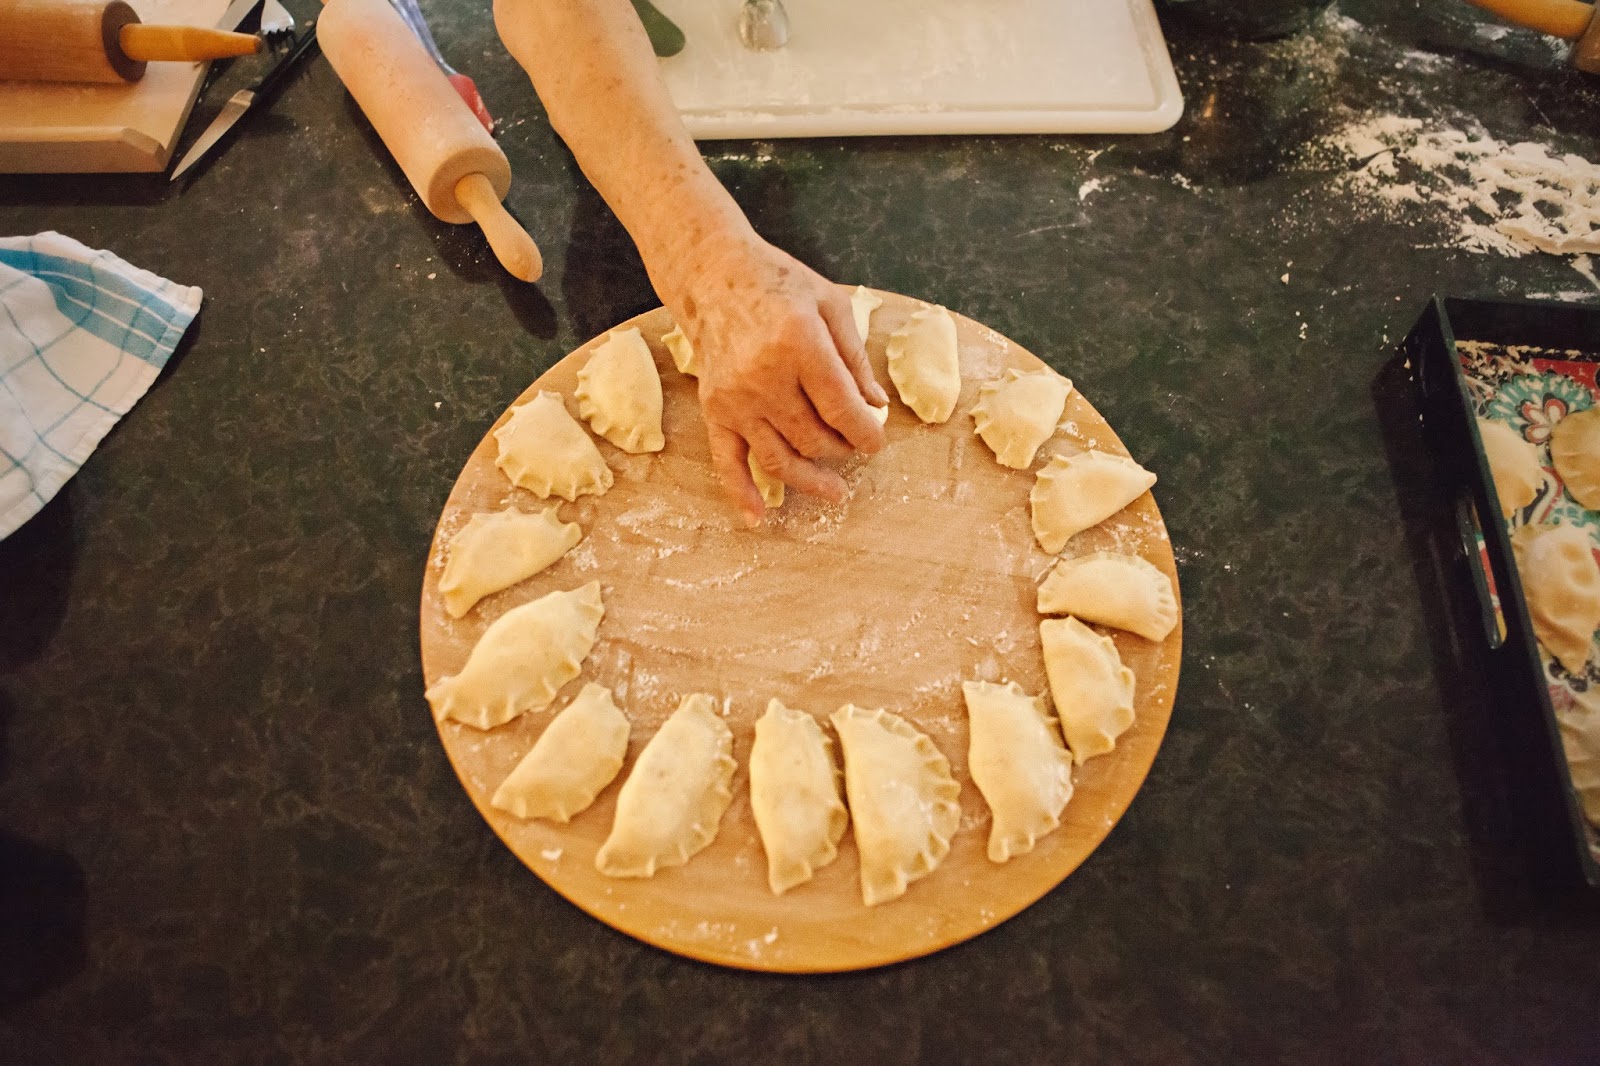
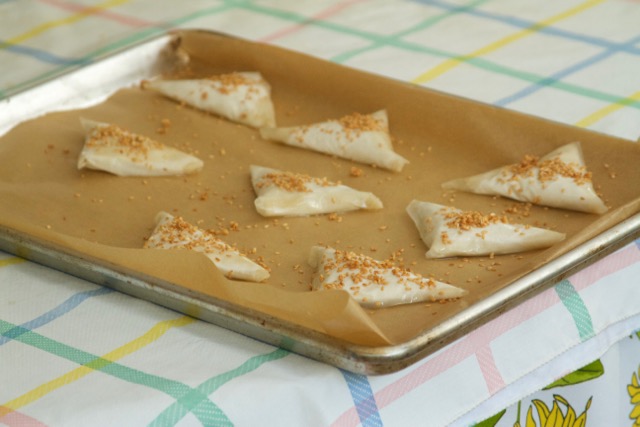
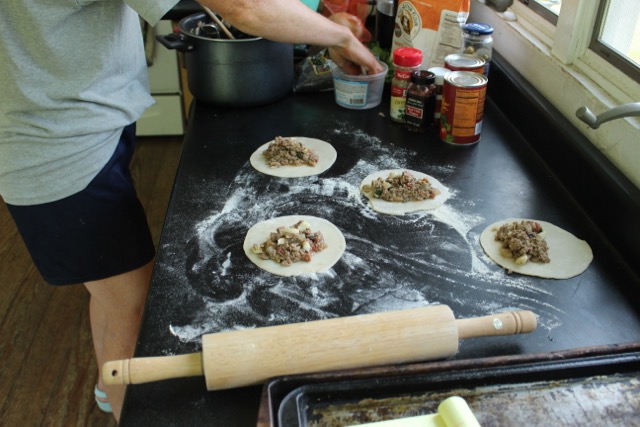
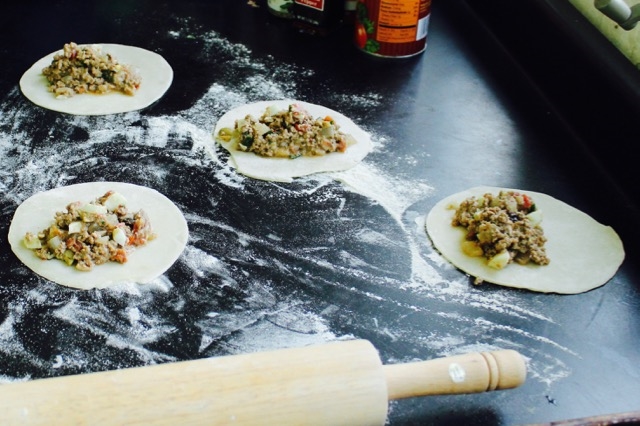
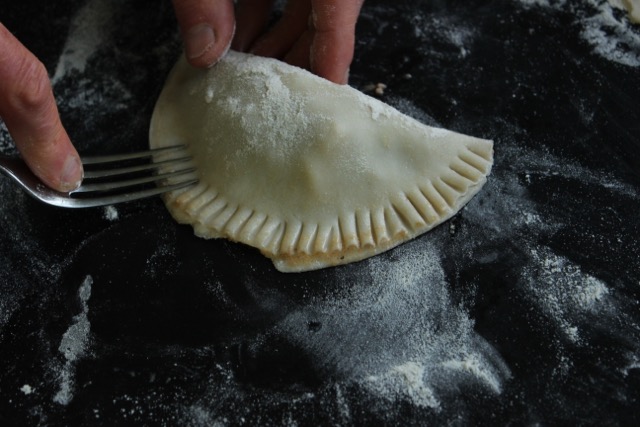
7. Fill the peppers. Spoon the filling into each pepper cavity so that the pepper is full but still closes. If you are not deep frying your peppers, skip to #11.

(Yazmin stitched each pepper closed with 1-2 toothpicks, however, when I tested the recipe at home I found that I didn't like guests having to hunt through their meal to find toothpicks hidden under the fried batter and sauce. The next time I made the dish, I discovered that you don't need to use toothpicks. If you believe the peppers will stay closed once they are sealed with batter, they do! Up to you - use toothpicks or faith.)  

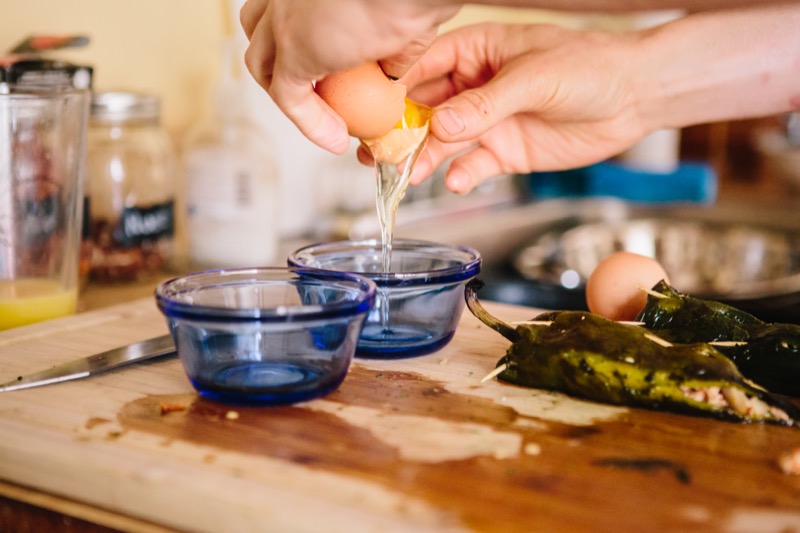
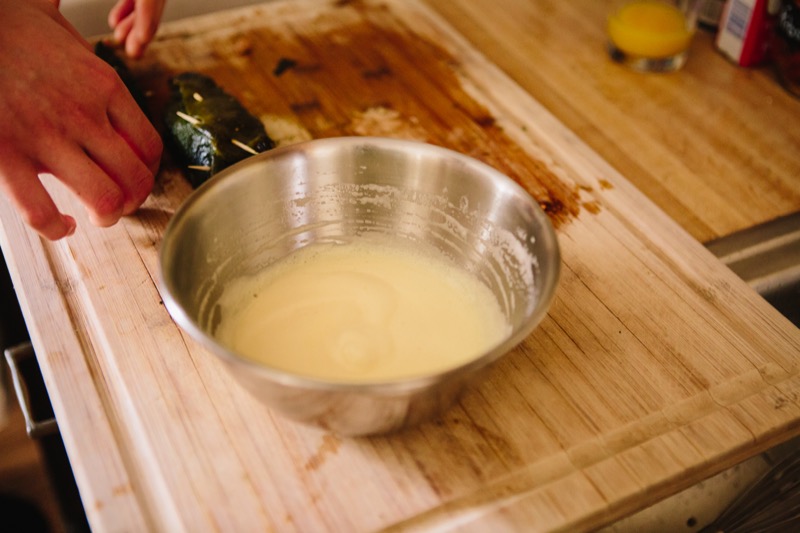
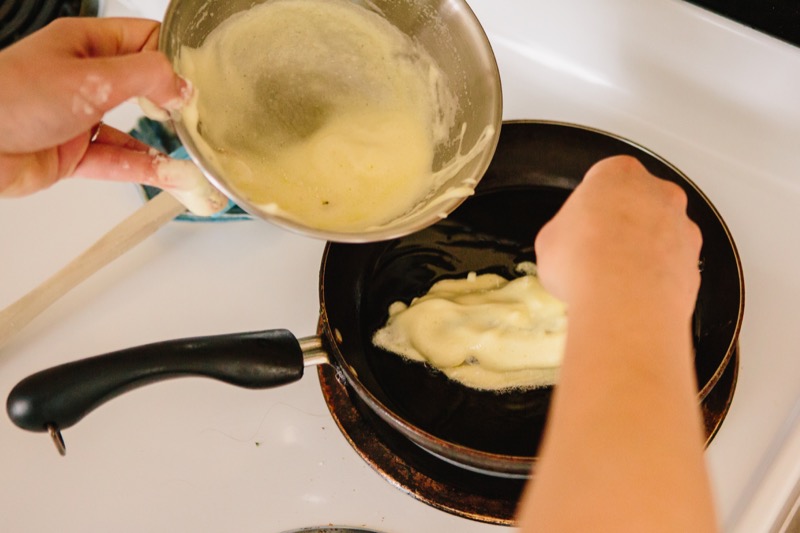
8. Batter the peppers. Put the white flour on a dinner plate. Separate the egg whites from the yolks. Whip the egg whites in a mixer until the peaks are almost stiff but not totally, then mix in the yolks. Pour oil about 3/4 inches deep into a large saute pan and heat on high. Transfer the whipped eggs to deep plate or wide bowl. Line a sheet pan with paper towels and place on the counter near the heating pan of oil.  

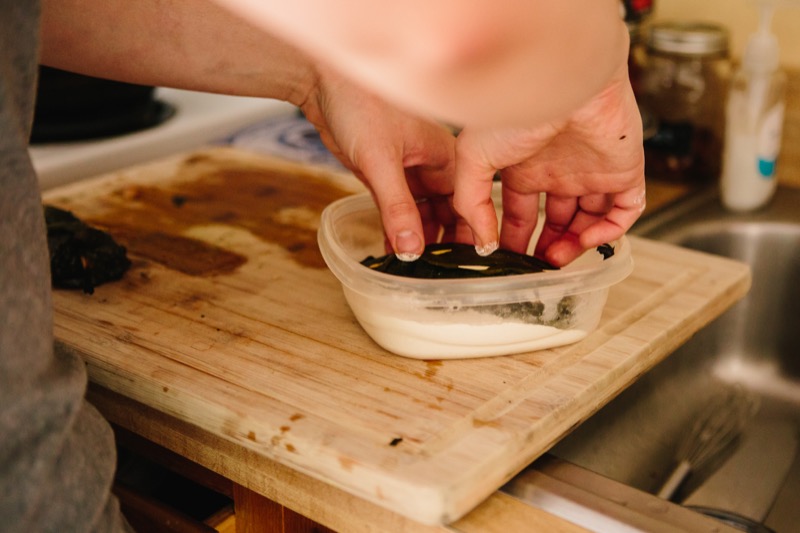
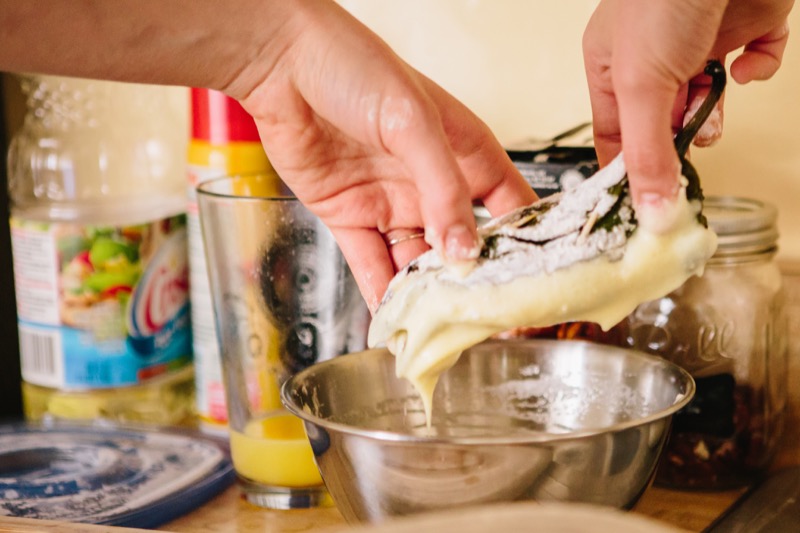
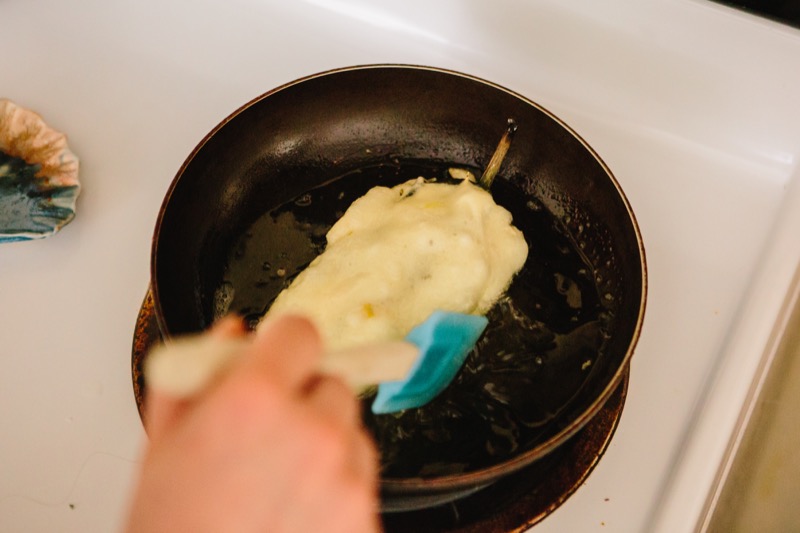
9. Deep fry the peppers. When the oil is shimmering hot (but not yet smoking), press the stuffed pepper onto the floured plate until all sides turn white and then dip the non-seam side of the pepper into the whipped egg. Lay the battered side gently in the oil. Spoon egg mixture on the top of the pepper, encasing the whole pepper except the stem in whipped egg.

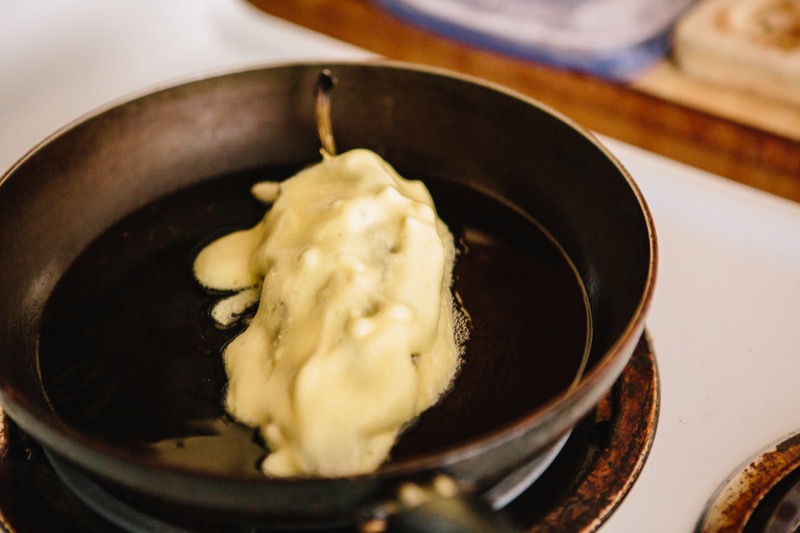
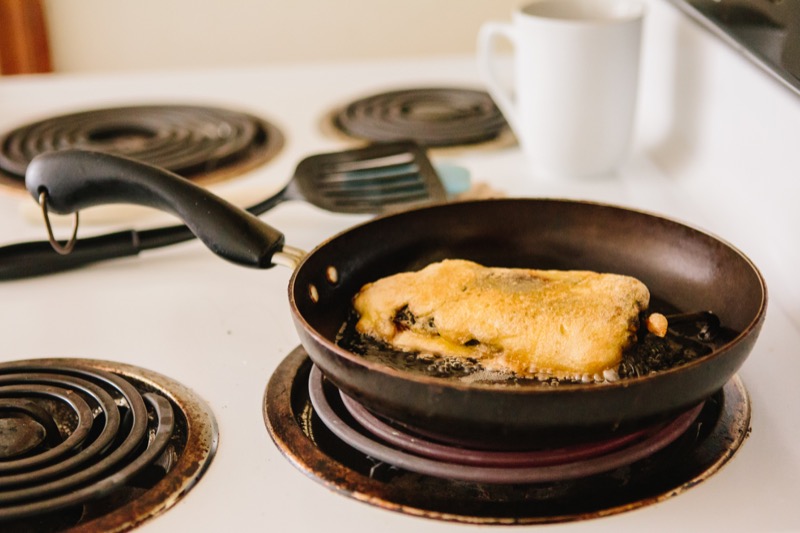
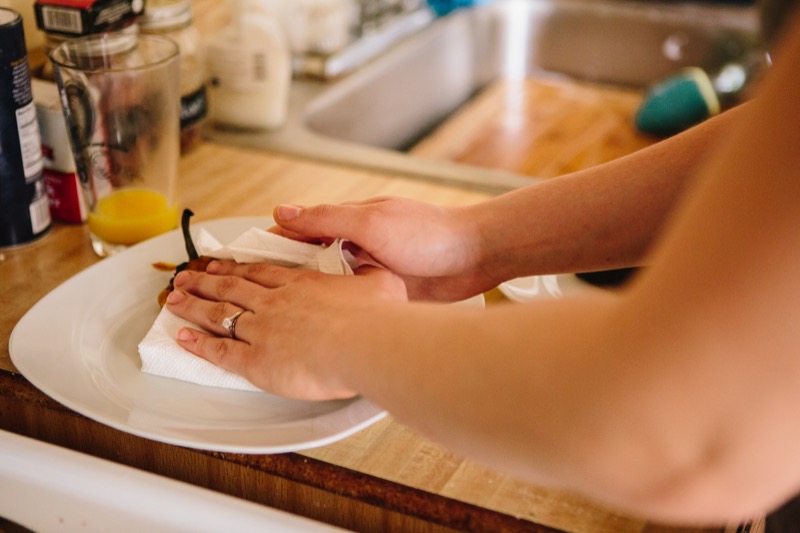
10. Gently lap hot oil against the sides of the battered pepper to help it solidify its shape. When the bottom is golden, carefully roll the pepper with a slotted spoon and a slotted spatula onto its raw side. When the egg batter looks cooked and golden all around, remove the pepper from the oil and onto the sheet pan. Continue with other peppers. If you fry more than one pepper at once make sure to leave at least an inch between peppers in the pan.

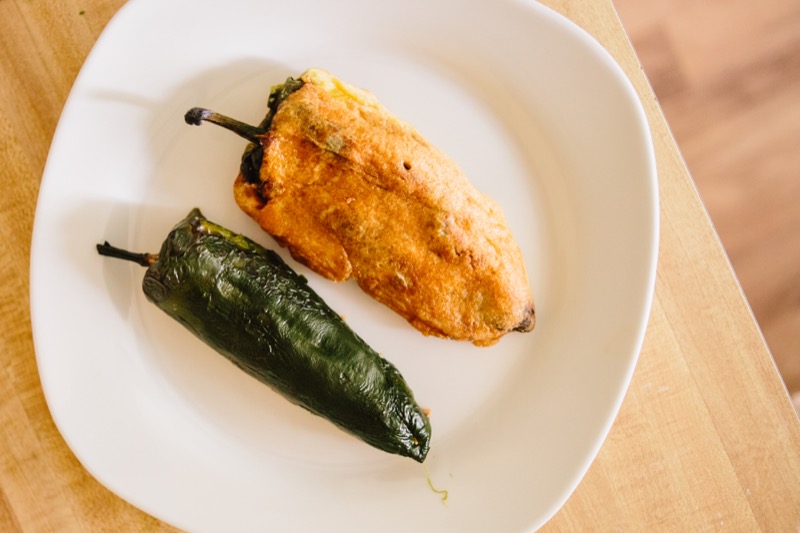
11. Serve three peppers to a plate for a full meal. (Peppers should be served warm -- they might need a moment in the oven if they have cooled off). Top peppers generously with walnut sauce, chopped parsley, and pomegranate seeds.
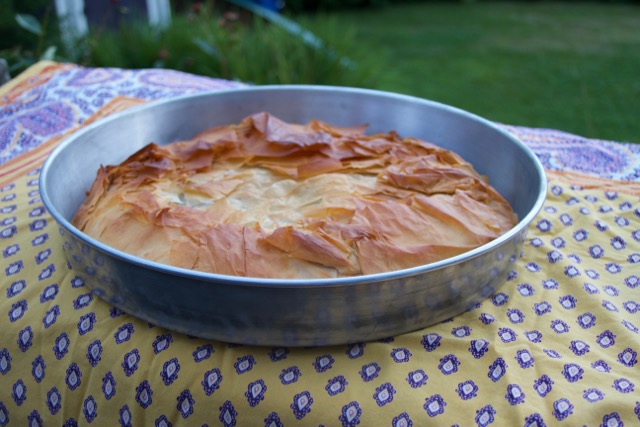
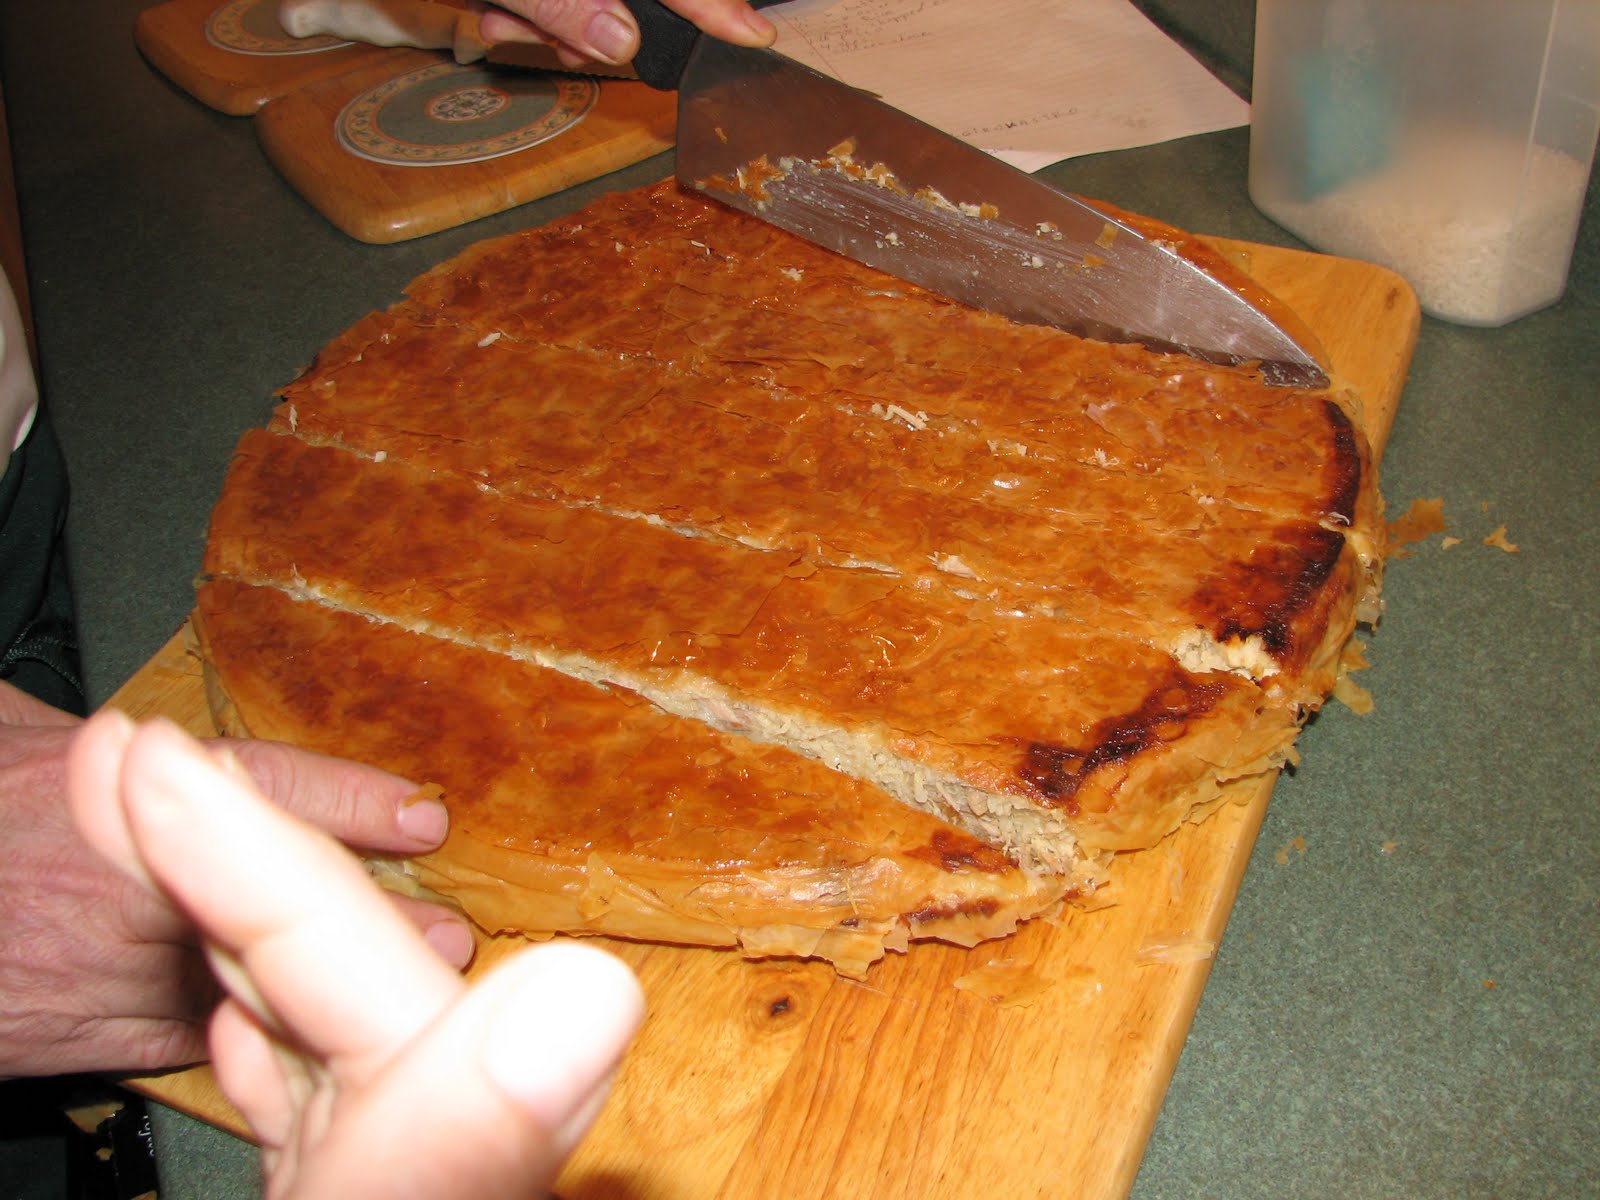
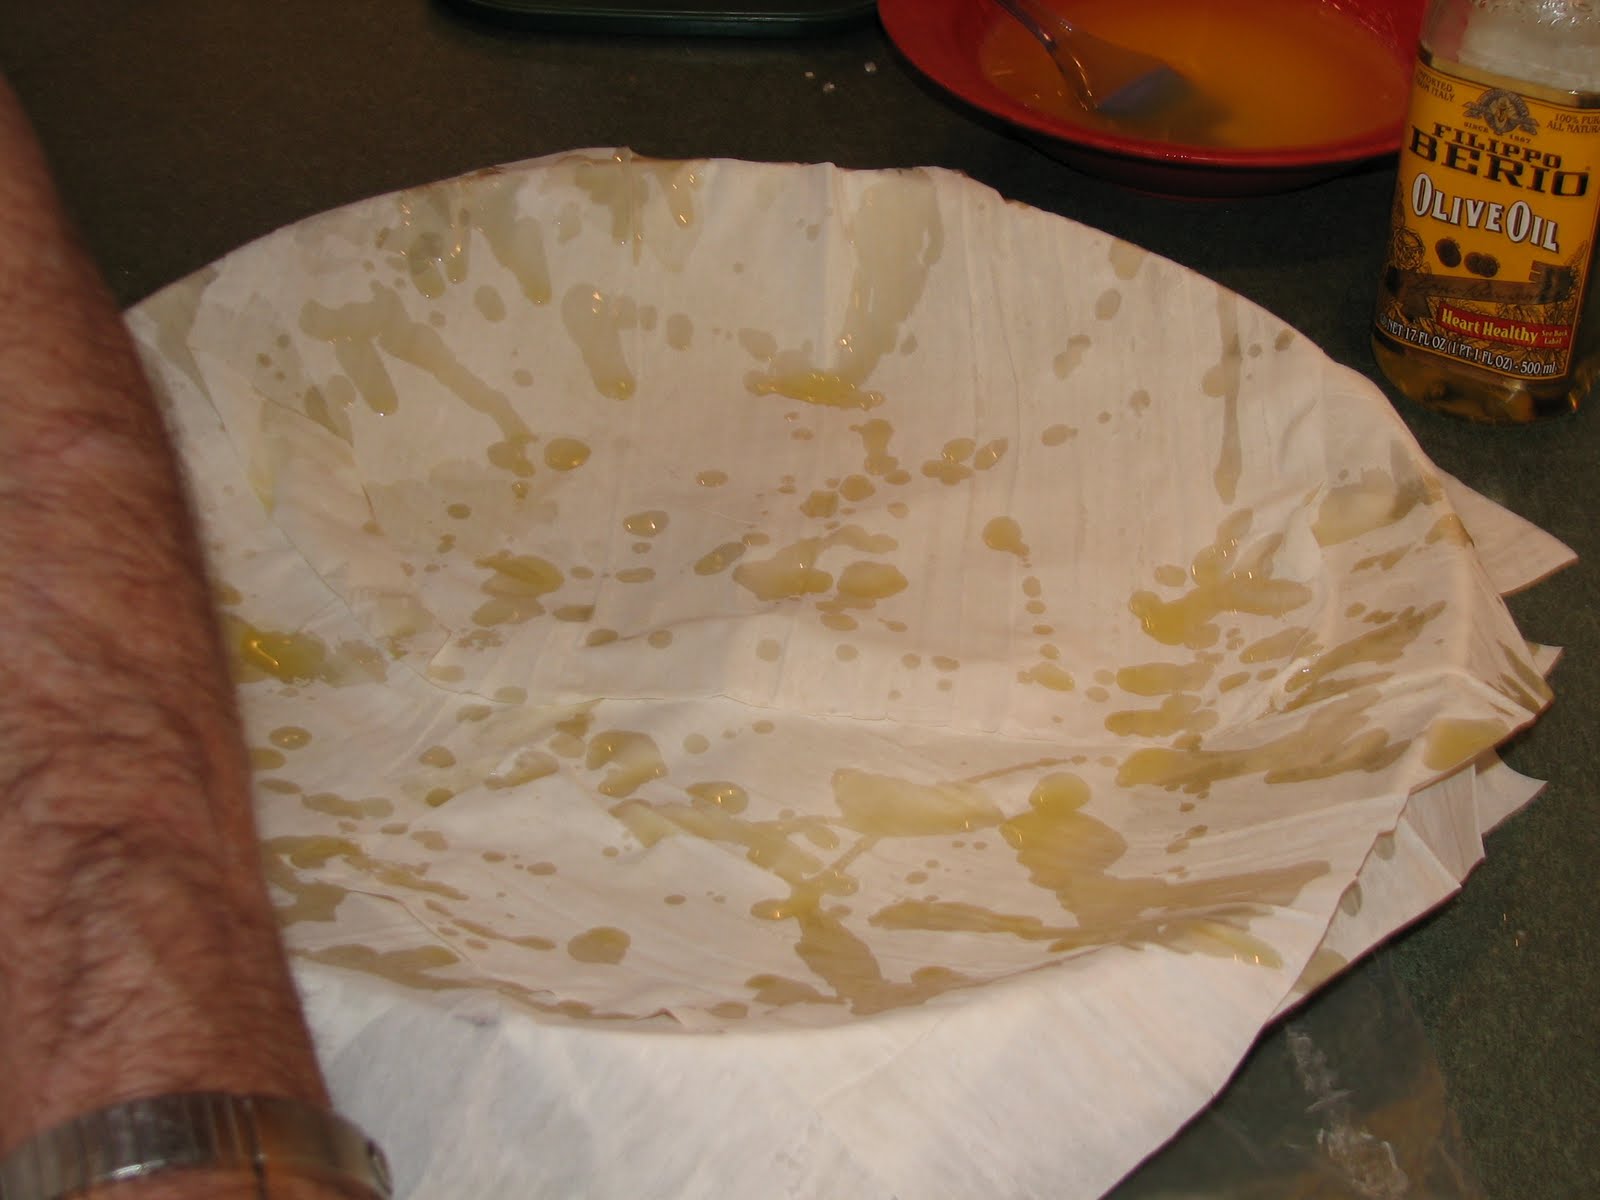


Polish Cheese-Potato Dumplings

Pierogi Ruski

As mother and daughter, Jadwiga and Izabela Lutostanska, from Szczecin, Poland, taught Lindsay Sterling in Brunswick, Maine. Photos by Cindy Giovagnoli.

Note: if you will be making your own Polish farmer's cheese (it's easy), you'll need to start the process the night before. You can otherwise find Polish farmer's cheese in a Polish market, or substitute ricotta or fresh goat cheese from a typical supermarket.

Makes: 70 dumplings, enough to serve for 6 for dinner or more as an appetizer or snack.

Cooking Time: 3-4 hours (less if friends or family are doing this with you)

Ingredients

For the filling:

  • 3/4 cup Polish farmer's cheese, called twarog (store bought or homemade)
  • 3 medium yellow potatoes, peeled
  • 1 onion, finely minced
  • 1/2 tsp salt or to taste
  • 1/2 tsp freshly ground pepper or to taste

For the dough:

  • 3 1/2 cups flour + 2-4 Tbsp for dusting
  • 1/2 tsp salt
  • 1 1/3 cup milk
  • 1 egg, whipped

For the topping:

  • 1 onion, finely minced
  • 4 Tbsp butter

Instructions

The night before: Start the Polish farmer's cheese process and boil the potatoes until soft. Strain and let cool. Mash potatoes with a potato masher (Jadwiga used a meat grinder but the masher worked fine). Let potatoes cool and refrigerate.

The next day, make the filling. Finish making the farmer's cheese. Also, saute minced onions in butter slowly on medium-low heat for 15 minutes. Combine farmer's cheese with potato,  half the sauted onions in butter, and generous salt and pepper to taste.

Make the dough. Warm the milk. In a large mixing bowl, mix the milk and whipped egg into the flour with your hands until you have a mass of globby, rough, sticky dough that sort of sags when you hold it up as opposed to stays in its shape. It's a wet dough. Spread flour across your cutting board or counter and put the blob of dough on it. Knead the dough for 15 minutes. Use a knife or pastry cutter to scrape any dough that sticks to the counter. You may dust some more flour to help contain the stickiness but keep in mind that you want the dough to end up tacky so that it will stick to itself when you are making the pierogis. Stop kneading when the dough is smooth, stretchy, and slightly tacky. It feels like a baby's bottom when it's done. Form the dough into a ball and cover it with a towel so that the dough doesn't dry out while it is resting and you finish making the filling.

Assemble the pierogis. See this video on how to form the pierogis. Put a 1-2 Tbsp of flour off to the side of your workspace on the counter. Break off a piece of dough about the size of a small apple, or about a quarter of all the dough. Roll the piece into a cylinder about as thick as a nickel. Cut across the roll, making 3/4"-thick pieces of dough. Dip the fingers of one hand in the flour and use them to turn each segment on its side and pat down on top of it once with two fingers to begin to flatten the piece into disc.

Use a rolling pin to roll out each piece into your dumpling wrapper. What you want is a thin disk about 2 inches in diameter and about 1/8th inch thick. Put the disk in one hand, and add a tsp of filling to the middle of the disk. Fold both halves of the dough over the filling, match the edges on top of one another, and press them together, sealing the filling inside. If the filling gets on the edge of the dough where you are trying to seal it together, then the seal won't work. If you need to push the filling back from the edges, it's helpful to dip your finger in a little pile of flour before using them to nudge the filling out of the way because then the filling doesn't stick to your fingers. Then press the dumpling wrapper closed.  Once the seal is secure, then pinch the dough six or seven times along the edge to make a pretty decoration.

Boil the pierogis. Bring a pot of water and 1/2 tsp salt to a boil. One by one, add enough pierogis to make a single layer in the water. Once they float, they're done. Another Polish source says she puts a tablespoon of oil in the water and then the pierogis don't stick to each other. Remove cooked pierogis with a slotted spoon or spatula and serve with sauteed onions-in-butter drizzled on top.

Freeze any uncooked pierogis in a single layer on a flour-dusted sheet pan. Once frozen, transfer into a Ziplock. Cook within 3 months.

RECIPE FEEDBACK

Please help improve this recipe for others by sharing your suggestions in the comment box below. Thank you.

Polish Sweet Cheese Dumplings

Pierogi

As mother and daughter, Jadwiga and Izabela Lutostanska, from Szczecin, Poland, taught Lindsay Sterling in Brunswick, Maine.


Notes: If you will be making your own Polish farmer's cheese (it's easy) for the filling, you'll need to start the process the night before. You can find Polish farmer's cheese already made in a Polish market. 

Pierogis freeze really well. It's great to make these in advance so all you have to do on the day you want them is make the topping and boil them.  

Makes: about 70 dumplings, enough to serve for 6 for dinner or more as an appetizer or snack.
Cooking Time: 3-4 hours

Ingredients

For the filling:

  • 3 cups Polish farmer's cheese (twarog), store bought or homemade
  • 2 egg yolks
  • 3 Tbsp powdered sugar
  • 1 package vanilla sugar (subst. 1/2 tsp vanilla)
  • (possibly 1-3 Tbsp milk)

For the dough:

  • 1 1/3 cup milk
  • 1 egg, whipped
  • 3 1/2 cups flour + 2-4 Tbsp for dusting
  • 1/2 tsp salt

For the toppings:

  • 1 cup breadcrumbs
  • 8 Tbsp butter
  • 1 cup plain yogurt
  • 4 Tbsp honey
  • juice of 1/2 lemon

Instructions


Make the dough. Warm the milk. In a large mixing bowl, mix the milk and whipped egg into the flour and salt with your hands until you have a mass of globby, rough, sticky dough that sort of sags when you hold it up as opposed to stays in its shape. It's a wet dough. Spread flour across your cutting board or counter and put the blob of dough on it. Knead the dough for 15 minutes. Use a knife or pastry cutter to scrape any dough that sticks to the counter. You may dust some more flour to help contain the stickiness but keep in mind that you want the dough to end up tacky so that it will stick to itself when you are making the pierogis. Stop kneading when the dough is smooth, stretchy, and slightly tacky. It feels like a baby's bottom when it's done. Form the dough into a ball and cover it with a towel so that the dough doesn't dry out while you make the filling.

Make the filling. Mix the filling ingredients together: Polish farmer's cheese, egg yolk, powdered sugar, and vanilla sugar or vanilla. You want it to be creamy and uniform rather than crumbly. Depending on how dry your cheese is, you may need to mix in small amounts of milk until your filling comes together in a creamy uniform mass.

Form the pierogis. See this video on how to form the pierogis. Put a 1-2 Tbsp of flour off to the side of your workspace on the counter. Break off a piece of dough about the size of a small apple, or about a quarter of all the dough. Roll the piece into a snake shape about as thick as a nickel. Cut across the roll, making 3/4"-thick pieces of dough. Dip the fingers of one hand in the flour and use them to turn each segment on its side and pat down on top of it once with two fingers to begin to flatten the piece into disc.

Use a rolling pin to roll out each piece into your dumpling wrapper. What you want is a thin disk about 2 inches in diameter and about 1/8th inch thick. Put the disk in one hand, and add a tsp of filling to the middle of the disk. Fold both halves of the dough over the filling, match the edges on top of one another, and press them together, sealing the filling inside. If the filling gets on the edge of the dough where you are trying to seal it together, then the seal won't work. If you need to push the filling back from the edges, it's helpful to dip your finger in a little pile of flour before using them to nudge the filling out of the way because then the filling doesn't stick to your fingers. Then press the dumpling wrapper closed.  Once the seal is secure, then pinch the dough six or seven times along the edge to make a pretty decoration.

If you are serving these another day, freeze pierogis in a single layer on a flour-dusted sheet pan. Once frozen, transfer into a Ziplock. Cook within 3 months.

On the day you want to eat them, prepare the toppings. Saute breadcrumbs in butter slowly on medium-low heat until breadcrumbs are golden. Remove from heat. Mix yogurt, honey, and lemon together in a bowl. If you're using Greek yogurt, whisk in a little water to loosen it into a sauce.

Boil the pierogis. Bring a pot of salted water to a boil. One by one, add enough pierogis to make a single layer in the water. Once they float, they're done. Another Polish source says she puts a tablespoon of oil in the water and then the pierogis don't stick to each other if you want to try cooking more at once.

Remove cooked pierogis with a slotted spoon or spatula and serve on a platter. Top with small splatters of yogurt sauce and buttered breadcrumbs.
 

Armenian Cheese Phyllo Packets

Burek

As Maggie Saab, whose family was from Kilis, Armenia (today part of Turkey), taught Lindsay Sterling in Falmouth, MA.

Cooking Time: 45 minutes (plus thawing something in the fridge over night)
Serves 8-16 as an appetizer or along with a meal

Ingredients

  • 1 box phyllo dough
  • 1 cup shredded mild, unsalty cheese (she preferrs Munster)
  • 1 cup feta cheese
  • 5-6 sprigs parsley, leaves picked and roughly chopped
  • 2 Tbsp butter
  • 2 Tbsp oil
  • 1/4 cup sesame seeds

Equipment

  • sheet pan or backing sheet
  • parchment paper
  • pastry brush
  • 2 small bowls
  • 1 medium bowl
  • cheese grater

Instructions

The night before:

1. The night before you want to cook, thaw the phyllo dough out in the fridge.

The day of:

2. about an hour before cooking put the phyllo on the counter to bring to room temperature before working with it.

3. Preheat the oven to 375. Melt the butter and add the oil to the butter in a small dish. Line a cookie sheet with parchment paper.

4. Mix the cheeses together with chopped parsley in a medium mixing bowl.

5. Open the phyllo dough and unroll it so you have a stack of rectangular sheets. Keep a clean towel handy for covering the stack when you're not using it. This keeps the sheets from drying out and breaking.

6. Take two sheets from the stack at once and place them in front of you with the short end of the rectangle facing you. With a paring knife cut the rectangle in half the long way, making two really tall rectangles. Brush butter along the edges of each rectangle with the pastry brush.

7. Place a spoonful of cheese mixture at the bottom of each rectangle. Then fold the bottom edge of the phyllo over the filling and line it up with side edge so that you start to form a triangle. Then keep folding the triangle up the phyllo dough. You effectively close in the filling and make each triangle have many layers of pastry. Brilliant! Fold the triangle until you can fold no more. (If you've ever folded a flag into a neat triangle it's the same idea here).

8. Place the burek on the lined cookie sheet. Make as many more as you can with your ingredients. Brush the tops of the burek with the butter/oil, stab the tops with a sharp knife to let steam out while cooking, and sprinkle sesame seeds on each. Bake them in the oven 'til golden.

THE STORY BEHIND THE RECIPE

PRINT THIS RECIPE

HOW DID IT WORK FOR YOU?

Help me improve this site by sharing your experience in the comment box below. 

Armenian Bulgur in Lettuce Leaf

Itch

As Maggie Saab, whose family was from Kilis, Armenia (today part of Turkey), taught Lindsay Sterling in Falmouth, MA.

Active time: 20 minutes
Total time: 1 hour
Serves: 4-6
Note: You'll likely need to find the asterisked ingredients online or at a Middle Eastern market.

Ingredients

  • 1 Tbsp olive or vegetable oil
  • 2 yellow onions, diced
  • 6 oz. tomato paste
  • 2 Tbsp lemon juice
  • 2 Tbsp sumac*
  • 2 tsp salt
  • 1 cup fine grain (#1) bulgur wheat*
  • 3 cups water
  • 1 head fresh lettuce or 1/4 head cabbage or fresh grape leaves
  • 6-12 sprigs fresh spearmint
  • 6-12 sprigs fresh parsley
  • Small dish of delicious olives with pits (optional)
  • 6 pita bread or flatbread (optional)
  • 8 oz. mild white cheese such as hallum (queso blanco also works) (optional)
  • 6-12 small sprigs fresh thyme (optional)

Equipment

  • large pot with lid
  • spoon
  • liquid measuring cup (or eyeball it)
  • cutting board
  • chef knife
  • mixing spoon
  • serving platter
  • bread basket or serving plate
  • 4 small serving plates (for sides of olives, herbs, leaves, and cheese)

Instructions

1. In a large pot with lid, saute onions in oil until soft. Add tomato paste and three cups water and bring to a boil. Add salt, sumac, and lemon juice. Once this boils, stir in the bulgur wheat and cover. Let the mixture sit off heat for about 40 minutes.

2. Adjust the texture. If after resting the bulgar has not become a paste, stir in a little bit more bulgur, which will soak up more liquid. The texture you want is is a soft, yet firm paste. If the mixture is too firm and dry you could stir in little bit more water. If adding water or bulgur, let the mixture rest again before serving so the bulgur has time to soak up liquid.

3. Serve itch on a family-style platter, garnished with fresh parsley sprigs. Put out additional fresh leaves of lettuce, cabbage, or grape vine; and fresh spearmint and/or parsley leaves. Guests spoon the itch (the bulgar dish) onto the leaves and top with a fresh sprig of parsley and/or mint. Delicious! Armenian itch also goes well served along with olives, pieces of pita, and slices of mild white cheese with sprigs of fresh thyme.

THE STORY BEHIND THE RECIPE

PRINT THIS RECIPE

HOW DID IT WORK FOR YOU?

Help me improve this site by sharing your experience in the comment box below. 

Argentinian Beef Hand Pies

Empanadas

As Valy Steverlynck, from Luján, Argentina, taught Lindsay Sterling in Freeport, Maine.

Serves: 12-24 depending on how big you make them
Active time: 1 hour
Total time: 1 hr (if you use pre-made dough) to 2 days if you make your own dough and prep the filling the day before.

Note: For the dough, Valy used pre-made empanada discs or "discos" as they are named on the package. They're sold in the freezer of Latin markets and some supermarkets. These make this recipe really easy. I've provided a dough recipe for those who want to make dough from scratch.

For the dough:

  • 2-3 packages pre-made empanada dough discos OR:
     
  • 6 cups flour
  • 1 1/2 sticks butter, cut into 1/2 inch pieces
  • 1 egg, mixed up
  • 1 egg for egg wash at the end
  • two dashes salt
  • 5-7 Tbsp cold water

For the filling

  • 2 eggs
  • 1/2 cup oil
  • 1 onion, diced
  • 1 lb. ground beef 
  • 1 cup diced tomatoes
  • 1 Tbsp oregano
  • 1 tsp chili flakes
  • 1 Tbsp paprika
  • 1 tsp salt
  • 1 tsp cumin
  • 1/4 cup raisins
  • 1/2 cup fresh parsley, rough chopped
  • 1/4 cup green olives, chopped
  • dash cayenne or hot chili powder to taste

For the glaze:

  • 1 egg

Equipment

  • 2 half sheet pans or cookie sheets
  • rolling pin
  • 2 cereal bowls
  • 1 small bowl
  • spatula

If you are making your own dough:

  • large food processor or large bowl with fork/pastry cutter
  • wax paper 
  • plastic wrap 

Instructions

1. If you are using the pre-made empanada dough, skip ahead to item number two. If you are not using the pre-made dough discs, make the dough a day ahead of time if you can. Put flour, salt, the mixed egg, and butter in a food processor or use a fork or your fingers to cut the butter into the flour until you have what looks like course coarse corn meal. Add 5 Tbsp ice cold water and blend briefly until the dry flour-y look is gone, but what you see is still loose and crumbly, not dough-y. Try squeezing the loose pieces together. Do they stick together? If not, then continue mixing in water teaspoon by teaspoon until they do. When the crumbles do stick together when pressed, then dump half the contents onto a sheet of wax paper, and the other half on another sheet. Press the contents on the wax paper into a long rectangular pile perpendicular to you and roll the wax paper over tightly so you make the dough into a cylinder, about 2 inches in diameter, contained in wax paper. Do this with the other pile and wax paper. Refrigerate the cylinders wrapped in plastic wrap for thirty minutes or better, over night.

2. You can make the filling the day before, too, if you like. Hard boil 2 eggs. Saute onions in oil. When soft, add ground beef, spices, tomatoes and salt. When beef is all the way cooked, mix in parsley, hard boiled eggs (cut into 1/4 inch pieces), green olives and raisins. Refrigerate until you want to assemble and cook the empanadas. 

3. Take the package of dough discs out of the freezer or your handmade dough and put out on the counter to soften. 

4. Preheat oven to 350.  

5. Assemble the empanadas. If you're using the store-bought discs, you can roll them out a little thinner on a generously floured counter top. Also dust the tops of the dough with flour to keep the rolling pin from sticking. 

If you're using your homemade dough, unwrap the wax paper, cut across the cylinder to make 2-inch thick pieces. Flour your counter and your rolling pin and roll a piece out in to a circle about 4 inches in diameter.

Put a cereal bowl upside down on the dough and trim off any excess. Put 2 Tbsp filling on the bottom half of the disc, keeping the edges of the disc clean. Dipping your finger in a small bowl of water, wet the edge of the dough so that when you fold the dough over the filling to make a half circle, you can press the dough together along the outer edge and it sticks, sealing the filling inside. 

Press the tines of a fork along the sealed edge (like rays shining out from the filled center) to make a pretty pattern. Or you can fold the edges on top of themselves (see pictures above).

6. Repeat with the rest of the dough and filling, putting each assembled empanada on a sheet pan or cookie sheet. Prick the top of each empanada with a fork. Mix up the last egg in a small bowl and brush the tops of all the empanadas with egg wash.

6. Bake for 20 minutes or until golden and shiny. Serve immediately.

THE STORY BEHIND THE RECIPE

PRINT THIS RECIPE

HOW DID IT WORK FOR YOU?

Help me improve this site by sharing your experience in the comment box below. 


Albanian/Greek Chicken Pie

Kotopita

As Bill Dilios, from Politsani, Albania (formerly part of Greece), taught Lindsay Sterling in Freeport, ME.

Serves: 10 for dinner, 20 as an appetizer or side
Cooking Time: 2 hours plus thawing overnight

Ingredients

  • 1 box phyllo dough
  • 2 Tbsp olive oil
  • 4 large yellow or sweet onions, medium dice
  • 1 stick butter, cut into 1/2" chunks + 1 stick butter
  • 4 chicken breasts, cut into 1/2" cubs
  • 1 1/2 cups long grain white rice
  • 3 cups chicken stock
  • 1 boullion cube, 1 tsp boullion paste, or 1 tsp salt
  • 3 eggs

Equipment

  • cutting board
  • chef knife
  • mixing spoon
  • large soup pot 
  • large mixing bowl
  • medium bowl
  • pastry brush
  • Bill's special kotopita pan [link to store]:
  • or 3 pie plates
  • or 2 9x12, 2-inch deep baking dishes 

Instructions

1. Thaw phyllo dough. The day before you want to make kotopita, transfer the phyllo dough box from the freezer to the fridge to thaw it. Then an hour before you want to start cooking, take the phyllo box out of the fridge and let it come to room temperature on the counter. If you forget to take the phyllo out of the freezer the night before, you can thaw it on the counter in 2-3 hours. 

2. Make the filling. Saute onions with 2 Tbsp oil and 1 stick butter (cut into chunks) until onions are soft, 5-10 minutes. Cut the chicken pieces into 1/2 inch cubes and add to the onions. Wash all surfaces that raw chicken touched.  When chicken is half-cooked (opaque on the outside but still translucent in the center), add rice and saute for 2 minutes without browning anything. Add chicken stock so that the rice is just floating in liquid, about 3 cups. Add crushed bouillon cube, bouillon paste, or salt as desired and incorporate. Saute, stirring frequently, until the liquid disappears and you have a thick mass of chicken and rice with no runny liquid. Remove from stove and let cool. Mix in three eggs.

3. Preheat oven to 395. 

4. Assemble the pie. See how he did it in this video. You melt a stick of butter in cereal bowl and get a pastry brush out. Bill made one awesome, giant pie in a what looked like an extra-large, deep-dish pizza pan. Alternatively you can use three pie dishes or 2 9x12 baking dishes. Brush the bottom and sides of the baking dish with olive oil. Layer whole phyllo sheets over the bottom of baking dish, overlapping the edges of the pan by roughly 2 inches. (No folding, cutting or fussing!). 

Now be like Jackson Pollock with the butter brush dripping melted butter on the phyllo. You don't need to brush the butter around - just drip enough butter so that it looks like it's starting to rain on a sidewalk. Make another layer of phyllo overlapping the edges again. Drizzle butter again. Layer phyllo again. Drizzle butter again. When you have about five layers of phyllo, make a layer of chicken filling about 1/2" inch deep. Cover with two more layers of phyllo/butter drips. Add another layer of filling about 1/2" deep. Do five more layers of phyllo. Fold all the draped edges of phyllo on top of the pie. Brush butter over the dry edges of phyllo, folding them down onto the pie. 

If you are using multiple pies, when you complete one pie, just follow the same process and make another one in another dish. 

5. Bake for about 40 minutes, turning the temp down to 385 after ten minutes. When the entire pie is golden brown, remove from oven and let the pie cool for 10-20 minutes. 

6. Serve. A cool trick for cutting the pie: place a large cutting board (one that is bigger than the pie itself) over the top of the pie. Holding the pan and the cutting board together, flip them over so that the pan ends up upside down on top of the cutting board. Now just lift the pan off the pie. Use a serrated bread knife to pie into squares or wedges, depending on what look you want.

Once pie is cool, store leftover pie in tinfoil in the fridge for up to 3 days. Reheat in a 350 degree oven or toaster oven.


Congolese Orange-Ginger Energy Drink

As Constance Kabaziga's daughter, from Kinshasa, Democratic Republic of Congo, taught Lindsay Sterling in Freeport, ME. Photo by Ted Axelrod

Note: This awesome energy drink cleanses and burns in a reviving way. It wakes you up with flavor!

Makes: 10 servings
Cooking time: 20 minutes

Ingredients

  • 1 quart of orange juice
  • 6-inch stalk of ginger
  • Sweetener (optional)
  • Pineapple juice (optional)

Instructions

1. Peel and cut ginger into chunks.

2. Blend ginger in blender with orange juice. Pour juice through a mesh strainer to strain out the ginger fibers.  

3. Serve the strained ginger-orange juice straight as a refreshing and healthy energy drink. Add sweetener or fresh pineapple juice if you wish.

Chinese Potstickers

As shown to Lindsay Sterling by Rattana Sherman, from Bankok, Thailand, in Durham, ME. Photography by David Holman.

Note: You can make these in advance so that all that’s left to do is step 6 - sauteeing. After step five, freeze them on the cooling tray, then transfer to an airtight container and store in freezer. 
Cooking time: 2 hours
Makes: about 42 

Ingredients

  • 1/4 cabbage, chopped then turned granular in a food processor

  • 1 tsp salt

  • 1/2 Tbsp minced garlic

  • 1 Tbsp minced ginger

  • 1 scallion, chopped

  • 1 Tbsp oyster sauce

  • 1 Tbsp corn starch

  • 1 tsp soy sauce

  • 1 tsp white whine

  • 1 tsp sesame oil

  • 1 tsp pepper

  • 1 tsp sugar

  • 1 lb. ground pork

  • 1 package circular dumpling wrappers (she used Twin Marquis brand Shanghai style)

For sauce:

  • 3 Tbsp soy sauce

  • 1 tsp chopped ginger

  • 1 Tbsp rice vinegar

  • 2-3 drops sesame oil

For garnish:

  • sesame seeds

  • or fried garlic

Instructions

1. Mix sauce ingredients in small bowl.

2. Make pot sticker filling by mixing everything except the dumpling wrappers in a large mixing bowl until evenly incorporated.

3. Set up where you’ll assemble and cook the dumplings. Next to your sink place the bowl of filling, the stack of dumpling wrappers, and a large plate or tray for your assembled pot stickers. Turn the faucet on cool drip. Put a pot of water on high on the stove for boiling them, and next to it a tray where you’ll place the boiled pot stickers to cool. Next to that, put a small dish of vegetable oil with brush for coating the hot pot stickers so they don’t stick.

4. Take one wrapper and wet it on one side with your fingers. Spoon a heaping teaspoon of filling in the center of the wrapper. Fold it in half, sealing the filling inside by pressing the wrapper edges together. Make three pleats in the round edge of the dumpling. Set aside on a tray and keep making more.

5. Boil a pot of water. Add batches of potstickers (if you put more than one layer in, they'll stick to each other), stirring gently at first to make sure none stick to the bottom. Once they’re all floating (about 4 min.), place on perforated tray or strainer. Brush all over each with oil to prevent sticking. Assemble the rest of the pot stickers and cook. Freeze what potstickers you want on a tray without them touching each other. (Once they're frozen, put in a Ziplock bag). 

6. In a large saute pan with 2 Tbsp of oil on med-high heat, brown about 10 pot stickers at a time on each side. Then toss a shot of water into the pan. Put the golden potstickers on plates, drizzle with sauce and sprinkle with fried garlic or sesame seeds.

Fresh Spring Rolls

As Panee Muncharoen and Rattana Sherman from Thailand, Quang Nguyen from Vietnam, and Makara Meng from Cambodia, taught Lindsay Sterling in Maine. Photo by T.Tseng through Wikimedia Commons.

Notes: For variety you can change the protein in these - my cooking teachers have used tiny shrimp, large shrimp (sliced across the middle in order to halve the thickness of the shrimp), slices of cooked pork chop, and wedges of hardboiled egg. Dipping sauces vary as well - two favorites are featured here. Thai basil is a different variety of basil than what's typically in supermarkets in the U.S. Thai basil has a purple stem, a distinct flavor (fabulous!), and heartier leaves. It is worth the trip to an Asian market to get this and other ingredients. 

Cooking time: 1-2 hours, depending on how good you get
Makes: 20 springrolls

Ingredients

For the Rolls:

  • 1/2 head lettuce: iceburg cut into 1/4 inch strips or another variety of your choice
  • small bunch fresh cilantro leaves
  • small bunch fresh mint, leaves picked from the stems 
  • small bunch Thai basil, leaves picked from the stems
  • 3 oz. thin rice noodles (Rattana likes Wai Wai brand)
  • package rice paper spring roll wrappers (Rattana likes Banh Trang 22cm)
  • optional protein: shrimp, hardboiled egg, slice of cooked pork

For the Sweet Chili Dipping Sauce (not pictured):

  • 1/4 cup sweet chili sauce (Rattana likes Mae Ploy brand “for chicken”)
  • 1/8 cup water
  • 1/8 cup distilled vinegar (Rattana likes Golden Mountain brand)
  • 2 tsp unsalted peanuts, ground in coffee grinder or chopped
  • 5 cilantro leaves

For the Chili-Garlic Dipping Sauce (not pictured):

  • 3 Tbsp sugar
  • 4 garlic cloves
  • 2 red Thai chilis 
  • juice of 4 limes
  • 1/4 cup water
  • 4 Tbsp fish sauce
  • 1 shallot, finely minced

Equipment

  • mortal and pestle (for the chili-lime sauce)
  • large saute pan
  • trivet (or work surface that can stand a hot pan)
  • clean counter for a work surface
  • serving platter
  • small bowls for dipping sauce for each person - people will want to double dip!

Instructions

1. Put rice noodles into boiling water for two minutes. Drain and let cool. Gather all your roll ingredients into separate dishes or piles at the counter where you will assemble the spring rolls. Also have the platter for serving the finished spring rolls nearby.

2. Heat 2 inches of water in a large saute pan until steaming; turn off heat. Put the pan on a trivet near where all the spring roll fixins' are.

3. Put one piece of rice paper in hot water until it softens like a jellyfish (5 seconds). Use a spatula to remove it, or your fingers if you’re tough. Spread rice paper out directly onto counter.

4. Place an oblong mound of iceberg lettuce just below the center of the wrapper. Put half as much rice noodles on top of lettuce, and 2-3 leaves of Thai basil and whole cilantro leaves. Break apart mint leaf into pieces and sprinkle on top. About half way up the wrapper, make a row out of your protein item (shrimp, chicken, egg, or pork) keeping the edges of the wrapper free of filling items by a couple inches on each side.

5. Pull the bottom of the rice paper tightly over the mound of fillings, and roll up. When you have rolled about two-thirds of the circle, fold the edges into the center like you would close the ends of a burrito, and complete rolling.

6. Put the finished roll on the serving platter, wipe your work surface dry (if it's wet, the wrapper tends to not stick as well to itself when rolling), and continue making more rolls. If the rice paper stops softening, you need to reheat the saute pan of water.

7. Make the dipping sauce of your choice. For the chili-lime sauce, start with the sugar in the mortal and pestle. Mash the garlic into the sugar into a paste. If your mortar and pestle is small, transfer its contents into a larger bowl and then mix in the liquids. Finely sliced rounds of the Thai chilis and add to the sauce. Wash your hands - the spicy oils are on them and will hurt if they get on or near your eyes. Add minced shallots. Ideally guests each have their own for sauce so they can double dip.