Mexican Green Enchiladas

Enchiladas Suizas

As Santiago Pirez Velasco, from Cuernavaca, Mexico, taught Lindsay Sterling in Portland, Maine.

Notes: There are dozens of kinds of enchiladas with different sauces and fillings. Red enchiladas are made with ground red chili peppers and/or tomato. This green variety is is made instead with poblano and serrano chilis and tomatillos. Santiago said that he thought that “Suizas” in the name of this dish refers to immigrants from Switzerland who liked to add milk and cheese products to Mexican enchiladas.
Cooking Time:
1 hour
Makes:
4-6 servings

Ingredients

  • 1 lb. raw chicken (bone in for best flavor)

  • 1/4 onion

  • 3 garlic cloves

  • 4 cups chicken broth (divided in to 3 cups and 1 cup)

  • 1 poblano chili

  • 8 tomatillos, papery skins removed

  • 1/2 cup sour cream

  • 1/2 cup cream cheese

  • 1-2 serrano chilis

  • 3 Tbsp Canola, peanut, or corn oil (for frying)

  • 2 cups shredded Mexican cheese

  • 12-18 corn tortillas

Instructions

  1. Boil chicken in 3 cups chicken stock and water if needed to cover chicken until cooked and tender. Drain and let cool. Remove skin and bones and pull chicken meet into strips.

  2. Preheat oven to 425.

  3. Blister poblano skin on all sides in broiler or over gas flame. Once black all over, cover in a bowl with plastic wrap so the pepper steams, helping the skin come off. Peel off the charred skin, cut the pepper in half, and remove seeds. Discard the skin and seeds.

  4. Blend the poblano, tomatillos, sour cream, cream cheese, and serrano chilis in blender until smooth.

  5. Cook the chili and cream mixture in a sauce pan for about 15 minutes on medium heat until sauce thickens slightly and begins sticking to sides. Turn off heat, cover and let sit.

  6. Heat oil in a 12 inch skillet on medium heat. When shimmering, add tortillas one at a time to soften. Let tortillas cool slightly then roll chicken inside of each and line the rolls up, seam side down, in a baking dish. Bake the stuffed tortillas until the tortillas are crispy.

  7. Pour sauce over the enchiladas, top with grated cheese, and broil until melted and slightly toasted.


Mexican Chilaquiles

Food styling and photo: @dianemorrisey

Chilaquiles

As Azmindo Cancino taught Lindsay Sterling in Yarmouth, ME.

Note: Spice level is mild to medium depending on chiles. You can use many different proteins for toppings - egg, pulled pork, seared chicken, steak, whatever you want.
Cooking time: 20 minutes
Makes: 4-6 servings

Ingredients

5 large or 10 small green tomatoes or tomatillos
5 serrano chilis, or ancho if you like spicy
1 Tbsp oil
2 large chicken breasts, or 1 lb. braised beef, pulled pork, or 4-8 eggs
1/4 cup + 2 cups water
1 large chicken bouillon cube or 1 tsp Better than Bouillon
1/2 of a large bag of tortilla chips
1/2 tsp salt
1/2 cup sour cream

Optional toppings:

1-2 avocadoes
6 radishes
1/4 red onion
6 oz queso panela (omit for lactose-free)
1 stem fresh epazote or
16 fresh cilantro leaves

Instructions

1. Blend chilis, tomatoes, and 1/4 cup water in a blender until smooth.

2. Heat 1 Tbsp oil in a large soup pot. Once the pan is hot, add blended chili-tomato mixture, bouillion, salt, 2 cups water, and epazote stem if you have it.

3. Simmer for ten minutes or so until the color of the liquid changes from spring green to muted green and loses its raw flavor.

4. Slice chicken breast horizontally into 1/4” planks while this is cooking. Wash all surfaces that touched the raw chicken with soapy water.

5. Get a large saute pan really hot and lay out thin chicken planks without touching each other in the pan. Sprinkle each with salt. Flip when the underside is golden brown.

6. When chilaquiles sauce is muted green, pour a mountain of tortilla chips (towering just over the liquid) into the pot and let sit -- no stirring! Let this sit for three minutes.

7. Serve a large spoonful of the tortilla-soaked tomatoes on each plate with a plank of golden chicken and a dollop of sour cream. Restaurants serve crumbled queso panela on top, but she says at home people don't use cheese. Garnish with colorful fresh toppings such as slices of avocado, radish, red onion, and fresh herbs.

Indian Yogurt Sauce

Raita

As Sudha Chalicham and Venu Chaganti, from Andhra Pradesh, India, taught Lindsay Sterling in Scarborough, ME.

Note: Raita is a cooling yogurt sauce that balances spicy food. 
Makes: 4-6 servings
Cooking time: 5 minutes

Ingredients

  • 1 Tbsp chopped cilantro
  • 1 cup plain yogurt
  • 1/2 tsp salt
  • 2 Tbsp diced fresh tomato (optional)
  • 1 Indian green chili (super hot, and small, also known as Thai chili), sliced into thin circles
  • about 1/2 cup water, depending on how thick your yogurt is

Instructions

Add cilantro, yogurt, salt, tomato (optional), and chili pepper to a mixing bowl. Mix in enough water so that the texture of the sauce is loose but not watery. Enjoy with spicy food. 

Three Eritrean Sauces

Silsi (Spiced Tomato), Ades (Lentil), and Shiro (Smooth Chickpea)

As a gentleman from Eritrea taught Lindsay Sterling in Portland, Maine. 

Notes: He served these three vegetarian sauces on sourdough flatbread called injera. He shared this platter with friends who all ate from it with their hands, using ripped pieces of the flatbread to scoop up sauces into delicious bites. If you can't find injera at an Eritrean/Ethiopian market or store near you or don't want to make your own (it takes 3 days to ferment and is quite tricky), serve these sauces as dips or spreads with sourdough toast.

Before you start this recipe you'll want to make the Eritrean spiced butter, and order berbere spice and shiro powder online. Once you have those and the rest of the ingredients, making these sauces is easy. 

Cooking time: 45 min
Makes: 6 servings as a light meal

Ingredients

  • 2 Tbsp Eritrean spiced butter (omit this for a vegan or lactose-free version)
  • 1 red onion, finely diced
  • 1/2 cup corn or canola oil
  • 3 Tbsp berbere spice
  • 5 large red tomatoes
  • 1/2 cup shiro powder 
  • 1 cup pink lentils 
  • 4 pieces injera or a loaf of whole wheat sourdough (or gluten free bread as desired)
  • small fresh green chilis for garnish (optional)

Equipment

  • sheet pan/cookie sheet
  • cutting board
  • knife
  • three medium sauce pots
  • blender or food processor
  • spatula
  • wooden spoon

Instructions

1. In a medium sauce pan on medium heat, saute a finely diced onion in 1/2 cup corn or canola oil for about ten minutes, stirring often, until onion is soft. Put the lid on between stirring. 

2. In another medium sauce pot, bring 4 cups water to a boil. Spread lentils on a sheet pan or tray and sort through them with your fingers, removing any non-lentil debris.

3. Rinse lentils, and add them to the heating water. Bring them to a boil, turn heat to medium-low and and continue to simmer until the lentils have softened somewhat but still have a little firmness to them and hold their shape. 

4. To the pot of frying onions, add 3 Tbsp berbere spice and cook another ten minutes, stirring frequently. 

5. Blend tomatoes in blender or food processor until smooth. Add the blended tomatoes to the frying onions along with 2 Tbsp spiced butter. Simmer for five more minutes, stirring frequently, and adding salt to taste. This is the first sauce, spiced tomato, or silsi.

6. In a third pot (small or medium size), bring 2 cups of water to boil.  

7. Once the lentils are half-way cooked, mix in 1 cup of the spiced tomato sauce and continue cooking on medium low until lentils are soft. Taste for seasoning and add salt as desired to finish. This is the lentil sauced called ades.

8. Once the water in the third pot is hot, stir in 3/4 cup spicy red sauce and continue to heat. Once it comes to a boil, turn it to simmer and whisk in 1/2 cup shiro powder. Heat on medium, stirring intermittently until the sauce becomes thickened, and slightly looser than pudding. Turn off heat.

9. Serve Eritrean sauces (spiced tomato, chickpea, and lentil) on injera or with slices of sourdough. Decorate the edges of the injera with small, fresh green chilis. Have extra injera or bread at the table. 

Eritrean Spiced Butter

Tesmi
 

Note: Known in the Tigrinya language as tesmi and in the Ge'ez language as niter kibbeh, this is essentially clarified butter (ghee) cooked with ginger, onion, and spices. Eritreans use it to create richness in sauces such as in spicy tomato (silsi), spicy lentil (ades), chickpea (shiro) and chicken (tsebhi derho). Also try using it instead of butter when making eggs or sautéing vegetables like cabbage, potatoes, and carrots or greens.

Cooking time: 30 min
Makes: 1 cup

Ingredients

  • 2 sticks unsalted butter
  • 5 cloves garlic
  • 1 1/2 inches ginger stalk, grated
  • 1/2 white onion, large dice
  • 2 bay leaves
  • 8 peppercorns
  • 1/2 tsp fenugreek
  • 1/2 tsp turmeric powder
  • 1 tsp black cardamom seeds, preferrably Aframomum corrorima (optional)

Instructions

1. In a small saute pan, melt butter on medium.

2. Once butter is melted, add other ingredients, turn heat to low, and simmer for 30 minutes.

3. Strain contents of pan through a cheese cloth. Discard the solids.

4. Use what you wish of the spiced butter and store extra in fridge for convenient use up to three months.

Eritrean Sourdough Flatbread

Injera

As Asmeret Teklu, from Mendefera, Eritrea, taught Lindsay Sterling, in Portland, ME 2010

Note: I tried making these at home as Asmeret had taught me. The injera didn't turn out like her beautiful ones at all. Some cooking takes a long time to master, and this is one of those dishes. I recommend buying expertly made injera from an Eritrean or Ethiopian market if you can. Or substitute a whole wheat pizza crust or sourdough bread. All that said, I had fun trying to make these and the results were edible, just not pretty. 
Makes: 8 crepes
Cooking Time: 3 Days + 30 minutes

Ingredients

  • 2 cups sour teff starter
  • 3 lbs. teff flour
  • water

Equipment

  • large pot
  • 20 inch electric skillet or flattop griddle
  • ladle
  • flat woven basket (I tried using spatulas)

Instructions

1. Mix teff flour and enough water in a really large pot so that it is the texture of melted chocolate ice cream. Let the mixture sit on counter top until it rises with bubbles and falls, about 8 hours.

2. Put the mixture in the fridge for a night and a day (24 hours).

3. Before cooking, add 1 cup boiling water to activate the making of air bubbles.

4. Pour batter onto 495 degree large electric skillet making a ring of batter around the outside and then spiraling in until the whole pan is covered evenly.

5. When batter is hole-y and cooked, remove by sneaking a flat plate (hers woven) under the crepe.

6. Stack as many crepes as you want on top of one another. Store extra batter in fridge, or freezer for later use.

Colombian Chicken and Corn Soup

Ajiaco

As Adelaida Gaviria from Medellin, Columbia (pronounced MedeGEENE) taught Lindsay Sterling in Bowdoinham, Maine.

Note: Adelaida said this dish (pronounced AH hee AH Ko), originated in Bogota, but has come to be a favorite across much of the country.  
Cooking time: 45 min
Makes: 6 servings

Ingredients 

  • 2 bone-in breasts
  • 5 cloves garlic
  • 2 tsp salt
  • 1 tsp black pepper
  • 6 large potatoes (she prefers Yukon Gold variety)
  • 2 Tbsp dried guascas, a Columbian herb available at latin markets or online
  • 4 cups chicken broth 
  • 1/2 bunch cilantro
  • 3 ears corn on the cob or frozen corn kernels
  • 3 avocados
  • 1/4 cup capers
  • 1/2 cup cream

Equipment

  • cutting board
  • chef knife
  • paring knife
  • peeler 
  • soup pot
  • tongs or slotted spoon
  • shallow dish for cooling chicken
  • immersion blender or mortar and pestle
  • lettuce spinner (ideally)
  • small bowl for serving capers on the table
  • creamer for serving cream at the table
  • soup bowls and spoons for serving

Instructions

1. Cover chicken with 2 inches of water in a large soup pot on high heat. Add 5 cloves sliced garlic, 2 tsp salt, and 1 tsp black pepper. Once water boils, turn heat down to keep the chicken simmering until it is cooked throughout. Wash hands and any utensils or surfaces that touched raw chicken.

2. While chicken is cooking, peel potatoes, slice them in half, and then into 1/4-inch slices. Wash and chop the cilantro. Put half of it in a small bowl for guests to garnish their soup at the table, and reserve the other half for use in a bit.

3. Once the chicken is cooked (opaque throughout), remove it from broth and put it in a shallow dish to cool. 

4. Use an immersion blender to blend the garlic slices into the broth. If you don't have an immersion blender, scoop out the garlic with a slotted spoon, mash it in a mortar and pestle with a little broth, and whisk that mixture into the broth in the pot. 

5. Add 4 cups of chicken stock to the broth. Rub 2 Tbsp guascas between your hands letting it fall into the pot. Add chopped cilantro. Bring to a simmer and add potato slices.

6. Once chicken is cool enough to the touch, rip it into bite-sized pieces. Discard the bones and add the pulled chicken back to the broth.

7. Once the potato slices are almost cooked, add corn to the soup and simmer another 8 minutes until corn is cooked. Taste the broth and add more salt and pepper if needed.

8. Serve soup in guests' bowls. Top each bowl with 2 quarters of ripe avocado. Invite guests to add capers, cream, and cilantro to their bowls at the table as desired.


Trinidadian Flatbread

Buss up Shut

As Steve Fortune, from Marabella, Trinidad and Tobago, taught Lindsay Sterling in South Portland, Maine. Photos by Lindsay Sterling.

Notes: The name of this dish, buss up shut, is Trinidadian Creole for "busted up shirt," referring to the worn-in, flaky texture of the flatbread. Steve served this flatbread with a quick garbanzo and potato curry. They were delicious together. Here's a youtube video on another Trinidadian's take on how to manage the dough - worth a watch before you dive into doing this for the first time. Some details are different but the feel of the dough and the concepts are the same.

Makes: 4 servings
Cooking Time: 2 hours (50 minutes active)

Ingredients

  • 2 cups flour plus extra for your work surface
  • 2 tsp baking powder
  • 1/2 tsp salt
  • about 3/4 cup water
  • 5 Tbsp ghee 
  • 2 Tbsp oil 

Equipment

  • mixer (optional) with dough hook or mixing bowl
  • clean kitchen towel
  • rolling pin
  • spoon or flexible spatula for spreading ghee
  • two flat wooden spoons or flat sticks
  • 12-inch-wide sauté pan or flattop griddle
  • basket lined with napkin 

Instructions

1. Soften ghee by bringing it to room temperature or microwaving it a little bit.

2. Mix flour, baking powder, salt, and water by hand or with a mixer with a dough hook until the dough turns smooth, soft, and stretchy (about 5 minutes w/ mixer or 10 minutes by hand.) If the dough is sticking to the sides you can add a little more flour. If the dough is hard to maneuver, add a little more water so the dough is easy to move around and manipulate but does not stick to your hands. (You can always dust your hands with flour to keep the dough from sticking to them.) 

3. Divide the dough into four balls. Cover them with a clean cloth for 20 minutes. (If you're making other dishes, such as curry, now would be a good time to make that.)

4. Once dough has rested, sprinkle flour on your work surface. Press one of the balls into a disc. Roll the disc out to a thin circle, about 1/8 inch thick. To help it keep a circular shape, turn the disc 45 degrees every couple times you roll it. When the dough starts to stick to the rolling pin, simply sprinkle flour on the dough and the counter, and spread it around with your hand.

5. Spread about 1 Tbps ghee over the entire surface, and sprinkle with flour.

6. With a paring knife, cut the radius of the circle. 

7. Roll the cut edge back on itself and keep rolling so that you roll almost the whole circle into a cone. Pull the last remaining flap over the base of the cone,  sealing the edges of the buttery layers inside.

8. Place cone on its base and press the upended tip of the cone down into the base, transforming the cone into a mound. Place the mound on a flour-dusted counter and cover with clean towel. 

9. Repeat this process with the remaining three balls of dough. Once finished, cover the mounds with a towel and let rest 30 minutes.

10.  Sprinkle counter top generously with flour. Pre-heat oiled flat pan or griddle to medium. Roll one of the mounds out into a circle. Sprinkle and wipe the top of the dough and/or counter with flour to keep the dough from sticking to the counter or the rolling pin. Roll into a thin circle, about 1/8 inch thick.

11. Place the circle of dough on the hot pan/griddle for a couple minutes, brushing the top side with vegetable oil. Flip and let the other side cook. With two wooden spoons push the edges of the circle into the middle multiple times, making it wrinkly and worn. Keep the circle scrunched in the center of the pan to make sure the edges have a chance to cook fully. Once the layered dough is cooked throughout, put it crunched up in a towel-lined basket. Repeat with the rest of the dough.

12. Serve busted up flat bread thick vegetable or meat dishes like stewed meats, dals, and curries. The classic Trinidadian combo is buss up shut and garbanzo and potato curry. Buss up shut is to be eaten with your hands - use ripped pieces of the bread to scoop up bites of other foods. 

Trinidadian Garbanzo and Potato Curry

As Steve Fortune, from Marabella, Trinidad and Tobago, taught Lindsay Sterling in South Portland, Maine.

Notes: Steve served this 30-minute vegetarian curry with a flaky homemade flatbread, which takes about 2 hours to make. If you don't have time for the flatbread, use store-bought flatbread or serve with rice in a bowl. Steve uses Chief brand curry powder from Trinidad and Tobago: a blend of coriander, cumin, turmeric, fenugreek, fennel, chili pepper, and ajwan. The garbanzos and potatoes would taste great with other varieties of curry as well.

Makes: 4 servings
Cooking Time: 30 minutes

Ingredients

  • 2 Tbsp vegetable oil
  • 1/2 small yellow onion, medium dice
  • 2 cloves garlic, peeled and chopped
  • about 3 cups water, divided
  • 2 Tbsp curry powder (he used Chief brand from Trinidad and Tobago)
  • 4 large or 8 medium potatoes, peeled and sliced into wedges
  • 1 can garbanzo beans, drained and rinsed
  • salt and black pepper to taste
  • 4-8 pieces of flatbread

Equipment

  • cutting board
  • knife
  • vegetable peeler
  • measuring spoons and cups (or just eye-ball it)
  • medium pot
  • mixing spoon

Instructions

1. In a medium pot on medium high heat, saute onions and garlic in 2 Tbsp oil for about 2 minutes. 

2. Mix 2 Tbsp curry powder with 1 cup water, and pour the mixture into the pot with the onions and garlic.

3. Let the mixture cook until most of the water evaporates and you have a slurry of spices and onions. Add the sliced potatoes. Stir to coat the potatoes with the curry and let cook 2 minutes.

4. Add enough water to almost cover the potatoes, and let cook until potatoes are almost done (soft, but not mushy). 

5. Stir in the garbanzo beans. 

6. Serve with flatbread.

English Sunday Dinner

Roast Beef, Gravy, Cabbage and Beans, Roasted Potatoes, Yorkshire Pudding, Leeks in Cheese Sauce

As Josephine Morris, from York, England, taught Lindsay Sterling in New Gloucester, ME.

Note: Beef roast - what cut should you get? In Yorkshire the cut would be called "Oyster." In Josie's words, this is "the top end of the sirloin. It looks round." I'd shoot for a sirloin roast or a prime rib roast here in the U.S. These are the more tender, less fatty cuts that will hold together better in the dry heat of the oven, and allow you to slice it thinly as is the Yorkshire tradition.
Cooking Time: 2-3 hours
Makes: 8 servings

Ingredients

  • 3 lbs. beef Sirloin roast (or 1/3 pound per person)*
  • 3 cups beef stock
  • 1 cup red wine
  • 1 tomato, sliced into wedges
  • 1 carrot, peeled and cut into thirds
  • 1 green pepper, cored and sliced into 4ths
  • 1/2 onion, peeled and sliced into wedges
  • 1 Tbsp olive oil
  • salt
  • pepper
  • 2 pounds small potatoes for roasting
  • 3 leeks, washed, whites cut into quarters legthwise, then across into 1/4 inch slices
  • 1 head small cabbage
  • 1/2 pound green beans, stems trimmed
  • 1 cup + 2 cups beef stock
  • 1 + 1Tbsp butter
  • 1 Tbsp flour
  • 1/2 cup milk + 2 cups milk
  • 1/2 cup grated sharp cheddar cheese
  • 5 small eggs (or 4 large)
  • 1 1/2 cup flour
  • 1/2 tsp salt

Equipment

  • ovenproof roasting pan or iron skillet
  • blender
  • large pot with steamer insert and lid
  • muffin pan for 12-24 muffins depending on size of hole
  • roasting pan
  • medium pot for potatoes
  • carving board
  • fork
  • chef knife
  • tinfoil
  • meat thermometer or skewer
  • couple hot pads

Instructions

1. Take milk and eggs out of the fridge so they become room temperature.

2. Make the roast. Preheat oven to 350. Season beef roast generously with pepper and salt. In an ovenproof hot pan such as an iron skillet sear roast in a thin bit of oil on the stovetop. Once the meat is browned on all sides add 1 cup red wine, and 1-2 cups beef stock. Then slide roast in the oven. Cook 45 minutes and check internal temp with a meat thermometer. Take the meat out when the internal temp reads 140 degrees. Cover with tinfoil and let rest. (She actually didn't use a thermometer. She just stabbed the roast with a skewer and pulled it out. She said when no blood comes out the hole, it's done.)

3. Start making the gravy. Toss the tomato, carrot, green pepper and onion in olive oil, salt and pepper, pour them into a roasting dish and cook in the oven until soft.

4. Start the potatoes and leeks. Preheat roasting pan or sheet pan (for potatoes) with 3 Tbsp oil in it. In a large pot, cover potatoes with water, bring to a boil, and par cook 5 minutes. Saute leeks in 1 Tbsp butter until soft. Set aside. Drain potatoes, return to pot, and bash the potatoes around in the pot vigorously (to break up the edges making way for the hot oil). Pull the preheated pan out of the oven, and place the potatoes in the hot oil, moving the potatoes around so each is covered all the way with hot oil. Bake until soft throughout and skins are slightly crispy.

5. Steam the veg. Cut cabbage into 1-2 inch pieces, put in a steamer pan with water on the bottom and steam with lid on for 30-40 minutes until soft. (Add green beans to steamer pan with 10 minutes or so to go so they will be done at the same time). Put in serving bowl with a couple pads of butter.

6. Blend the roasted veggies in a blender until as smooth as possible. Heat the puree in a medium pot with enough beef stock to create a gravy consistency. Let simmer together until the rest of the dinner is ready. Serve in a gravy boat or small pitcher on the table.

7. Make the cheese sauce. In a small pot make the cheese sauce. Melt 1 Tbsp butter, stir in 1 Tbsp flour. Let that cook for a couple minutes, then whisk in 1/2 cup milk. Keep stirring as you bring it to steaming hot. It will become thick and smooth. Turn heat off. Add grated cheddar and mix until melted. Pour cheese sauce over sauteed leeks and mix. Cover with tinfoil to keep warm until everything else is ready.

8. Make the Yorkshire puddings. Turn the oven temp up to 425. Pour a teaspoon of oil in each hole of the muffin pan and stick the muffin pan in the oven to preheat. In a blender, combine 5 eggs, 1 1/2 cups flour, 1/2 tsp salt and 2 cups milk. Blend until smooth. Blend until (when the blender is off and you've removed the lid) the top of the batter is filled with little air bubbles. Remove the muffin tin from the oven and pour batter so it fills 1/3 of the depth of the holes in the muffin tin. Cook in oven about 20 minutes until they are golden brown. Check on them after fifteen minutes and give the pan a turn for even cooking if you are not using a convection oven. Open oven door and let popovers cool down gradually in oven to encourage them to stay puffy.

9. Serve all components in separate dishes on the table so guests can make their own plates and get seconds as desired.

English Popovers

Yorkshire Pudding

As Josephine Morris, from York, England, taught Lindsay Sterling in New Gloucester, ME.

Note: Josephine served these as part of her Sunday dinner, with roast beef, leeks in cheddar sauce, potatoes and gravy. They're also great by themselves for breakfast or brunch with jam and butter. In the U.S., these are called "popovers" because they puff up and pop over the edge of the container when they're cooking.
Makes: 24
Cooking time:  45 min

Ingredients

  • 1/3 cup vegetable oil
  • 2 cups milk
  • 5 small eggs (or 4 large)
  • 1 1/2 cup flour
  • 1/2 tsp salt

Equipment

  • blender
  • muffin pan(s) for 24 muffins
  • hot pads
  • teaspoon

Instructions

1. Take milk and eggs out of the fridge so they become room temperature.

2. Turn the oven temp up to 425 degrees F.

3. Pour a teaspoon of oil in each hole of the muffin pan and stick the muffin pan in the oven to preheat.

4. In a blender, combine 5 eggs, 1 1/2 cups flour, 1/2 tsp salt and 2 cups milk. Blend until smooth. When blender is stopped, look to see if there are air bubbles showing on the top of the batter. If not, blend a bit more.

5. Remove the hot muffin tin from the oven and pour batter to fill 1/3 of each mold. Put in over.

6. After fifteen minutes and give the pan a turn for even cooking. After five minutes (or when popovers are puffed up and a little golden, turn off oven and open oven door to let popovers cool down gradually (this helps them keep their shape).

Chinese Spicy Peanut Chicken

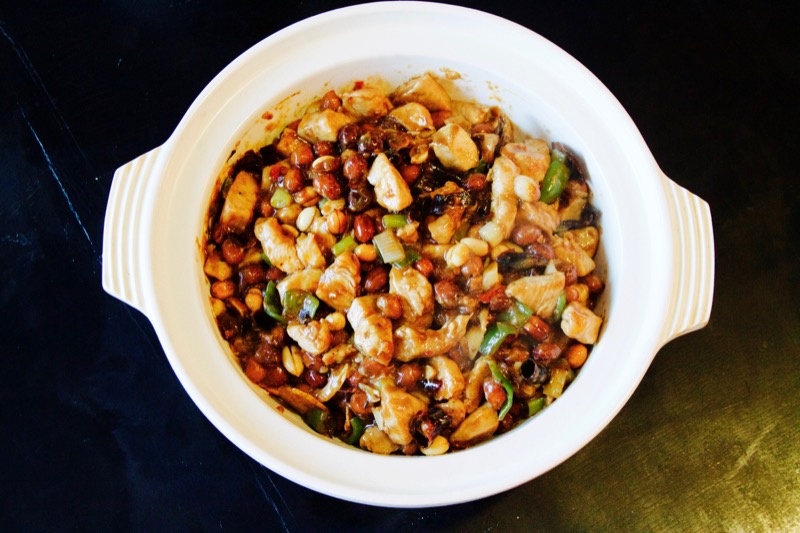
Gong Bao Ji Ding (Also known as Sichuan Chicken, Szechwan Chicken, Kung Pao, or Kung Po)

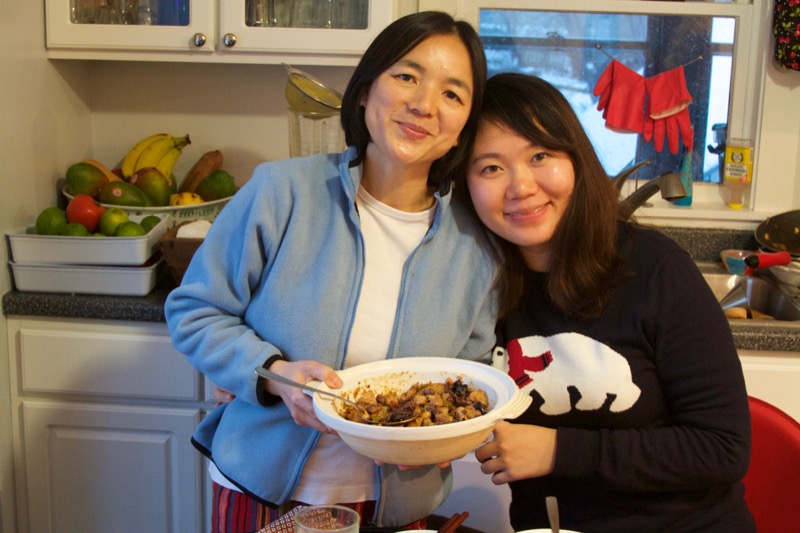
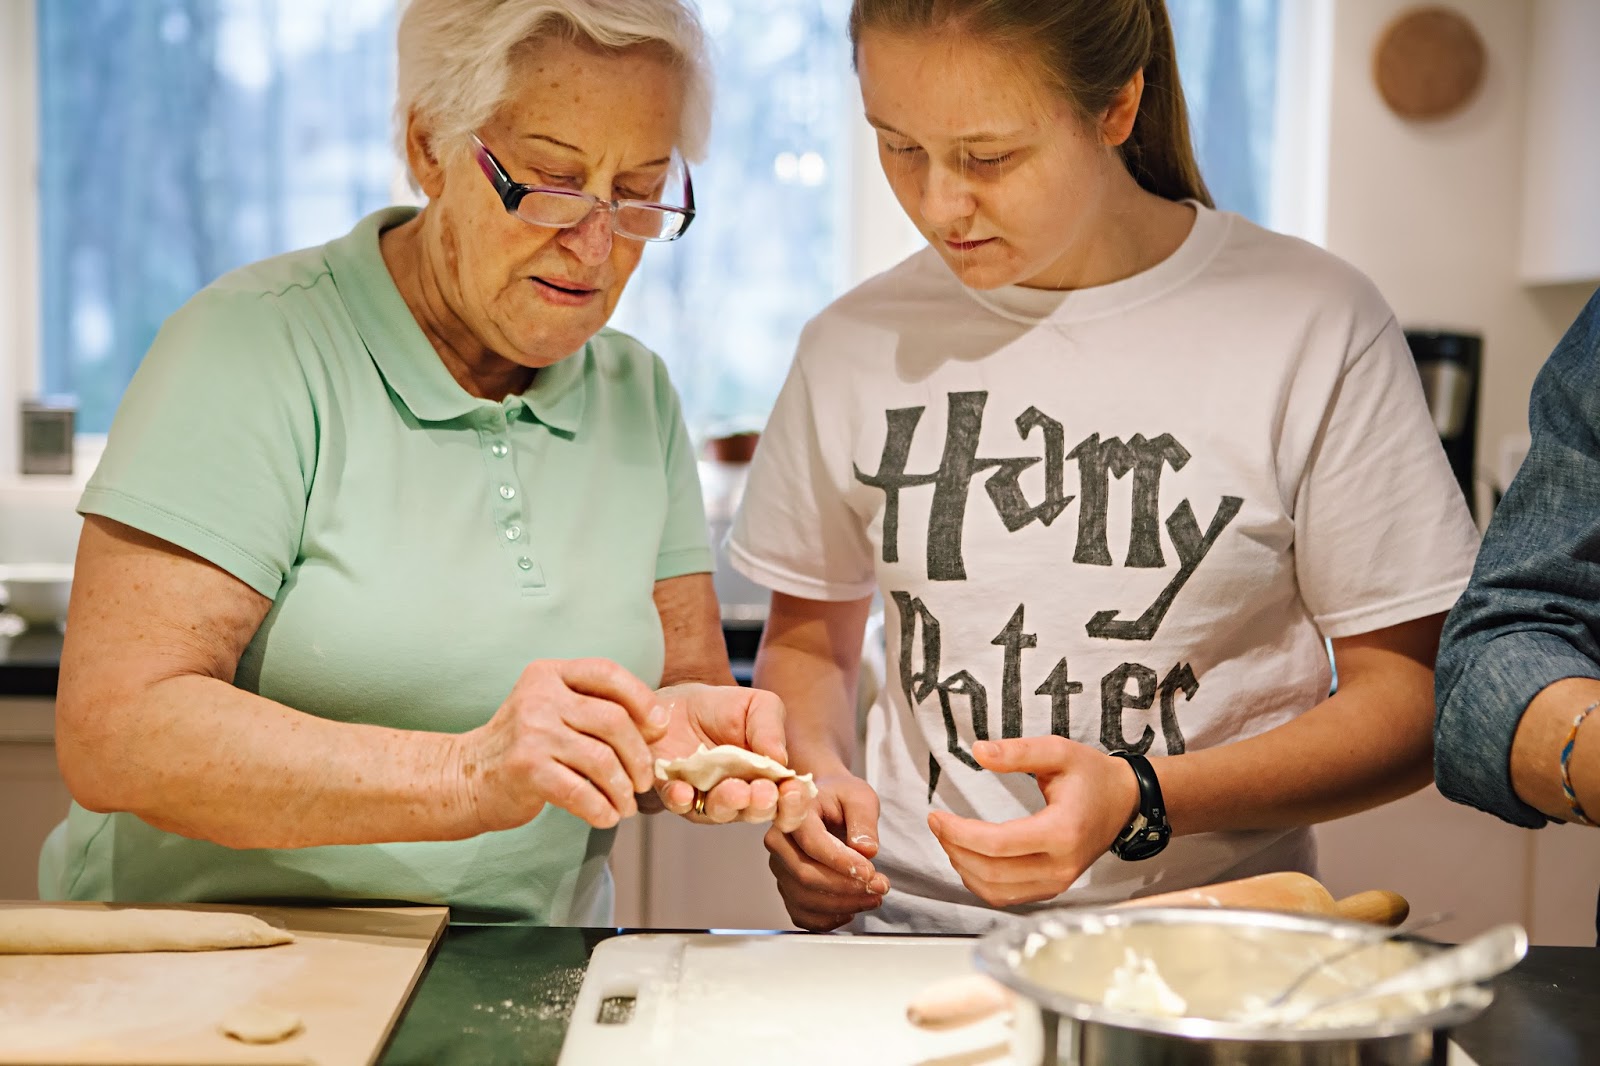
As Lily Perilla, from Guilin, China, (Guang Xi Province) and her friend, Peng Qiao, from Chong Qiang, China, (Sichuan Province) taught Lindsay Sterling in Freeport, Maine. 

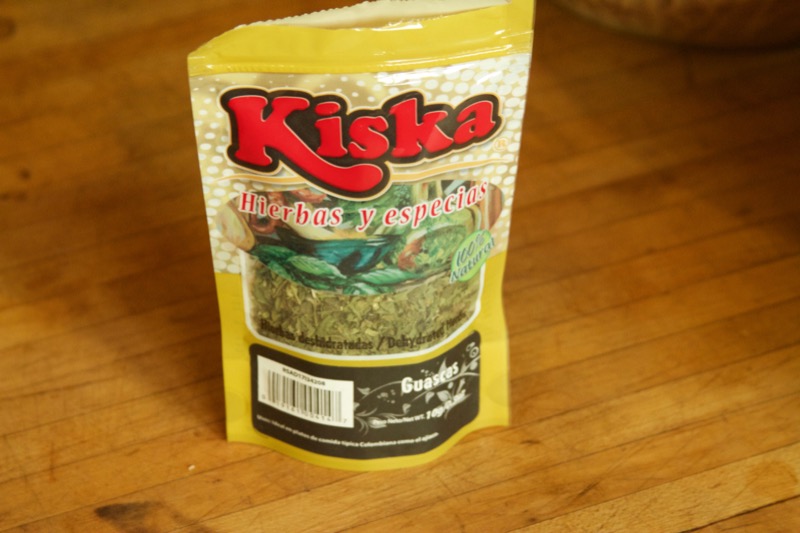
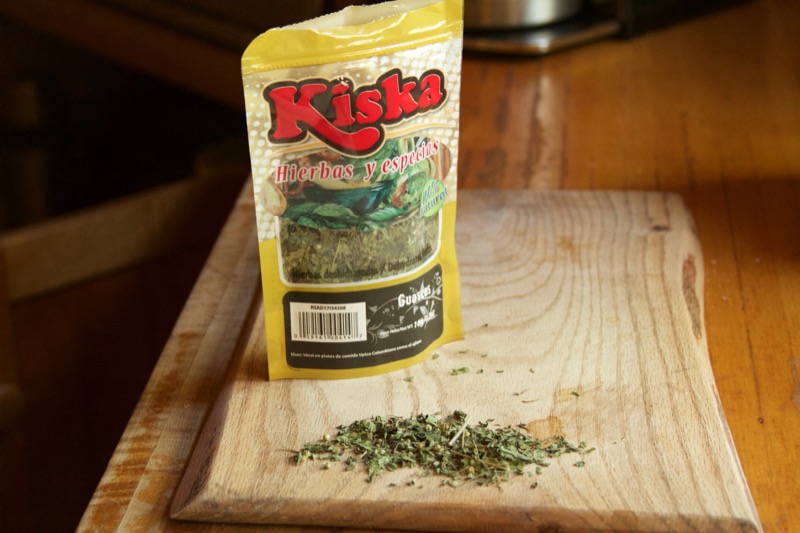
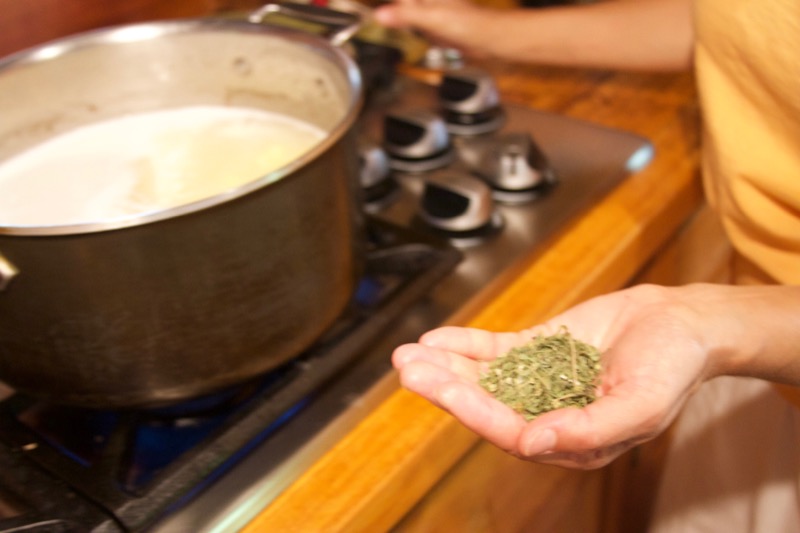
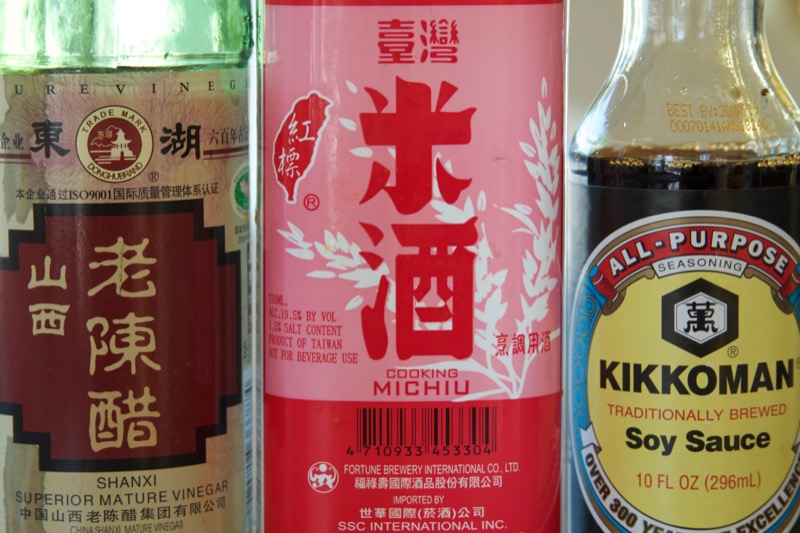
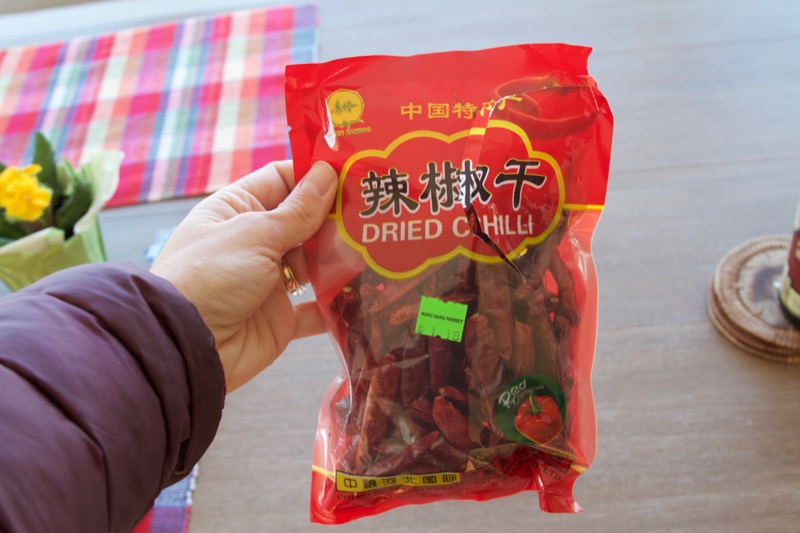
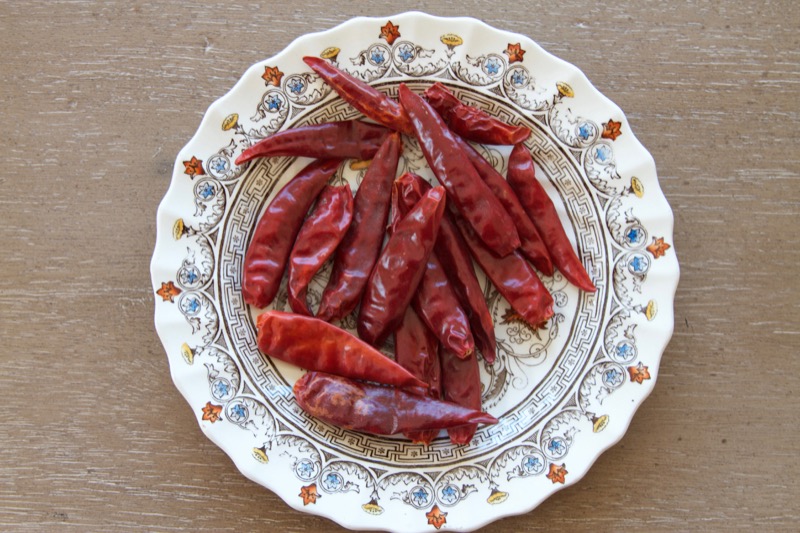
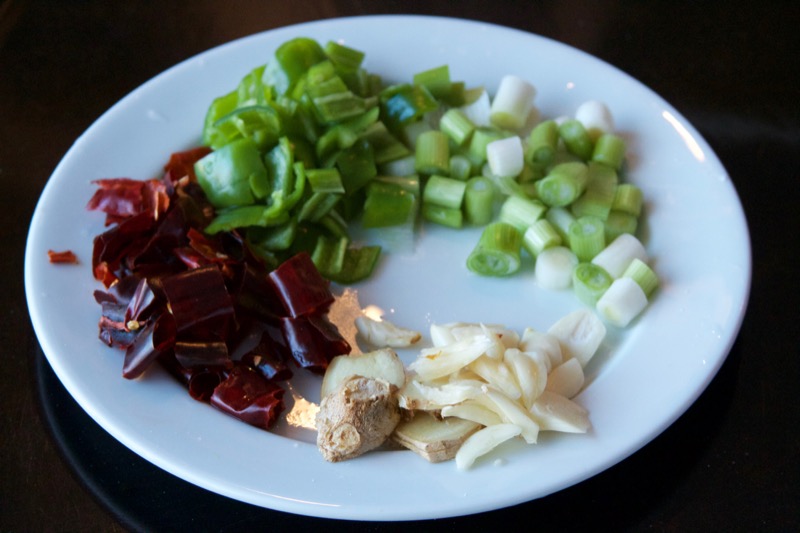
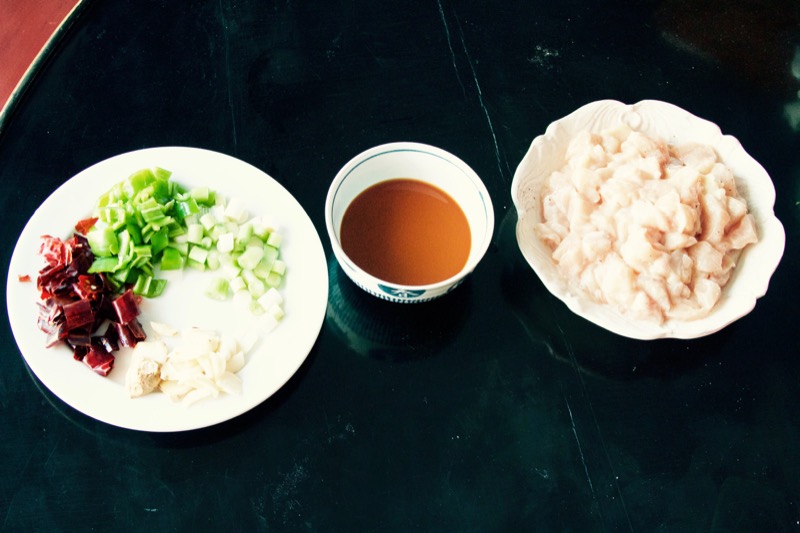
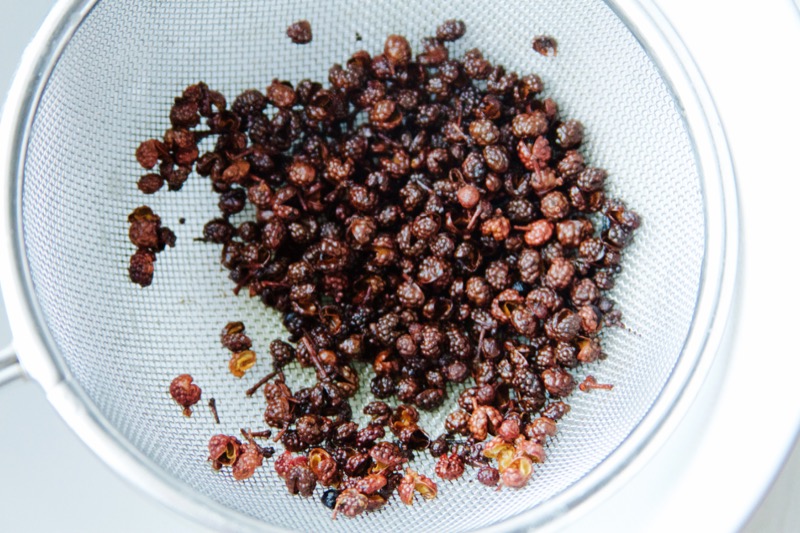
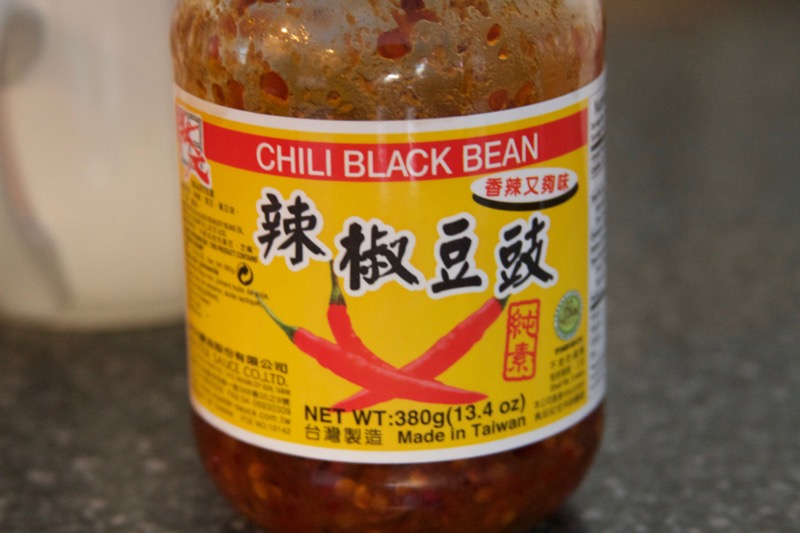
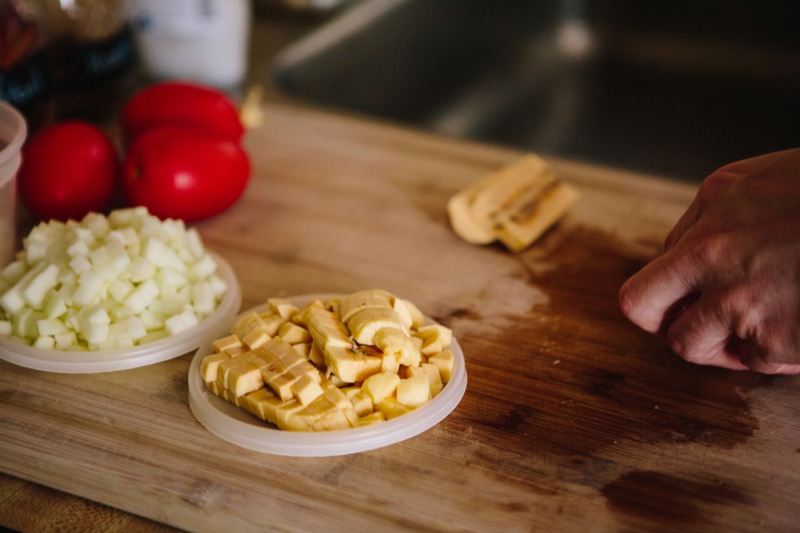
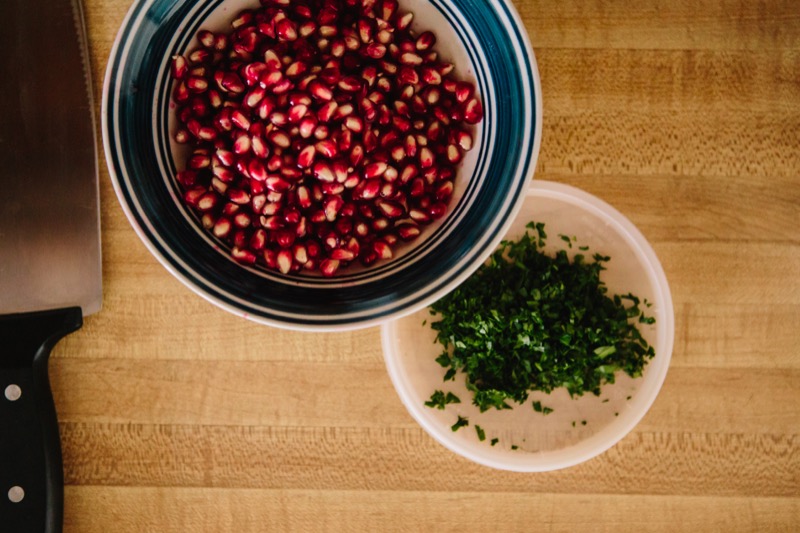
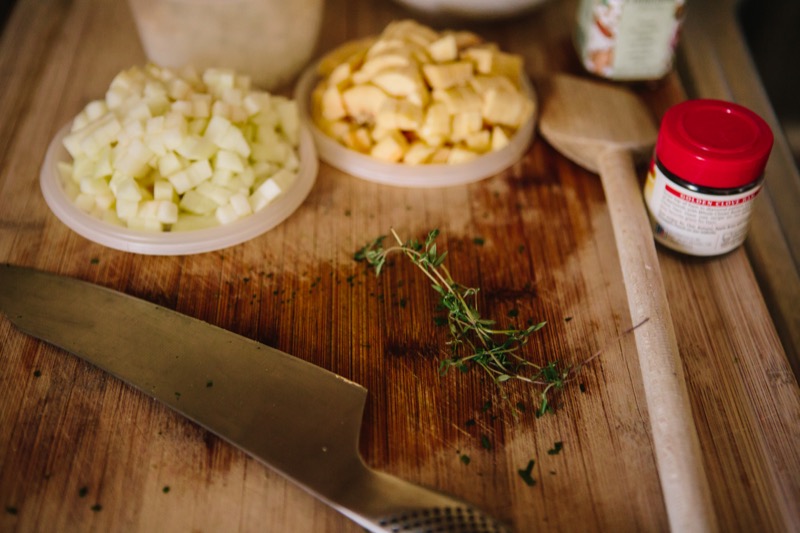
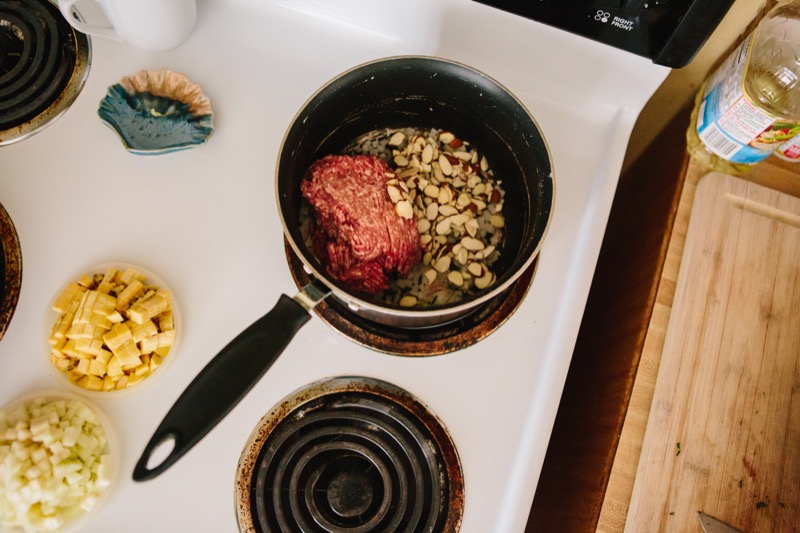
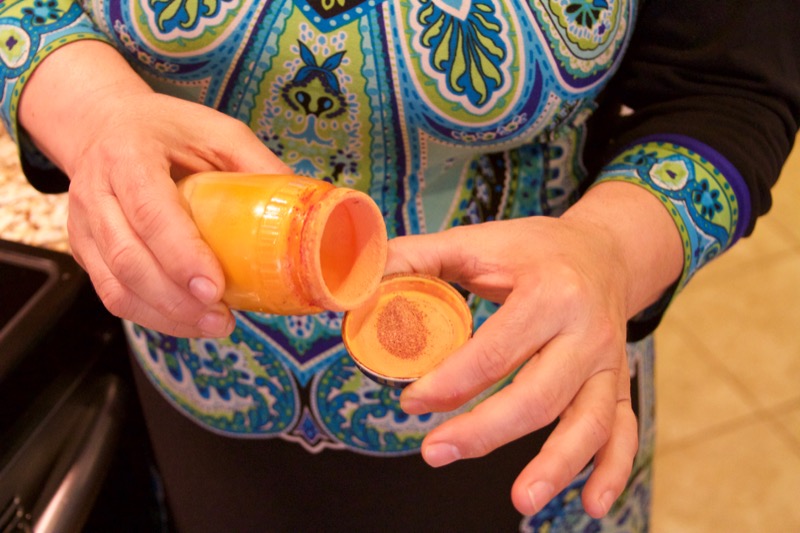
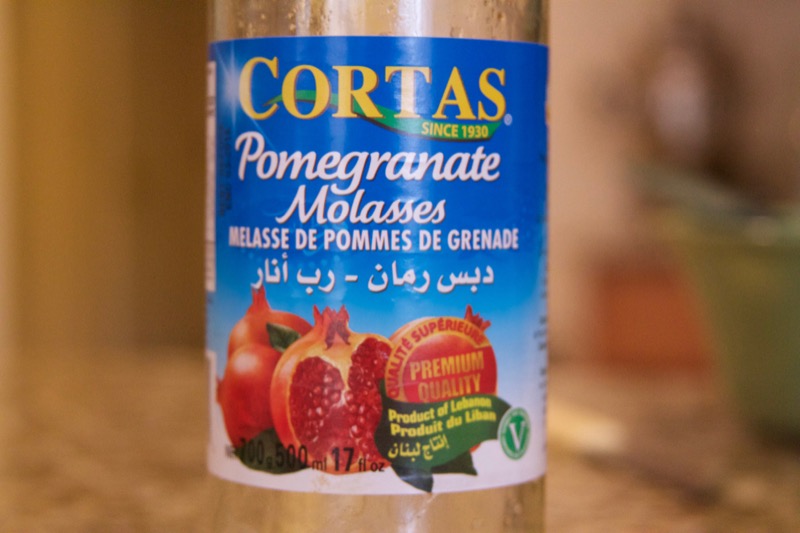
Note: The layers of different kinds of spice make this dish really fun to eat. You have an overall warming feeling from the Sichuan peppercorns, zippy slices of ginger, and the fried dried chili peppers, all working their magic. People love the texture of the dish, studded with crunchy fried peanuts. Find the Chinese cooking wine, rice vinegar, Sichuan peppercorns, dried peppers, red-skinned peanuts, and Chinese chili-bean paste at an Asian market or online. Pictures of the ingredients she used are above.
Cooking time: 1 hour active plus marinating time (2-12 hours)
Makes: 6 servings

Ingredients

  • 3 cups short or medium grain white rice

For marinating:

  • 2 lb. skinless, boneless chicken breast, cut into 1/2-inch cubes
  • 2 Tbsp Chinese white rice wine, called Mishiu
  • 1/4 cup corn starch
  • 1 egg white
  • 1 Tbsp soy sauce (use gluten-free soy sauce if desired)
  • 1/2 tsp salt

For stir frying:

  • 1 cup + 1/2 cup peanut oil
  • 1 cup red-skinned peanuts
  • 2 Tbsp whole Sichuan peppercorns
  • 1/4 cup 2-inch long dried red chili peppers, broken and deseeded
  • 1/2 inch ginger, peeled and sliced into thin cross sections
  • 4 cloves garlic, peeled and rough chopped
  • 1 Tbsp Chinese or Taiwanese chili-bean paste 
  • marinated chicken (see above)
  • 1/2 green pepper, cut into 1/2-inch squares
  • 3 scallions, cut into 1-inch segments

For finishing sauce:

  • 2 tsp sugar
  • 3 tsp Chinese white rice wine, called Mishiu
  • 1/8 tsp salt
  • 3 tsp corn starch
  • 5 tsp Chinese black vinegar (for gluten free, substitute cider or balsamic vinegar)
  • 5 tsp soy sauce (use gluten-free soy sauce if desired)

Equipment

  • rice cooker or medium pot with lid
  • small pot
  • large wok or skillet at least 12 inches in diameter
  • cutting board
  • chef knife
  • small strainer basket (for submerging Sichuan pepper corns in oil in wok then removing them)
  • slotted metal spoon
  • paper towels
  • strainer or plate
  • medium bowl
  • small bowl

Instructions

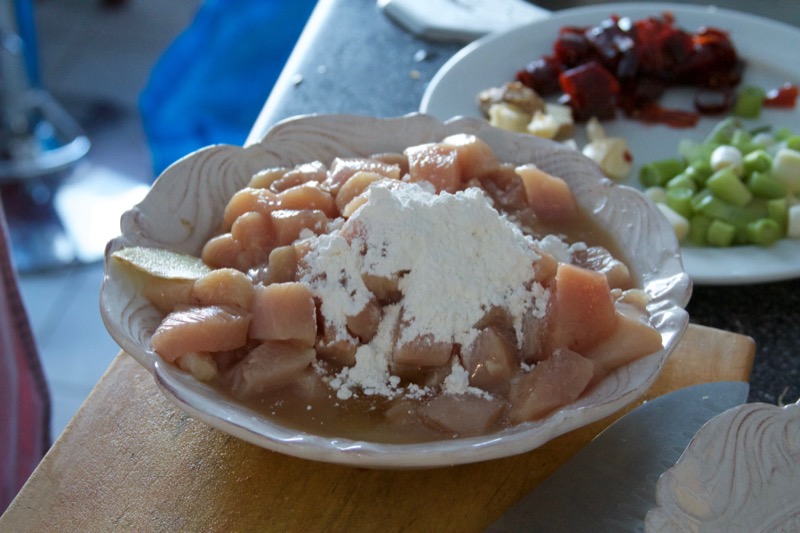
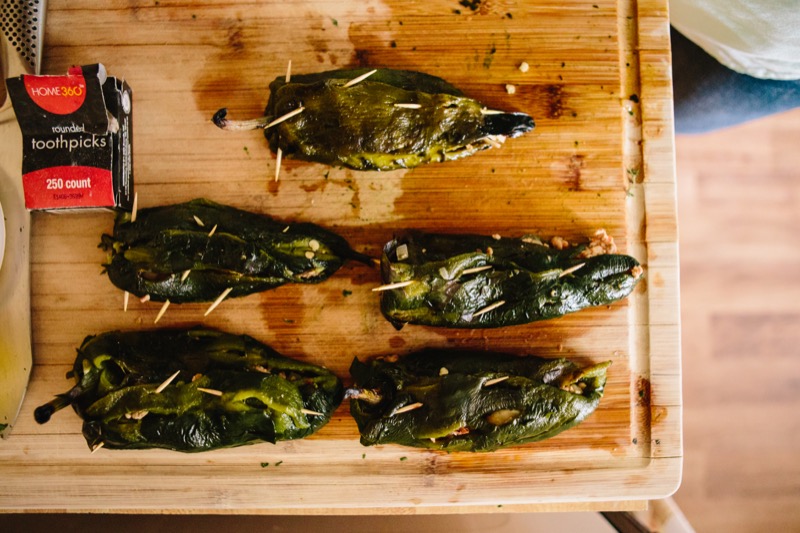
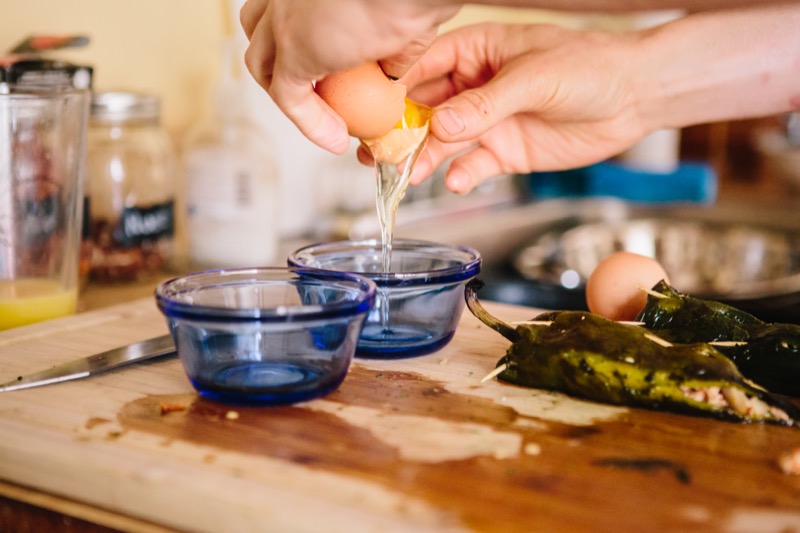
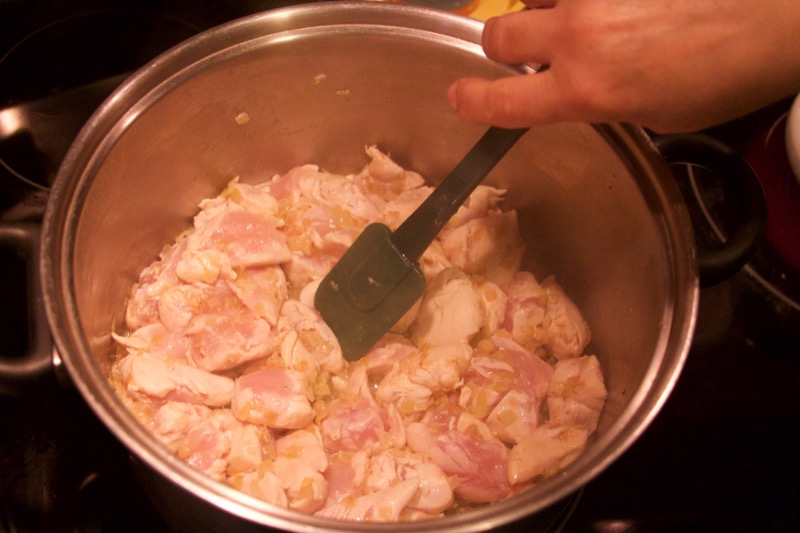
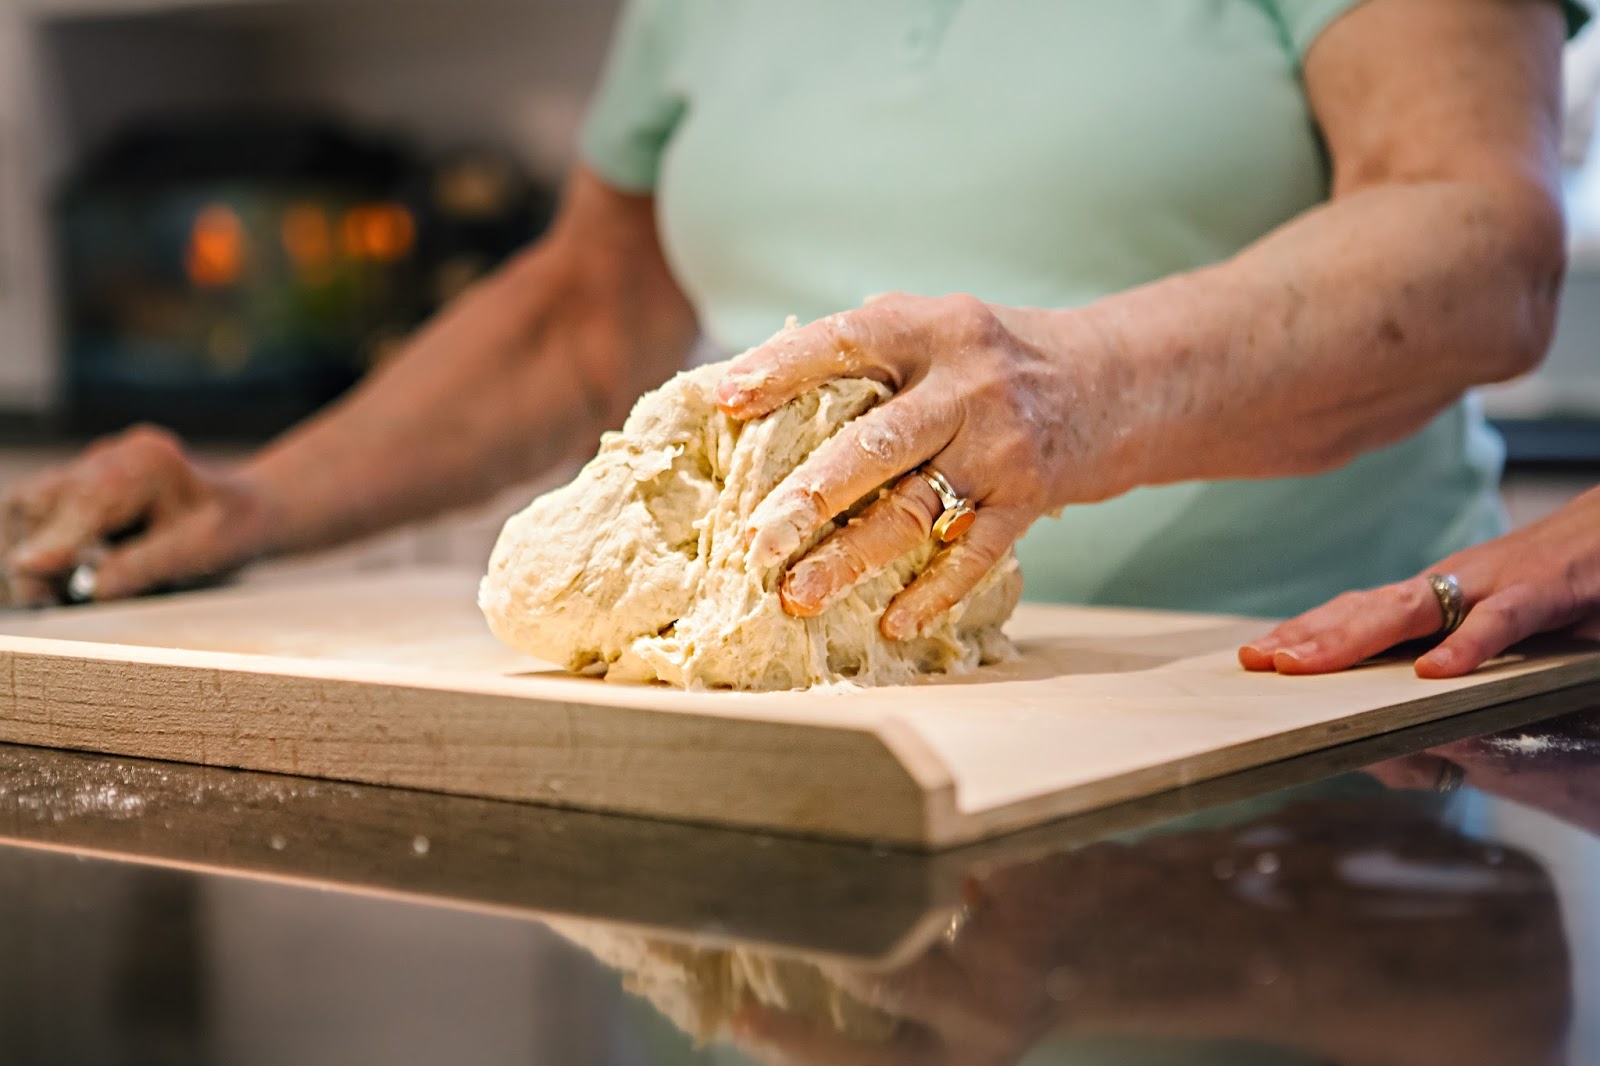
1. Prep the chicken. Slice chicken into 1/2-inch cubes and mix in 2 Tbps Chinese cooking wine (Mishiu). Then mix in the rest of the marinating ingredients: 1/4 cup corn starch, 1 egg white, 1 Tbsp soy sauce, and 1/2 tsp salt. Wash the counter and utensils that touched the raw chicken. Let the chicken marinate 2-12 hours if you can.

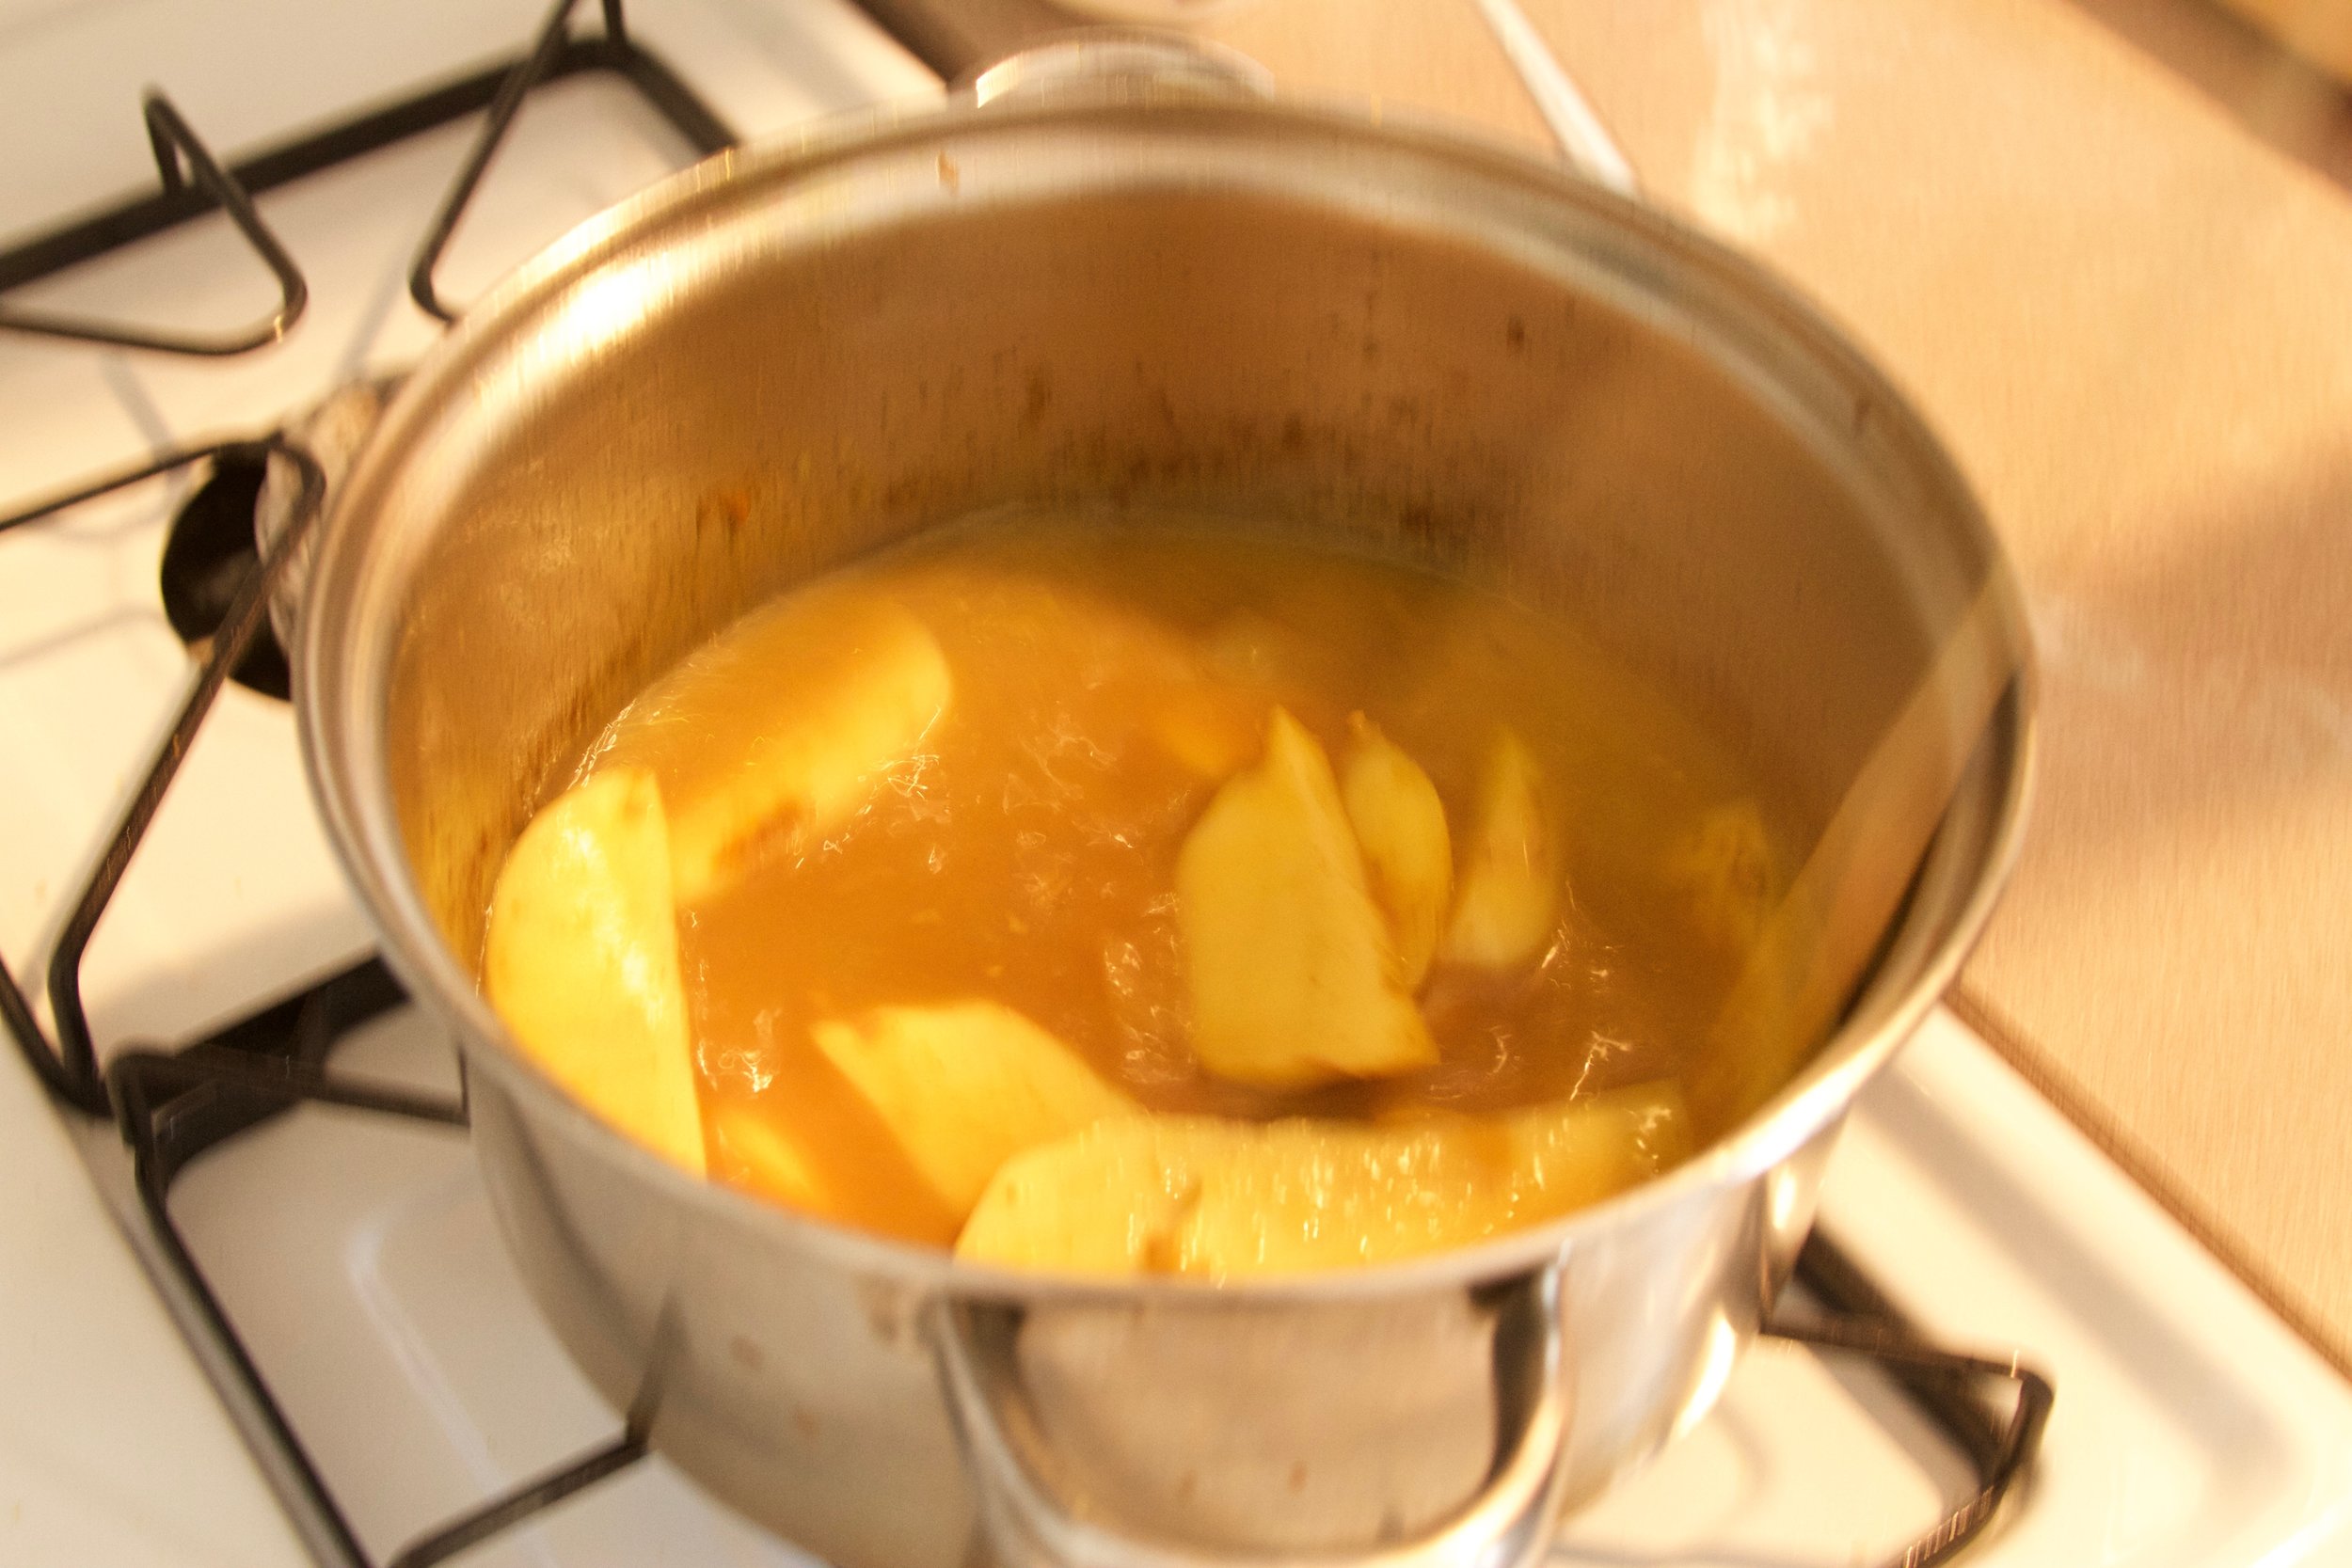
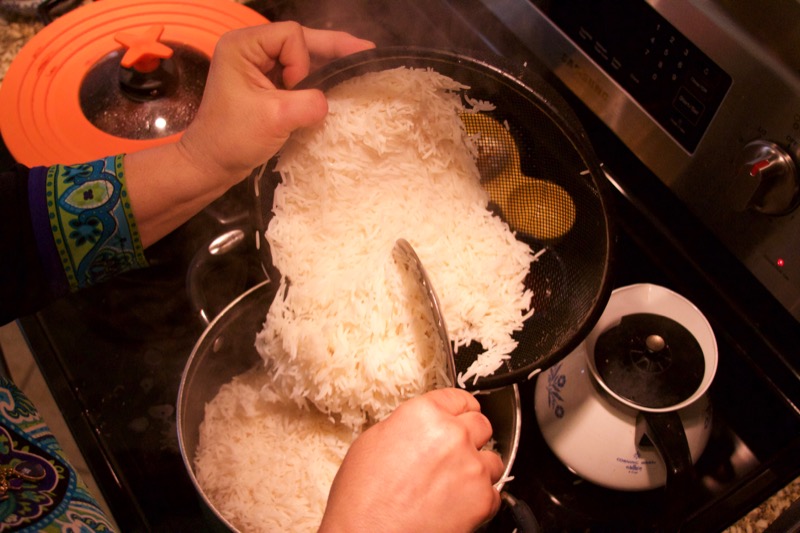
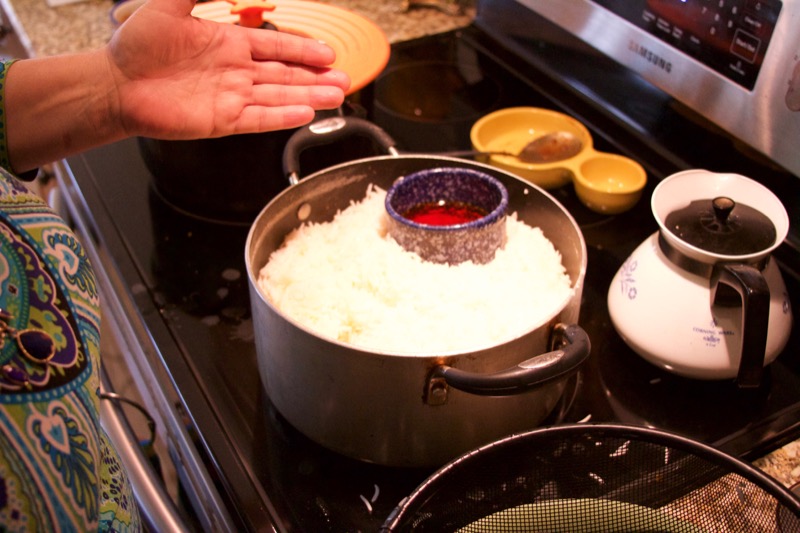
2. Prep the rice. Rinse the rice in a strainer so that the water runs clear. Cook rice in a rice cooker or medium pot with 4 cups water. Bring water and rice to a boil, then turn the heat to low and cook with the lid on for twenty minutes. 

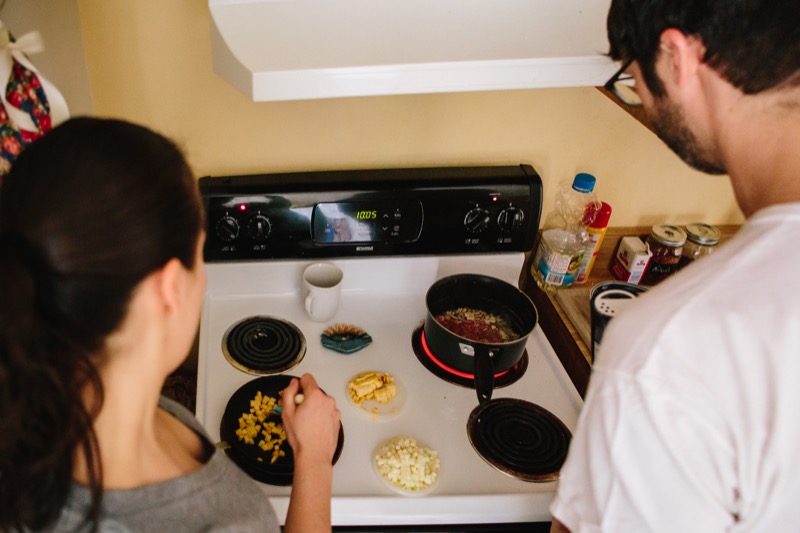
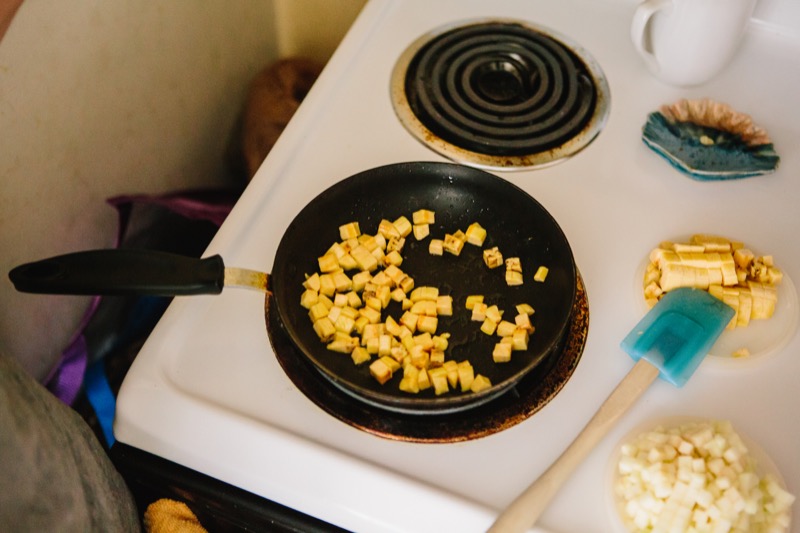
3. Prep the stir-fry ingredients. Peel and roughly chop the garlic; wash and slice the scallions into 1 inch segments; halve the dried chilis (shake out and discard the seeds or leave 1 tsp of the seeds in if you like really spicy food); peel and slice the ginger into thin cross sections. 

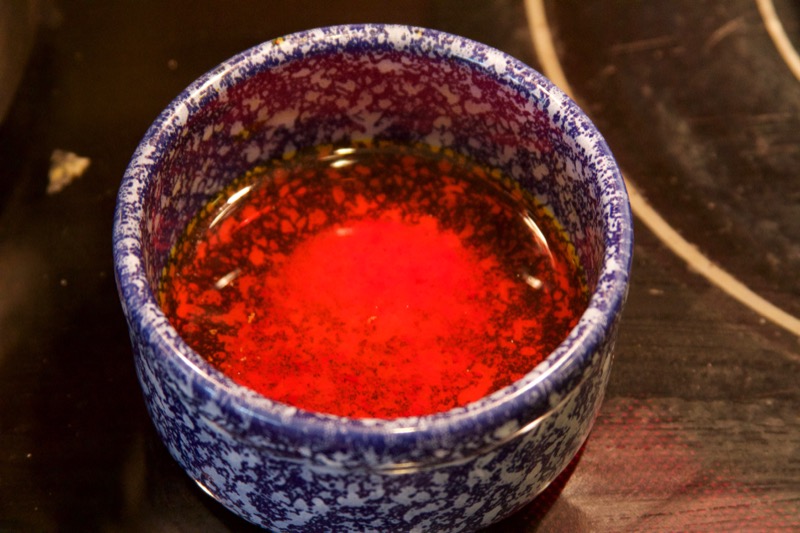
4. Prep the finishing sauce. In a small bowl, mix together the ingredients for the finishing sauce.

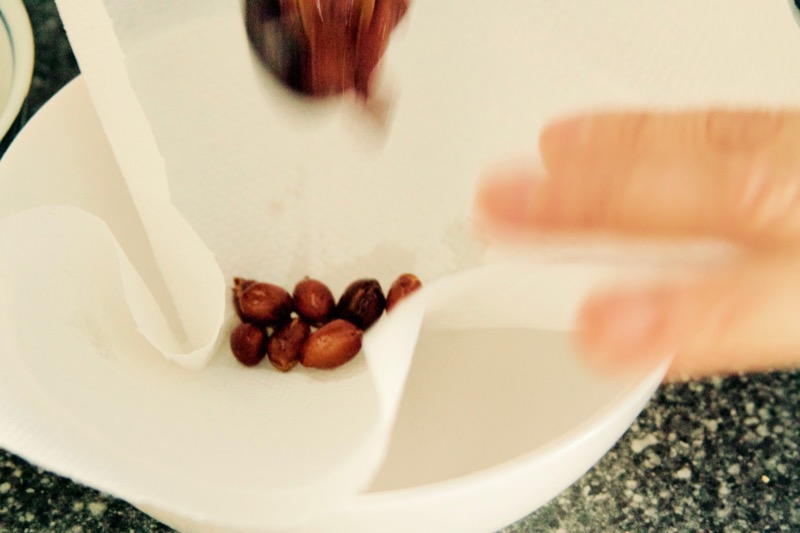
5. Fry the peanuts. Fill a small pot with 1 cup oil and turn heat on high to get it shimmering. While oil is heating, line a strainer or plate with paper towels and keep it near the stove. When the oil is shimmering, add the red skinned peanuts and turn the heat to medium. Stir the peanuts so they fry evenly in the oil. Do not take your eyes off them - they can quite quickly transition from golden to burned. When the peanuts are golden, turn off the heat. Remove the peanuts from the oil with a slotted spoon, placing them on the paper-towel-lined strainer or plate to dry. Pour some of the oil into a jar for some other use, keeping about 1/2 cup in the pot. 

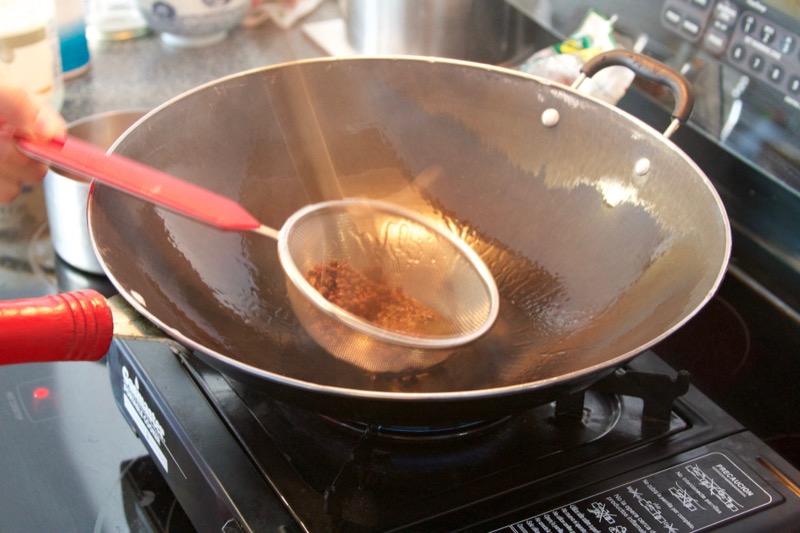
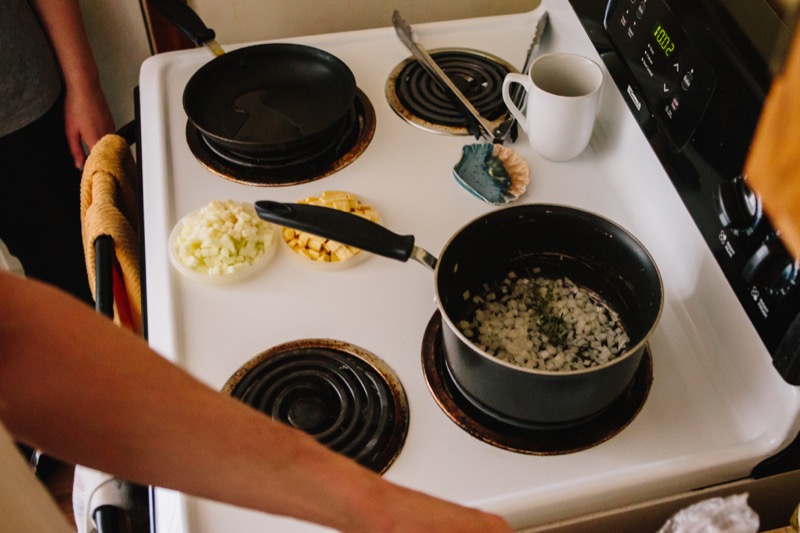
6. Prepare to stir fry. Put the Sichuan peppercorns in a small strainer basket near the stove. Bring the garlic, ginger, chili peppers, ginger-garlic paste, marinated chicken, green pepper, scallions, and finishing sauce next to the stove.

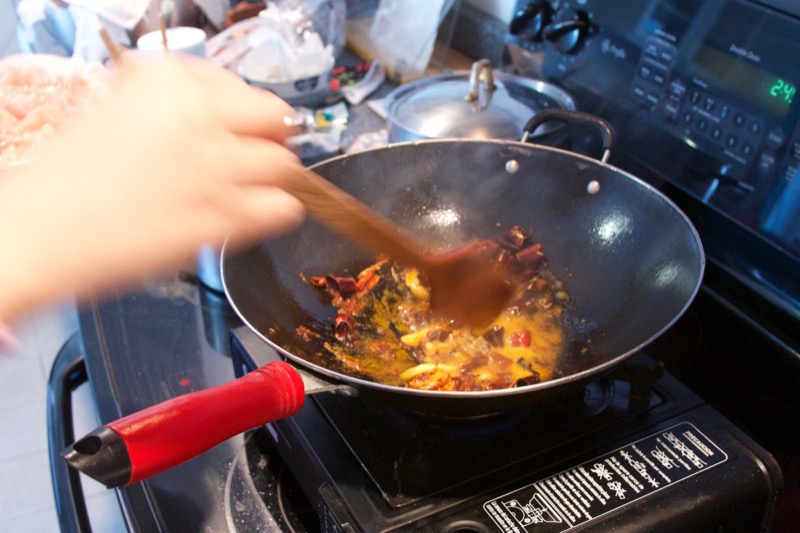
7. Flavor the stir-fry oil with Sichuan peppercorns. Heat the oil in the pot until shimmers and then turn the heat to medium low. Dip the strainer filled with pepper corns under the oil. Let the peppercorns sizzle and flavor the oil for as long as you can without letting them burn, about a couple minutes. Remove and discard the peppercorns.

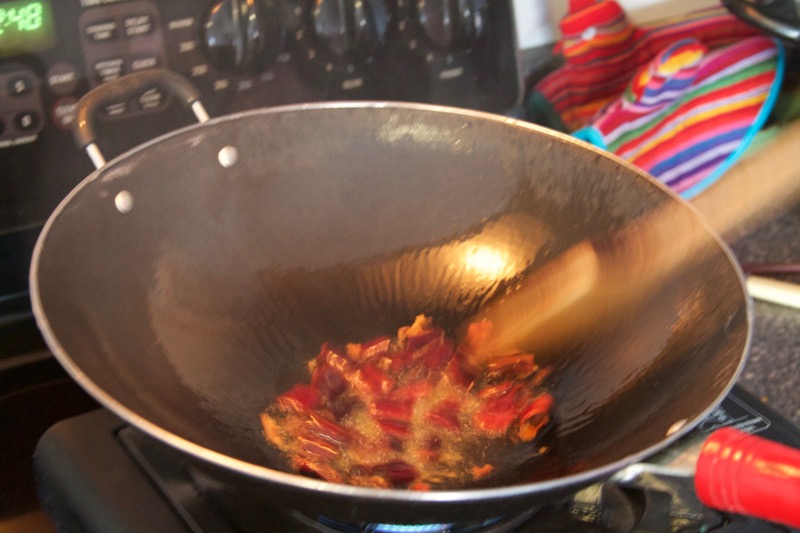
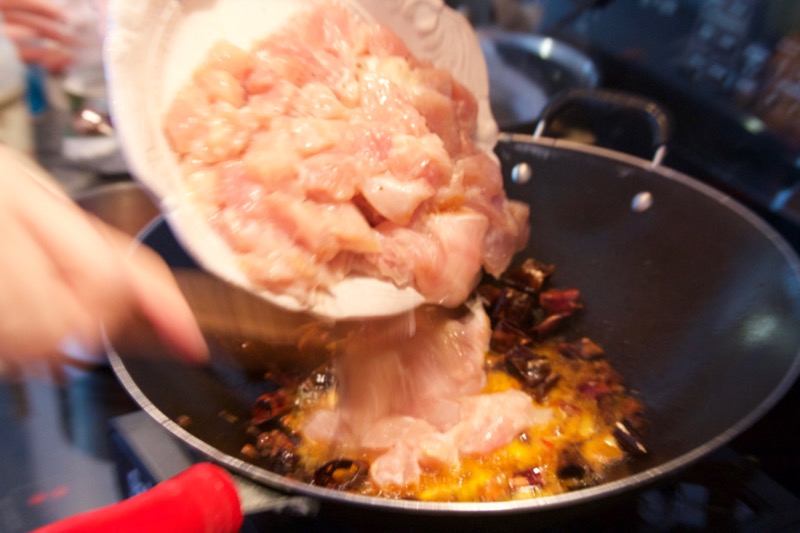
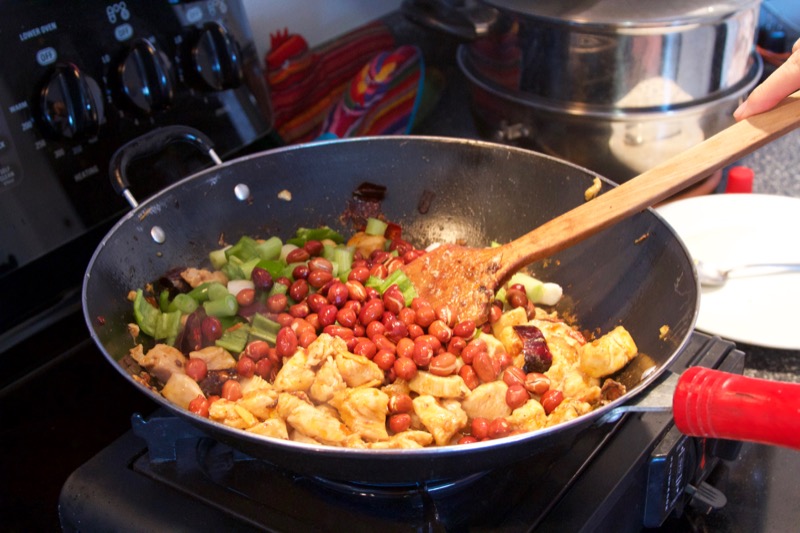
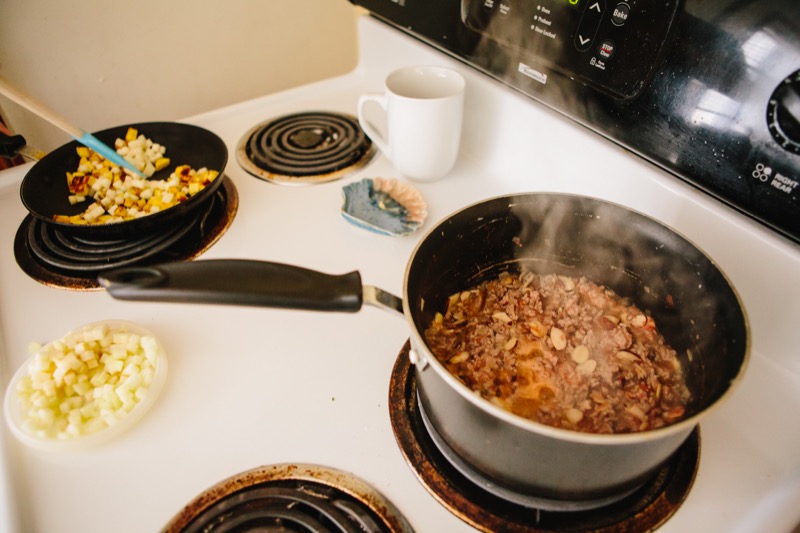
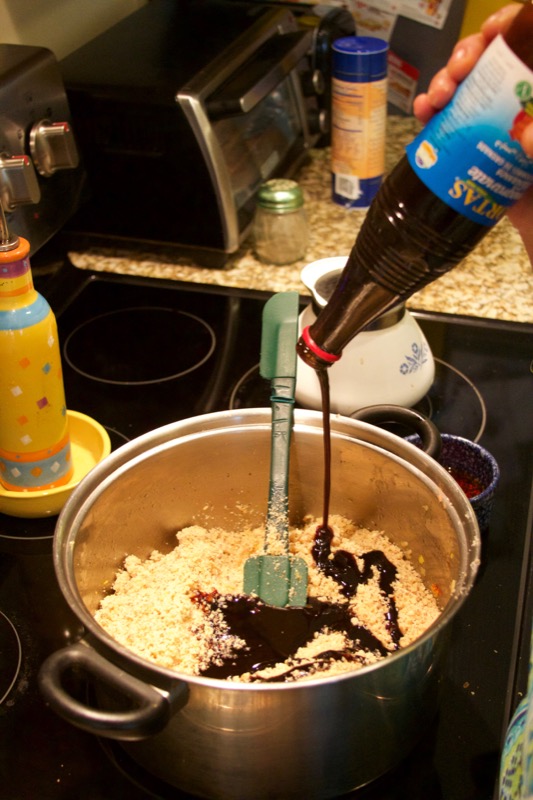
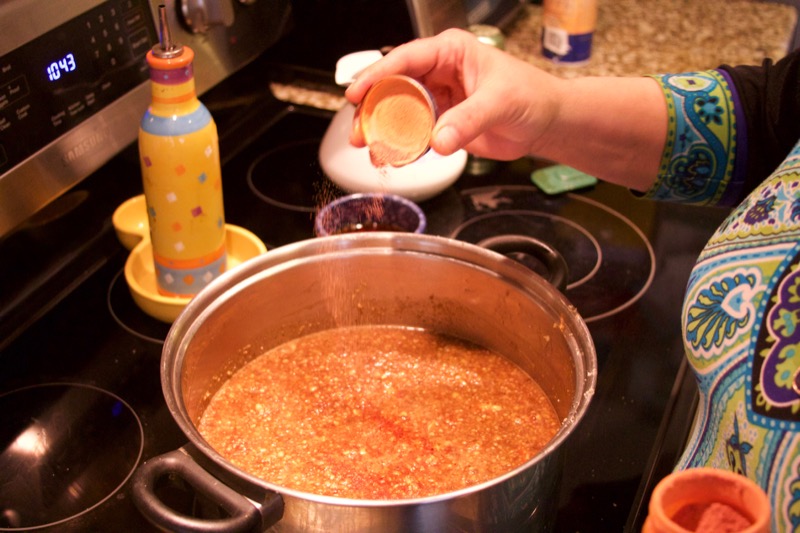
8. Perform the stir fry in the correct sequence. Transfer the Sichuan pepper-flavored oil into a wok or skillet. Turn the heat to high. Once the pan and oil are hot, add the dried chili peppers, tossing in the oil until they turn a shade darker in color, about 20 seconds. Once they do, with about ten seconds between each item, stirring constantly, add the following: ginger slices, garlic, chili-black-bean paste, and then the marinated chicken. Keep stirring and cooking the chicken until all the pieces are cooked through (opaque through the middle of each piece). Once chicken is cooked, add the chopped green peppers, scallions, and fried peanuts, stirring for two minutes. 

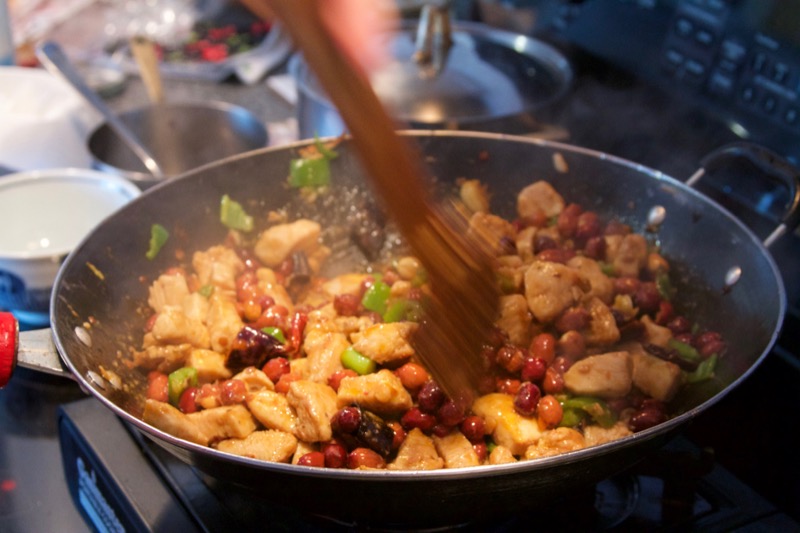
9. Add the finishing sauce. Add the finishing sauce and continue heating and stirring until it thickens. Serve with white rice.


Mexican Stuffed Poblanos

Chiles en Nogada

As Yazmin Saraya from Mexico City, Mexico, taught Lindsay Sterling in Old Orchard Beach, Maine. Photography by Cindy Giovagnoli.

Makes: 20 stuffed poblano chiles, serves 6-8 as a full meal
Cooking time: 1.5-2 hours
Note: This dish can be deep fried or simply roasted. Pick your pleasure. Also, if you have an apron, this would be a great occasion to wear it. 

Ingredients

For the stuffed peppers:

  • 20 poblano chili peppers

  • 1.5 pound ground pork

  • 3 garlic cloves

  • 1 onion

  • 1/4 cup sliced almonds

  • 1 apple

  • 3 teaspoons oil

  • 1 sweet plantain (yellow with black spots)

  • 1/8 tsp ground cloves

  • 1/2 tsp cinnamon

  • 2 sprigs fresh thyme

  • 1 tsp dried oregano

  • 2 tomatoes

For deep-frying (omit this part if doing gluten-free):

  • 1 cup white flour

  • 8 eggs

  • 3 cups frying oil

For the walnut cream sauce:

  • 1 cup walnuts

  • 1 cup sour cream

  • 6 oz cream cheese

  • 2 Tbsp sugar

  • 1 Tbsp sherry (optional)

  • 1/2 cup milk

  • 1 tsp salt or 1 chicken bouillon cube

Garnishes:

  • 2 pomegranates

  • 1 bunch fresh parsley

Equipment

  • tongs

  • cutting board

  • chef knife

  • large metal bowl

  • 2 sheet pans/cookie sheets

  • paper towels

  • paring knife

  • 1 medium bowl

  • plastic wrap

  • large saute pan

  • blender

  • 2 small plates

  • 2 cereal bowls

  • toothpicks

  • slotted spoon

  • slotted spatula

  • electric mixer with whip

  • soup spoon for stuffing filling into peppers

Instructions

1. Broil the poblanos on a sheet pan on the top rack in the oven and broil. Keep on eye on them. Once the flesh is blistering (and colored brown or black) turn the peppers. Repeat until all sides of peppers are blistered. Put the peppers immediately in a bowl and seal with plastic wrap to steam for fifteen minutes.

2. Prepare your other ingredients. Dice the onion, apple, plantain and keep in separate dishes. Pull the thyme leaves off the stems, discard the stems, and finely chop the leaves. Remove the skins from the garlic cloves and finely dice. Slice through the equator of the pomegranate. Hold the side that is revealing the seeds facing down into a bowl and whack she skin-side all over with the back of a soup spoon until all the seeds fall into the bowl. Repeat with the other half of the pomegranate. Remove any of the fruit lining that fell into the bowl. 

3. Make the walnut cream sauce by simply blend all the ingredients for sauce in a blender until creamy and smooth.

4. De-skin and de-seed the peppers. Line a sheet pan with paper towels and put it next to the sink. Over the garbage disposal or a bowl in the sink, peel the skin off a pepper with a paring knife or your fingers. Make a slit down the length of the pepper body and gently remove the seeds without breaking the pepper. If you do, just pretend it's not broken and move on. It'll still be great! Rinse the cavity of the pepper under the faucet to remove any stray seeds. Put the cleaned pepper on the paper towel to dry. Continue with the rest of the peppers. Increase your speed and efficiency as you practice on the next 19 peppers. I got my time down to about one minute per pepper. Pat all peppers dry with a paper towel.

5. Make the filling. In a large saute pan on medium heat add a teaspoon of oil and saute the onion, thyme and garlic with a little salt, which helps them cook faster and enhances their flavor. Once onions are soft, add pork, cinnamon, oregano, and almond slices. Blend tomatoes in a blender. Once pork is cooked, add blended tomato and turn off heat.

6. In a small saute pan, add a teaspoon of oil and saute the plantains for about three minutes until they soften and turn gold. Put them on a plate to cool. In the same pan, add another teaspoon oil and saute the apples briefly. When they are warm but still crunchy transfer them to a plate to cool. When the pork has cooled, mix the apples and plantains into it. This is your filling.

7. Fill the peppers. Spoon the filling into each pepper cavity so that the pepper is full but still closes. If you are not deep frying your peppers, skip to #11.

(Yazmin stitched each pepper closed with 1-2 toothpicks, however, when I tested the recipe at home I found that I didn't like guests having to hunt through their meal to find toothpicks hidden under the fried batter and sauce. The next time I made the dish, I discovered that you don't need to use toothpicks. If you believe the peppers will stay closed once they are sealed with batter, they do! Up to you - use toothpicks or faith.)  

8. Batter the peppers. Put the white flour on a dinner plate. Separate the egg whites from the yolks. Whip the egg whites in a mixer until the peaks are almost stiff but not totally, then mix in the yolks. Pour oil about 3/4 inches deep into a large saute pan and heat on high. Transfer the whipped eggs to deep plate or wide bowl. Line a sheet pan with paper towels and place on the counter near the heating pan of oil.  

9. Deep fry the peppers. When the oil is shimmering hot (but not yet smoking), press the stuffed pepper onto the floured plate until all sides turn white and then dip the non-seam side of the pepper into the whipped egg. Lay the battered side gently in the oil. Spoon egg mixture on the top of the pepper, encasing the whole pepper except the stem in whipped egg.

10. Gently lap hot oil against the sides of the battered pepper to help it solidify its shape. When the bottom is golden, carefully roll the pepper with a slotted spoon and a slotted spatula onto its raw side. When the egg batter looks cooked and golden all around, remove the pepper from the oil and onto the sheet pan. Continue with other peppers. If you fry more than one pepper at once make sure to leave at least an inch between peppers in the pan.

11. Serve three peppers to a plate for a full meal. (Peppers should be served warm -- they might need a moment in the oven if they have cooled off). Top peppers generously with walnut sauce, chopped parsley, and pomegranate seeds.


Chilean Corn Pie

Pastel de Choclo

As Benjamin Sepulveda, Marcela Naveas, and Javiera Alvarez, from Santiago, Chile, taught Lindsay Sterling in Portland, Maine. 

Serves: 4
Cooking time: 1 hour
Note: Easily make this dish for 8 by doubling the amounts and using a large casserole dish or two pie plates. 

Ingredients

  • 6-8 ears fresh corn or substitute with 4 cups frozen kernels
  • 1 cup milk
  • 1 medium yellow onion
  • 1 Tbsp oil
  • 2 eggs
  • 1 chicken breast
  • 1 lb. ground beef
  • 1 + 1/2 tsp salt
  • 1/4 tsp pepper
  • 1/2 tsp cumin
  • 1 Tbsp paprika (sweet, not spicy variety)
  • 1 tsp oregano
  • 3 leaves fresh basil (plus more for garnish)
  • 1/2 cup black olives
  • 1/4 cup raisins
  • 2 Tbsp sugar

Equipment

  • cutting board
  • knife
  • meat grinder, blender, food processor, or grater
  • 2 medium pots
  • 1 large pot
  • measuring spoons -- or just eyeball it!
  • 1 small pot 
  • 1 pie plate or similarly sized oven safe dish 
  • spatula

Instructions

1. Shuck the corn, and grind the kernels using whatever tool you have. You can grate the kernels off the cob using a grater, or you can slice the kernels off the cob with a knife and then turn them into a rough paste using a meat grinder, food processor, or blender. (To cut the kernels off the cob, turn a cob on its thick end and slice down the length of the cob, shaving the kernels off. Rotate cob and repeat until all the kernels are shaved off.)

2. Chop basil roughly or pulse it briefly with the corn in the blender or food processor. (Don't puree it in there otherwise your topping will turn slightly green, not as appealing as yellow!)

3. Preheat oven to 350°F. Cook the ground corn and basil in a medium pot with the milk for 20-30 minutes on medium-low until the mixture thickens. 

4. Hardboil the eggs, and boil the chicken. You can do this together in one pot. (Cover both with water, add 1 tsp salt, and bring to a boil. Once boiling, turn heat down so water is simmering). Once water boils, set a timer for 14 minutes.

5. Dice the onion. In large saute pan, saute the onions in 1 Tbsp oil. When the onions are soft, add ground beef, 1/2 tsp salt, 1/4 tsp pepper, 1/2 tsp cumin, 1 Tbsp paprika, and 1 tsp oregano. Saute, stirring occasionally until the ground beef loses all its pinkness.  

6. When the timer goes off, remove the chicken from the broth and cut into to it to see if it's done (opaque throughout). Cover the eggs in cold water.  Peel the eggs. Slice the chicken and eggs into 1/4-inch pieces.

7. Make the following layers in a deep pie dish or oven-safe baking dish: beef and onions on the bottom, then the chicken slices, then egg slices, olives, and raisins. Cover everything in the corn porridge. Sprinkle the top with sugar. Bake for 20-30 minutes until golden. Broil the top for extra crispy texture. 

Recipe Feedback

Please help improve this recipe for others by sharing your suggestions in the comment box below. 


Clarified Butter

Ghee

Serves: 10
Cooking Time: 30 minutes-1 hour, as you wish
Note: You can buy industrially produced ghee for convenience or make your own. The flavor of your ghee will vary depending on the flavor of cream that was used to make the butter and how long you cook the butter. The longer you simmer it, the stronger and nuttier the flavor. 
Perfect with: Azerbaijani yellow rice, Azerbaijani beef, Indian roti

Ingredients

  • 1 stick butter

Equipment

  • small pot
  • serving spoon for skimming
  • cereal bowl

Instructions

1. Put a stick of butter in a pan on medium low. Let cook until the butter turns a clear amber color underneath a thin layer of solids on top. Be careful to not let any solids that drop to the bottom burn by adjusting your heat level a little lower.

2. Let the butter and solids cook for a while on the lowest setting to let the flavor of caramelizing milk solids (on the bottom) enter the fat. Scoop the solids off the top (discard) and pour clear butter into a bowl, not including the solids that sank to the bottom. 

RECIPE FEEDBACK

Please help improve this recipe for others by sharing your suggestions in the comment box below. Thank you.

African FouFou

As cooking friends from Ghana, DRC, Burundi, Somalia, Zambia, and Liberia taught to Lindsay Sterling at various locations in New England.

Notes: Foufou is a starch similar in texture to polenta and known by many different names throughout Africa (Burundian bugali, Zambian nshima, Congolese ugali...) It served in the form of a smooth mound or a slice of a molded loaf alongside soup or saucy dishes. In the U.S. we use bread similarly as we dip our bread into soup or soak up sauce with it.

Foufou can be made out of different flours such as that of corn, rice, semolina, plantain, or cassava/yuca. Foufou mixes/flours are sold online or at tropical markets such as the Tropical Foods Supermarket (450 Melnea Cass Blvd Boston, MA). The easiest and tastiest version of foufou to make in my opinion is one made with pre-cooked corn flour that some Congolese friends told me beginners should use. Incidentally, this is the same flour my Venezuelan friend used to make arepas. 

All my foufou teachers ate foufou with their hands. They broke off small bites of foufou, dipped them in soup or sauce, and then ate them. After the novelty of getting my hands messy wore off for me, I found myself putting spoonfuls of foufou in my soup and enjoying them as I would dumplings with a spoon. For authentic dishes to accompany foufou, try these: Ghanaian peanut soup, or Burundian greens, beans, and goat.

Cooking time: 30 min.
Makes: 4 servings

Ingredients

  • 2 cups fou fou mix or fine flour of corn, plantain, rice, or semolina
  • 4 cups water

Equipment

  • Small pot or microwave safe bowl
  • Foufou stick, wooden dowel, or wooden spoon
  • soup bowls or medium mixing bowl

Instructions

1. Fill medium pot on medium high heat with 4 cups water. Mix in the foufou flour in so that the water turns opaque  but is still completely watery in texture. Stir constantly with the foufou stirring stick.

2. When the mixture heats up, it'll turn thick like cream. Boil vigorously, stirring constantly. The mixture will continue to thicken. Now, keep stirring around and around the edges and bottom, about 15-20 minutes. This is hard and you will want to quit, but this is how you do it. The goal is to end up with a contained ball of thick dough: jiggly, sticky, and malleable. Keep stirring so the foufou is smooth and thick, like a wet ball of really sticky playdough.

3. When you have a smooth thick mass, wet the inner surface of your guest's soup bowl (this will make the foufou not stick to the bowl). Scoop a serving (about 2/3 cup) of the foufou dough into the bowl. Move the bowl back and forth and around to get the mass of foufou to bounce around inside the bowl and take on the bowl-shape. It may help to turn the foufou over to get a really smooth, mounded top surface. Repeat for other guests. You can spoon soup or sauce around the foufou in the same bowl or serve the foufou and soup/sauce in separate bowls.  

Iranian Powdered Saffron

As Parivash Rohani from Ardestan and Shiraz, Iran, taught Lindsay Sterling in Freeport, ME, 2016

Cooking Time: 5 minutes
Note: For use in dishes such as Iranian chicken in walnut-pomegranate sauce. Ground saffron releases its flavor into the food faster and more evenly than saffron threads. 


Ingredients

  • 2 grams saffron threads (preferably Iranian)
  • 1/2 tsp sugar


Equipment

  • mortar and pestle
  • small empty, clean, dry spice jar with tightly fitting lid
  • clean sheet of paper
     

Instructions


1. Put all your saffron threads in a mortar and pestle with 1/2 tsp sugar. Pressing hard and putting your weight into the pestle, grind in a circular motion quickly for about a minute until you have a fine powder.

2. Pour powder into a pile on a clean sheet of paper.  Then lift two sides of the paper to create a channel that allows you to pour the powdered saffron into a storage jar without spilling any precious granules. Tighten lid on jar, and store for use in any dishes that call for saffron.

3. So as not to waste the saffron residue in the mortar, put a couple tablespoons of hot water in the mortar. This will create saffron water, which you can use immediately in a dish, or store in a jar in the fridge for use within 5 days.

Iranian Chicken in Walnut-Pomegranate Sauce

Fesenjoon

As Parivash Rohani, from Ardestan and Shiraz, Iran, taught Lindsay Sterling in Portland, Maine, March 2016

Serves: 8
Cooking time: 2 hours active + 2 hours soaking rice

Ingredients


For chicken in walnut sauce:

  • 1 yellow onion
  • 2 Tbsp + 3 Tbsp olive oil
  • 2 pounds skinless boneless chicken breast
  • 1/2 tsp black pepper
  • 1/2 tsp salt
  • 1/8 tsp + 1/8 tsp powdered saffron (Iranian saffron preferred)
  • 1 lb. walnuts
  • 17 oz. pomegranate molasses
  • 1-6 Tbsp sugar, depending on the sweetness of your Pomegranate molasses (sometimes it has sugar in it, sometimes not)

For saffron rice:

  • 4 cups basmati rice (Aahu Barah super sela brand preferred)
  • 4 tsp salt
  • 2 medium potatoes
  • 1/4 cup olive oil plus more for drizzling
  • 1 dash rosewater (optional)

For Shirazi salad:

  • 1 head lettuce
  • 1 lime
  • 1 cucumber
  • 3 tomatoes
  • 3 Tbsp sumac
  • 3 Tbsp dried mint
  • 1/2 tsp salt
  • 4 Tbsp olive oil

Equipment

  • food processor or blender
  • large bowl
  • measuring spoons (or eyeball it)
  • 2 large pots with well-fitting lids
  • cutting board
  • chef knife
  • mixing spoon
  • liquid measuring cup
  • spatula
  • salad bowl
  • serving bowl
  • large serving platter
  • small plate or 2nd mixing spoon
  • strainer
  • medium bowl
  • tea kettle or small pan
  • small glass or ceramic dish

Instructions


1. Two hours or more ahead time, put the basmati rice in a large bowl, add 4 tsp salt, and cover the rice by a couple inches with cold water.

2. About two hours before you want to eat, cut onion into small dice. In a large pot with lid, saute onion in 2 Tbsp olive oil on medium high heat until soft. Cut chicken into 1-inch pieces. Add chicken pieces to the onions and saute until golden. Add salt, pepper, and 1/8 tsp powdered saffron, and 2 cups of water. Wash cutting board, knife, and anything else that touched raw chicken with soap and water.

3. In a separate small glass or ceramic dish, cover 1/8 tsp powdered saffron with 1/3 cup hot water and let steep.

4. In food processor pulse walnuts in batches into a fine meal. You might throw in a tablespoon of sugar to help. Mix the ground walnuts into the chicken, along with 17 oz. pomegranate molasses. Mix. Add more water if you need to so the texture is loose and soupy. Cook this mixture on medium with the lid on, stirring occassionally, for about an hour until the liquid thickens into a thick sauce (think like the meat sauce on your spaghetti).

5. While the walnut sauce is cooking, peel the potatoes and slice into planks about 1/4 inch thick. Put potatoes in a bowl and cover them with water (so they don't turn brown before you use them).

6. After the walnut mixture has cooked for about 30 minutes, strain the soaking rice and put it in a large pot that has a lid. Cover the rice by 2 inches with water. Bring rice to a boil, and let it continue to boil like you would pasta - for about 10 minutes. When the rice still has a hard center, but is softening on the outside. Drain the rice in a strainer.

7. Cover the bottom of the pot that you used to boil the rice with olive oil and make a layer of potato planks in the oil. Pile the strained rice on top of the potatoes. Use the back of the spoon to create vertical holes in the rice, which presumably help the moisture get around evenly. Nestle the small dish of steeping saffron water on top of the rice. Drizzle olive oil over the top of the rice. Cover the pot and heat on low for about 30 minutes, until the rice is fully cooked and the potatoes on the bottom are crispy and golden.

8. Keep stirring the walnut sauce every so often. Taste it. It should taste tangy and delicious. If it's too sour, add more sugar. A little sour is good because it goes well with the rice.

9. Prepare the salad. Cut up lettuce, dice cucumbers and tomatoes and put in a bowl. Sprinkle sumac and dried mint generously to cover the top of the salad. Sprinkle salt as desired. Squeeze the juice of a fresh lime over the salad. Drizzle olive oil on top as you wish, about 4 Tbsp.

10. Taste rice to see if it is soft. When it is, fill the dish of saffron-water completely with rice and put it on the counter. Scoop most of the rest of the rice onto a large serving platter. Keeping the bottom layer of rice and potatoes in the pot for a minute.

11. Spread the saffron-soaked rice from the small dish over the top of the rest of the rice so the platter of rice looks beautiful yellow.

12. Fill a large wide bowl or your sink with cold water. Submerge just the bottom of the rice pot in the cold water for about 30 seconds. This helps the crispy rice and potatoes come up. Now loosen the fried potatoes and fried rice in the bottom of the pot with a spatula and put them on another platter.

13. Transfer chicken in sauce into a serving bowl. Serve yellow rice, crispy rice and potatoes, chicken in walnut sauce, and salad family style on the table. When making individual plates, Parivash likes to scoop the fesenjoon right on top of her pile of yellow rice.

If you like this dish, try it with lamb or beef meatballs instead of chicken.

Polish Cheese-Potato Dumplings

Pierogi Ruski

As mother and daughter, Jadwiga and Izabela Lutostanska, from Szczecin, Poland, taught Lindsay Sterling in Brunswick, Maine. Photos by Cindy Giovagnoli.

Note: if you will be making your own Polish farmer's cheese (it's easy), you'll need to start the process the night before. You can otherwise find Polish farmer's cheese in a Polish market, or substitute ricotta or fresh goat cheese from a typical supermarket.

Makes: 70 dumplings, enough to serve for 6 for dinner or more as an appetizer or snack.

Cooking Time: 3-4 hours (less if friends or family are doing this with you)

Ingredients

For the filling:

  • 3/4 cup Polish farmer's cheese, called twarog (store bought or homemade)
  • 3 medium yellow potatoes, peeled
  • 1 onion, finely minced
  • 1/2 tsp salt or to taste
  • 1/2 tsp freshly ground pepper or to taste

For the dough:

  • 3 1/2 cups flour + 2-4 Tbsp for dusting
  • 1/2 tsp salt
  • 1 1/3 cup milk
  • 1 egg, whipped

For the topping:

  • 1 onion, finely minced
  • 4 Tbsp butter

Instructions

The night before: Start the Polish farmer's cheese process and boil the potatoes until soft. Strain and let cool. Mash potatoes with a potato masher (Jadwiga used a meat grinder but the masher worked fine). Let potatoes cool and refrigerate.

The next day, make the filling. Finish making the farmer's cheese. Also, saute minced onions in butter slowly on medium-low heat for 15 minutes. Combine farmer's cheese with potato,  half the sauted onions in butter, and generous salt and pepper to taste.

Make the dough. Warm the milk. In a large mixing bowl, mix the milk and whipped egg into the flour with your hands until you have a mass of globby, rough, sticky dough that sort of sags when you hold it up as opposed to stays in its shape. It's a wet dough. Spread flour across your cutting board or counter and put the blob of dough on it. Knead the dough for 15 minutes. Use a knife or pastry cutter to scrape any dough that sticks to the counter. You may dust some more flour to help contain the stickiness but keep in mind that you want the dough to end up tacky so that it will stick to itself when you are making the pierogis. Stop kneading when the dough is smooth, stretchy, and slightly tacky. It feels like a baby's bottom when it's done. Form the dough into a ball and cover it with a towel so that the dough doesn't dry out while it is resting and you finish making the filling.

Assemble the pierogis. See this video on how to form the pierogis. Put a 1-2 Tbsp of flour off to the side of your workspace on the counter. Break off a piece of dough about the size of a small apple, or about a quarter of all the dough. Roll the piece into a cylinder about as thick as a nickel. Cut across the roll, making 3/4"-thick pieces of dough. Dip the fingers of one hand in the flour and use them to turn each segment on its side and pat down on top of it once with two fingers to begin to flatten the piece into disc.

Use a rolling pin to roll out each piece into your dumpling wrapper. What you want is a thin disk about 2 inches in diameter and about 1/8th inch thick. Put the disk in one hand, and add a tsp of filling to the middle of the disk. Fold both halves of the dough over the filling, match the edges on top of one another, and press them together, sealing the filling inside. If the filling gets on the edge of the dough where you are trying to seal it together, then the seal won't work. If you need to push the filling back from the edges, it's helpful to dip your finger in a little pile of flour before using them to nudge the filling out of the way because then the filling doesn't stick to your fingers. Then press the dumpling wrapper closed.  Once the seal is secure, then pinch the dough six or seven times along the edge to make a pretty decoration.

Boil the pierogis. Bring a pot of water and 1/2 tsp salt to a boil. One by one, add enough pierogis to make a single layer in the water. Once they float, they're done. Another Polish source says she puts a tablespoon of oil in the water and then the pierogis don't stick to each other. Remove cooked pierogis with a slotted spoon or spatula and serve with sauteed onions-in-butter drizzled on top.

Freeze any uncooked pierogis in a single layer on a flour-dusted sheet pan. Once frozen, transfer into a Ziplock. Cook within 3 months.

RECIPE FEEDBACK

Please help improve this recipe for others by sharing your suggestions in the comment box below. Thank you.

Polish Sweet Cheese Dumplings

Pierogi

As mother and daughter, Jadwiga and Izabela Lutostanska, from Szczecin, Poland, taught Lindsay Sterling in Brunswick, Maine.


Notes: If you will be making your own Polish farmer's cheese (it's easy) for the filling, you'll need to start the process the night before. You can find Polish farmer's cheese already made in a Polish market. 

Pierogis freeze really well. It's great to make these in advance so all you have to do on the day you want them is make the topping and boil them.  

Makes: about 70 dumplings, enough to serve for 6 for dinner or more as an appetizer or snack.
Cooking Time: 3-4 hours

Ingredients

For the filling:

  • 3 cups Polish farmer's cheese (twarog), store bought or homemade
  • 2 egg yolks
  • 3 Tbsp powdered sugar
  • 1 package vanilla sugar (subst. 1/2 tsp vanilla)
  • (possibly 1-3 Tbsp milk)

For the dough:

  • 1 1/3 cup milk
  • 1 egg, whipped
  • 3 1/2 cups flour + 2-4 Tbsp for dusting
  • 1/2 tsp salt

For the toppings:

  • 1 cup breadcrumbs
  • 8 Tbsp butter
  • 1 cup plain yogurt
  • 4 Tbsp honey
  • juice of 1/2 lemon

Instructions


Make the dough. Warm the milk. In a large mixing bowl, mix the milk and whipped egg into the flour and salt with your hands until you have a mass of globby, rough, sticky dough that sort of sags when you hold it up as opposed to stays in its shape. It's a wet dough. Spread flour across your cutting board or counter and put the blob of dough on it. Knead the dough for 15 minutes. Use a knife or pastry cutter to scrape any dough that sticks to the counter. You may dust some more flour to help contain the stickiness but keep in mind that you want the dough to end up tacky so that it will stick to itself when you are making the pierogis. Stop kneading when the dough is smooth, stretchy, and slightly tacky. It feels like a baby's bottom when it's done. Form the dough into a ball and cover it with a towel so that the dough doesn't dry out while you make the filling.

Make the filling. Mix the filling ingredients together: Polish farmer's cheese, egg yolk, powdered sugar, and vanilla sugar or vanilla. You want it to be creamy and uniform rather than crumbly. Depending on how dry your cheese is, you may need to mix in small amounts of milk until your filling comes together in a creamy uniform mass.

Form the pierogis. See this video on how to form the pierogis. Put a 1-2 Tbsp of flour off to the side of your workspace on the counter. Break off a piece of dough about the size of a small apple, or about a quarter of all the dough. Roll the piece into a snake shape about as thick as a nickel. Cut across the roll, making 3/4"-thick pieces of dough. Dip the fingers of one hand in the flour and use them to turn each segment on its side and pat down on top of it once with two fingers to begin to flatten the piece into disc.

Use a rolling pin to roll out each piece into your dumpling wrapper. What you want is a thin disk about 2 inches in diameter and about 1/8th inch thick. Put the disk in one hand, and add a tsp of filling to the middle of the disk. Fold both halves of the dough over the filling, match the edges on top of one another, and press them together, sealing the filling inside. If the filling gets on the edge of the dough where you are trying to seal it together, then the seal won't work. If you need to push the filling back from the edges, it's helpful to dip your finger in a little pile of flour before using them to nudge the filling out of the way because then the filling doesn't stick to your fingers. Then press the dumpling wrapper closed.  Once the seal is secure, then pinch the dough six or seven times along the edge to make a pretty decoration.

If you are serving these another day, freeze pierogis in a single layer on a flour-dusted sheet pan. Once frozen, transfer into a Ziplock. Cook within 3 months.

On the day you want to eat them, prepare the toppings. Saute breadcrumbs in butter slowly on medium-low heat until breadcrumbs are golden. Remove from heat. Mix yogurt, honey, and lemon together in a bowl. If you're using Greek yogurt, whisk in a little water to loosen it into a sauce.

Boil the pierogis. Bring a pot of salted water to a boil. One by one, add enough pierogis to make a single layer in the water. Once they float, they're done. Another Polish source says she puts a tablespoon of oil in the water and then the pierogis don't stick to each other if you want to try cooking more at once.

Remove cooked pierogis with a slotted spoon or spatula and serve on a platter. Top with small splatters of yogurt sauce and buttered breadcrumbs.